
This article covers integrating SureMDM with your Intune tenant. We will go over creating an app registration in your Entra (FKA. Azure AD) environment and configuring the Graph API permissions required for the SureMDM to automatically create, update and assign Win32 applications in your Intune tenant; as well as configuring the tenant ID, application ID and application secret within the SureMDM console.
Purpose
This article provides guidance on integrating SureMDM with Microsoft Intune by setting up app registration in Entra ID (formerly Azure AD), assigning the necessary Graph API permissions, and configuring tenant details within the SureMDM console to enable automated creation, updates, and assignment of Win32 applications.
Prerequisites
- A valid Microsoft Intune subscription.
- Windows devices must be enrolled in Intune.
- Intune App Management Integration enabled by the 42Gears Sales Team.
Steps
1: Registering the SureMDM Application in Microsoft Entra ID (FKA. Azure AD)
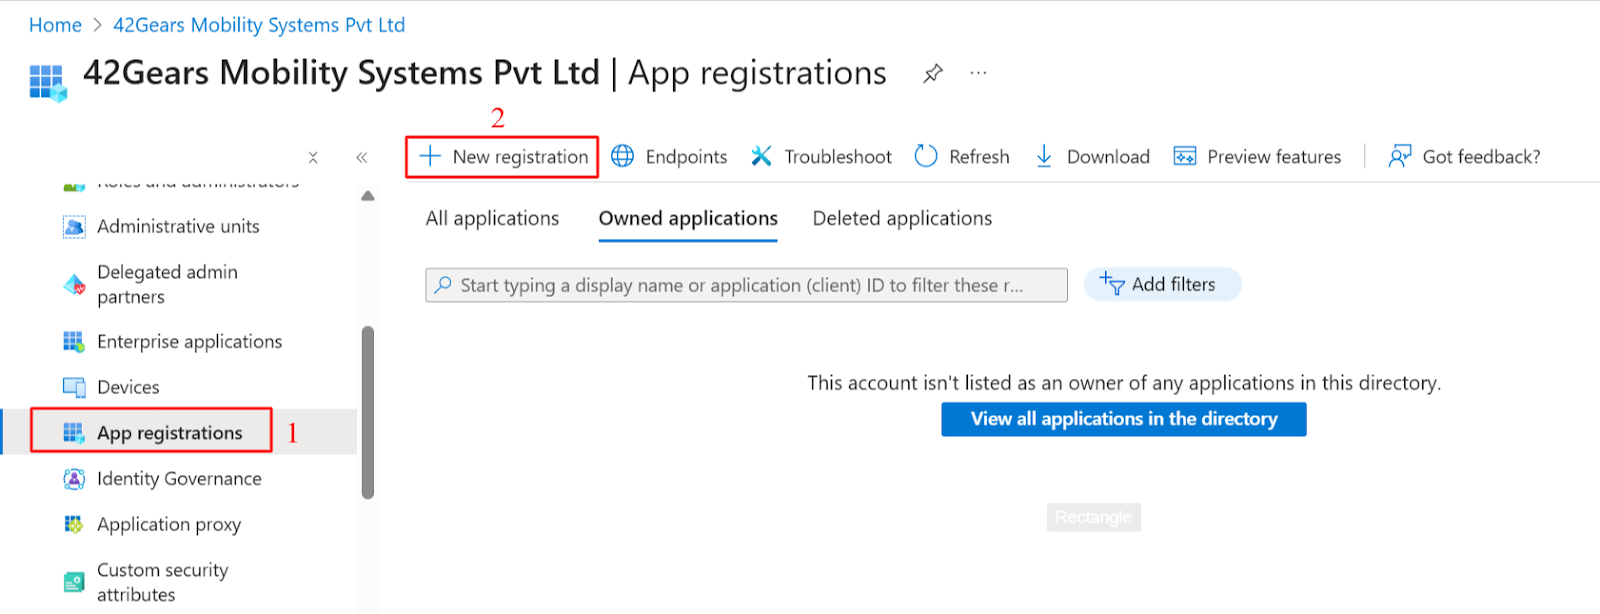
To grant SureMDM the required permissions to your Intune tenant for application management, begin by navigating to your environment’s Entra Portal (FKA. AzureAD). Then, go to App registrations section under Manage, and click New registration in the top left of the main pane.
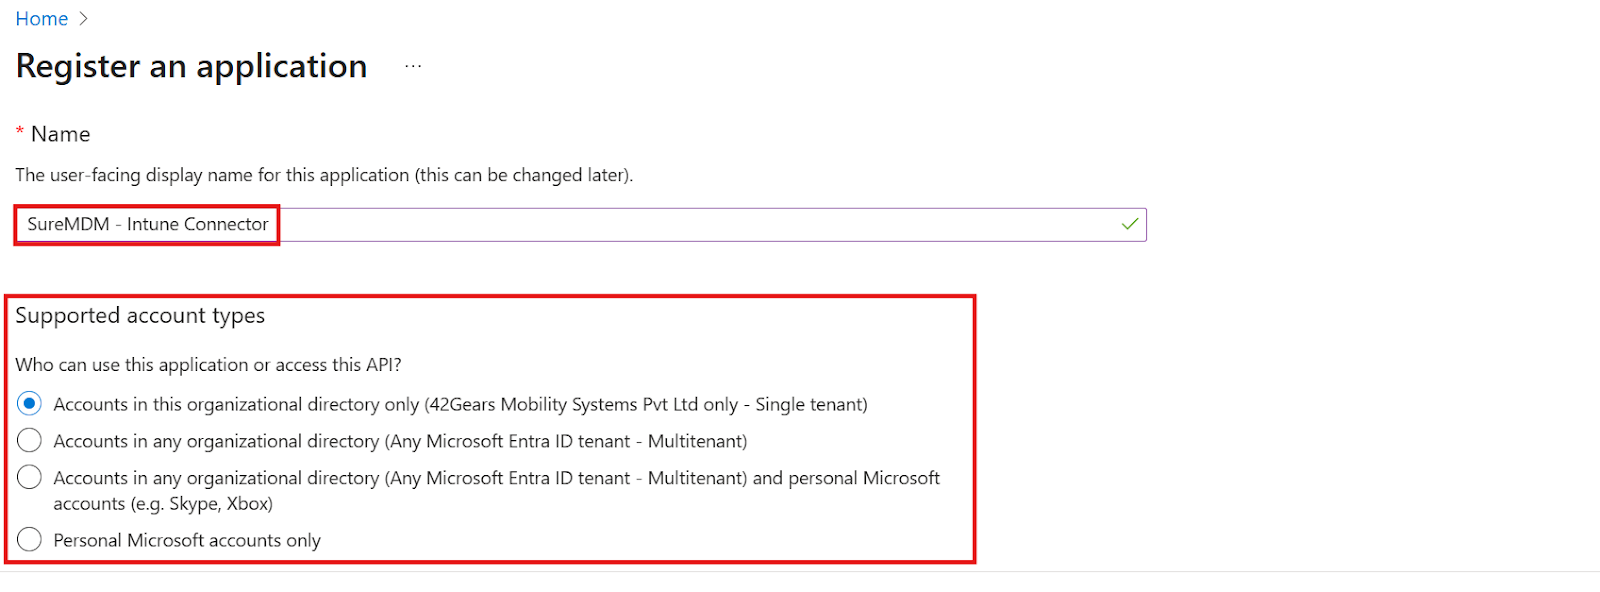
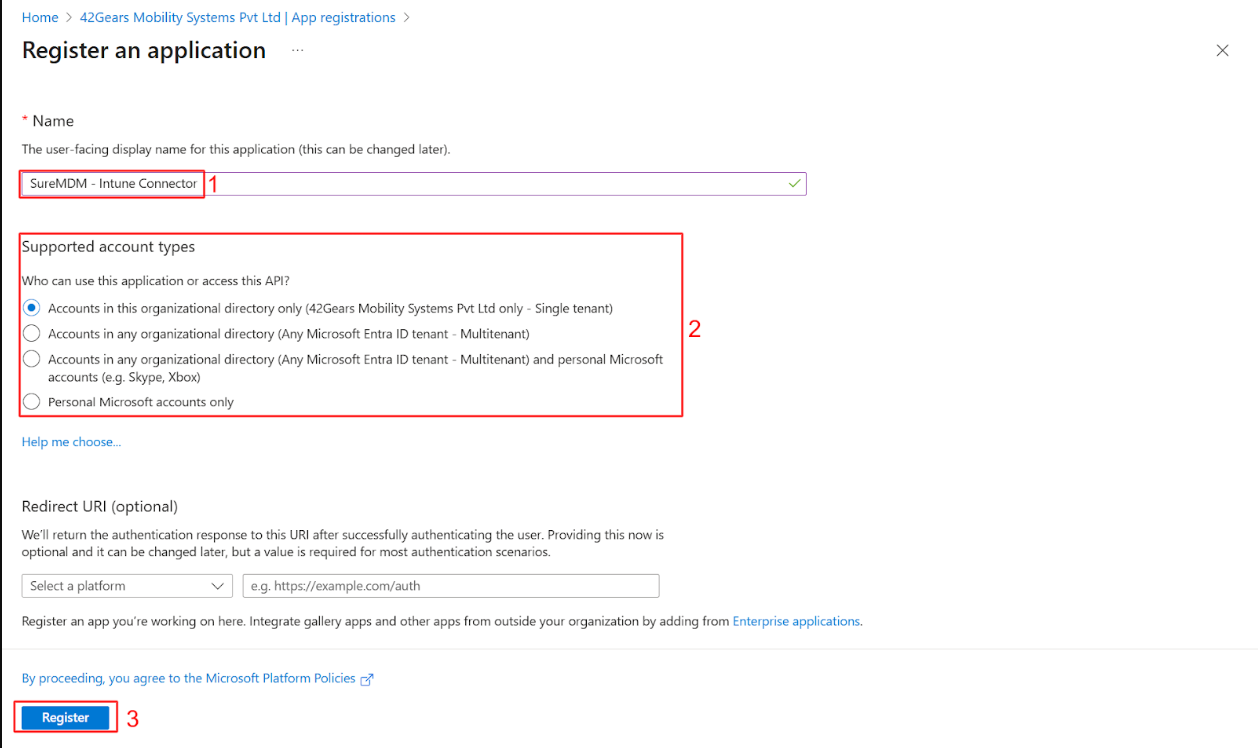
Assign a relevant name to your app registration, for example “SureMDM – Intune Connector”. Configure the account types based on your tenant requirements. Unless you have specific needs, leave the Redirect URI set to its default. Finally, click Register.
2: Configure API Permissions for the New Application
After registering a new application, you’ll need to delegate specific permissions so SureMDM can create and update Win32 applications in your Intune tenant, as well as view Azure groups and automatically create assignments for those applications.
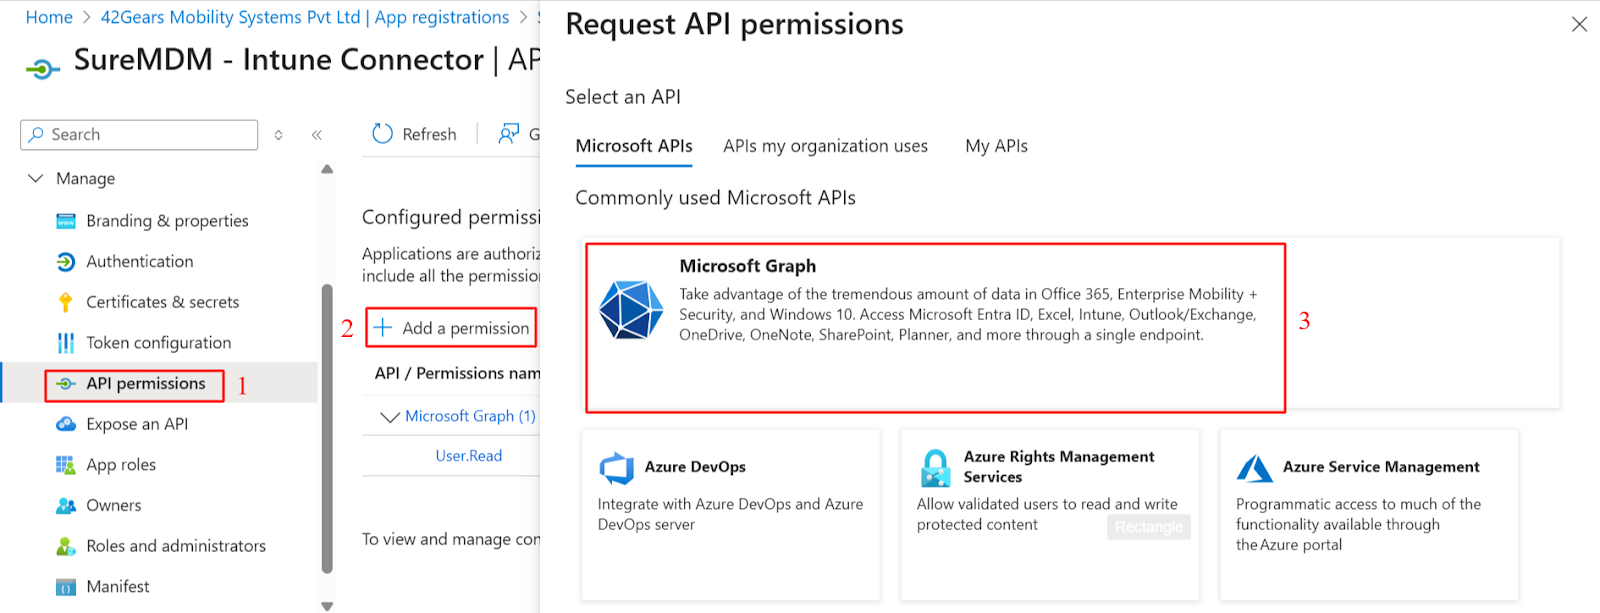
Once the app is registered, go to the API permissions section in the left menu of the newly created app’s page. On the API permissions page, click Add a permission, then in the pane that appears on the right, select Microsoft Graph API.
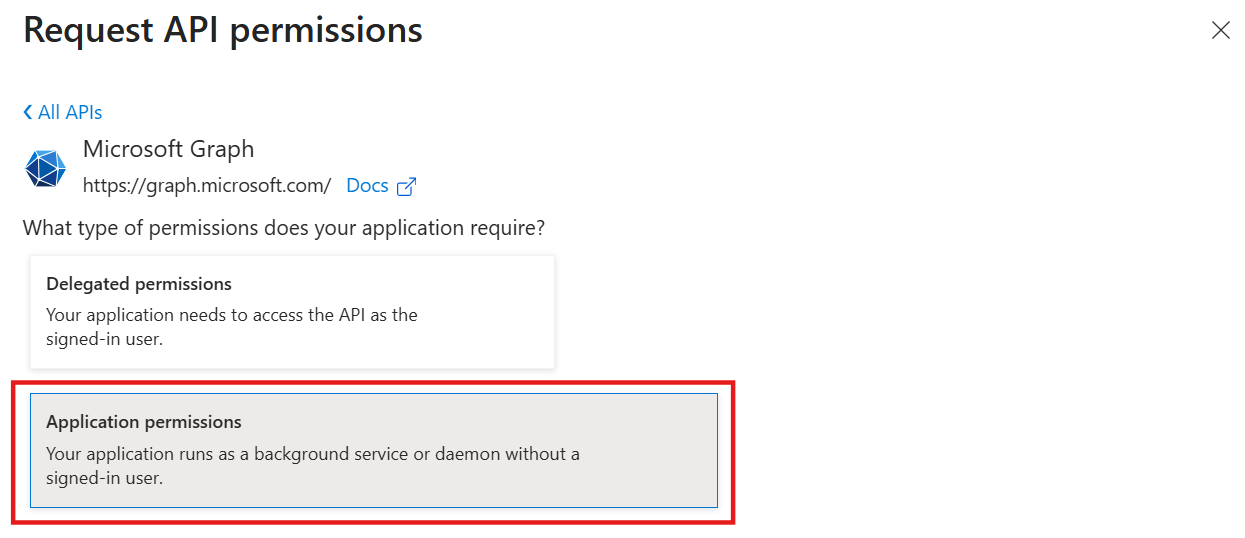
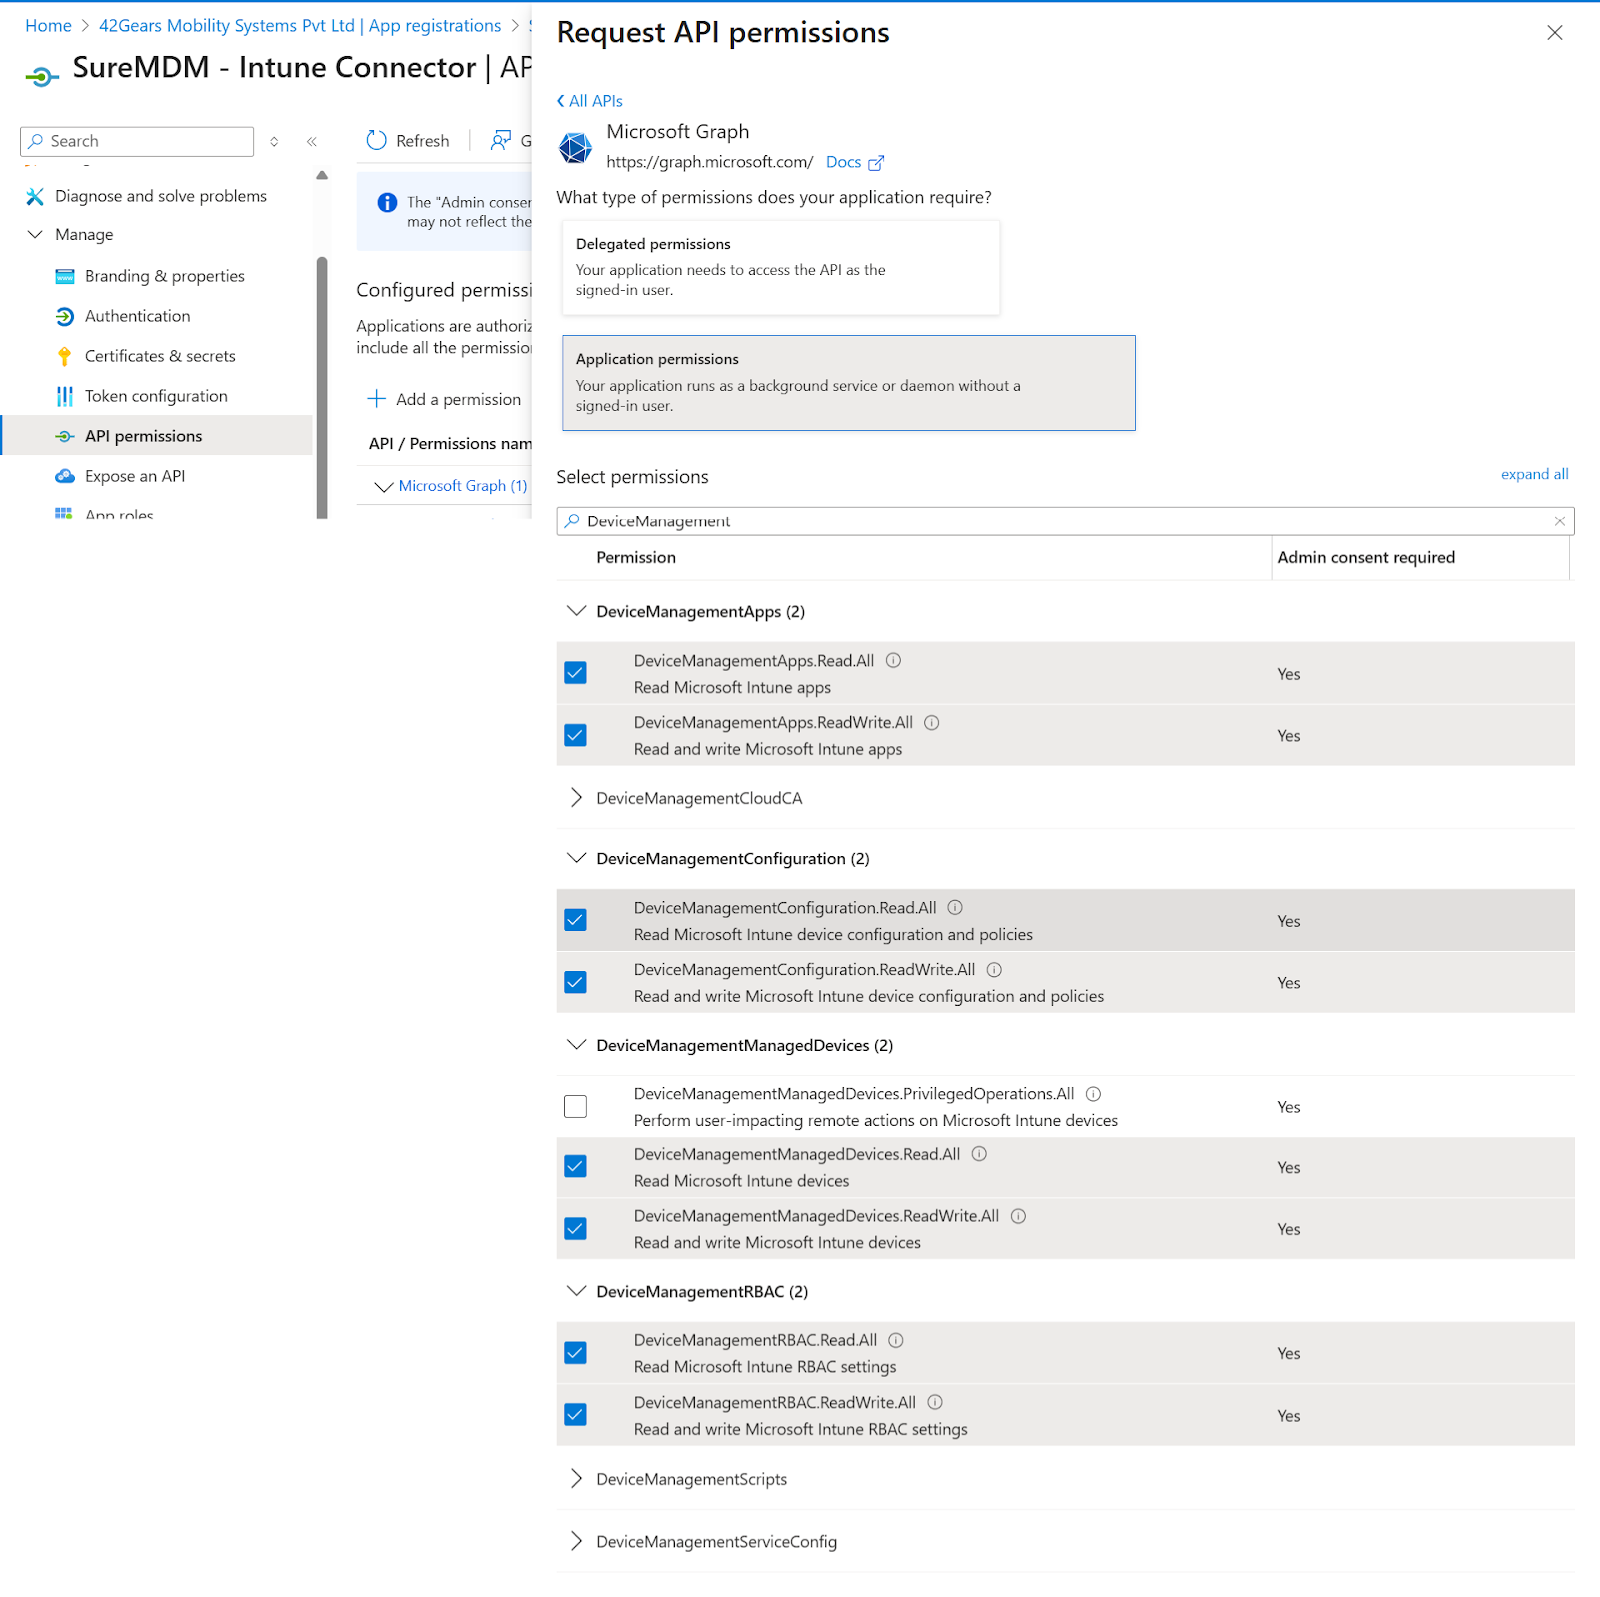
Next, when prompted to choose the type of permissions your app needs, select Application permissions. In the Select permissions table, search for “DeviceManagement” and enable the following permissions listed under it:
- DeviceManagementApps.Read.All
- Read Microsoft Intune apps
- DeviceManagementApps.ReadWrite.All
- View and create applications in Intune
- DeviceManagementConfiguration.Read.All
- View properties and relationships of assignment filters
- DeviceManagementConfiguration.ReadWrite.All
- Read and write Microsoft Intune device configuration and policies
- DeviceManagementManagedDevices.Read.All
- View device inventory for the auto-publish feature
- DeviceManagementManagedDevices.ReadWrite.All
- Read and write Microsoft Intune devices
- DeviceManagementRBAC.Read.All
- View scopes to be assigned to applications
- DeviceManagementServiceConfig.ReadWrite.All
- Update Enrollment Status Page configurations
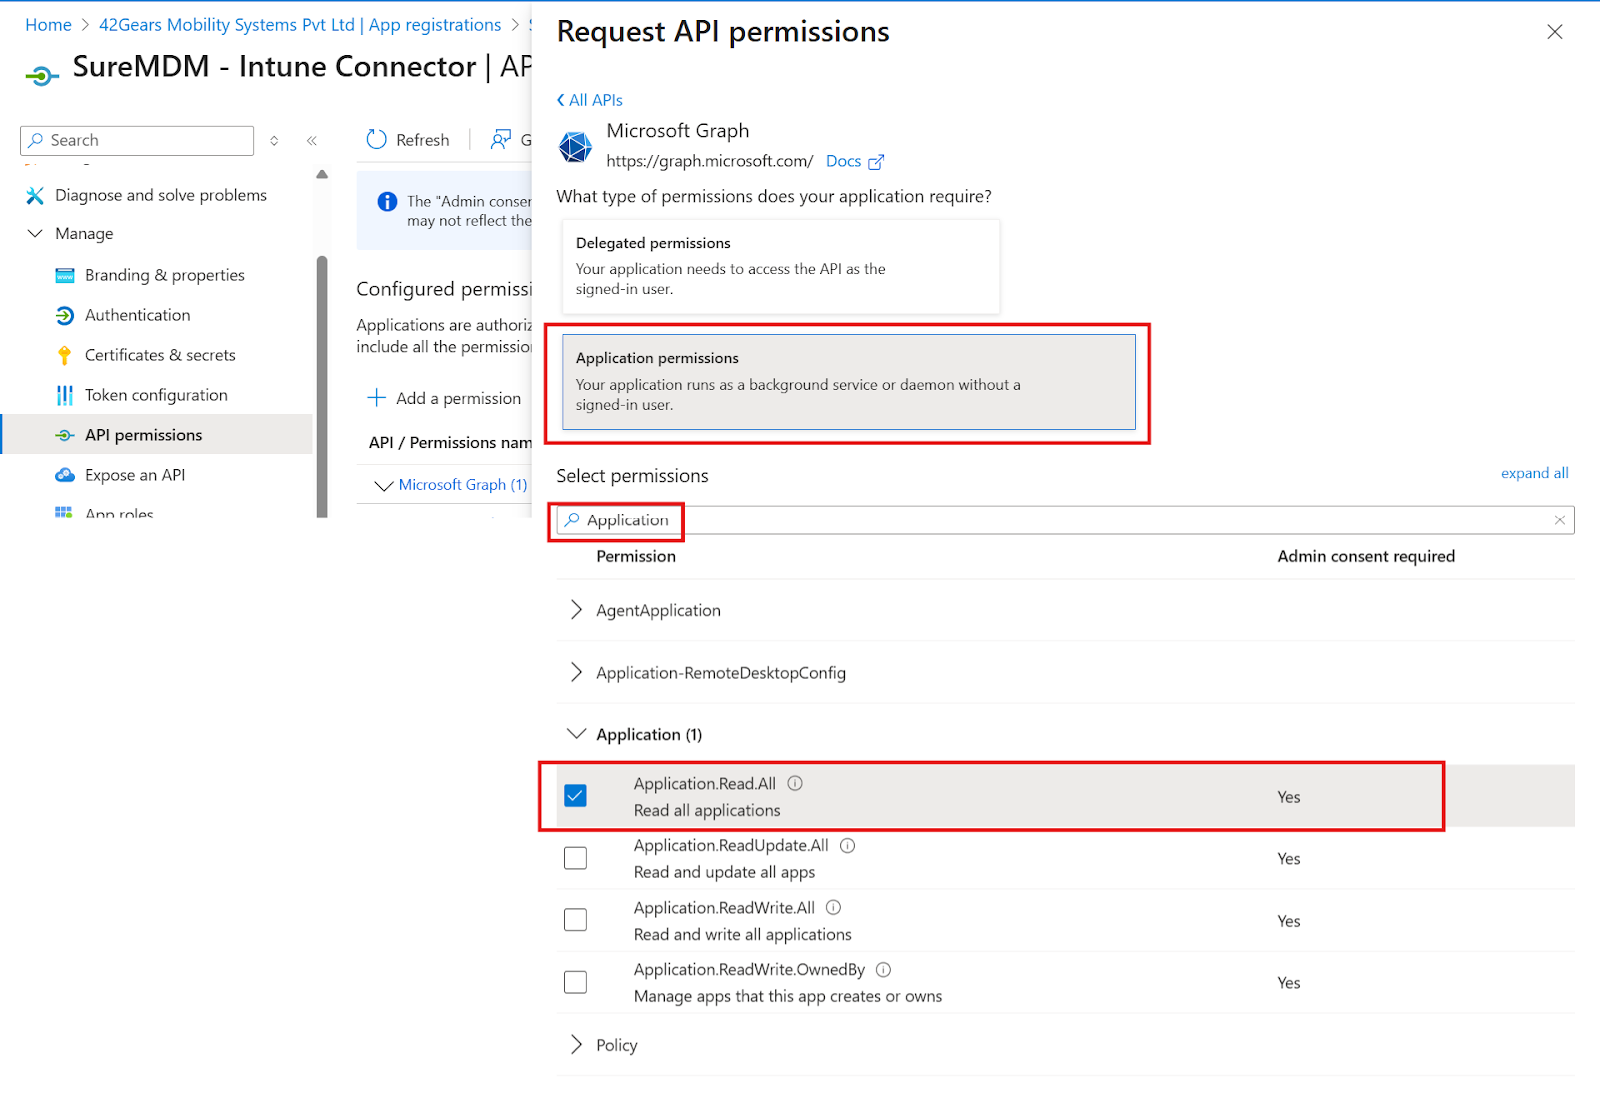
Next, search for “Application”, and under Application permissions, enable the following:
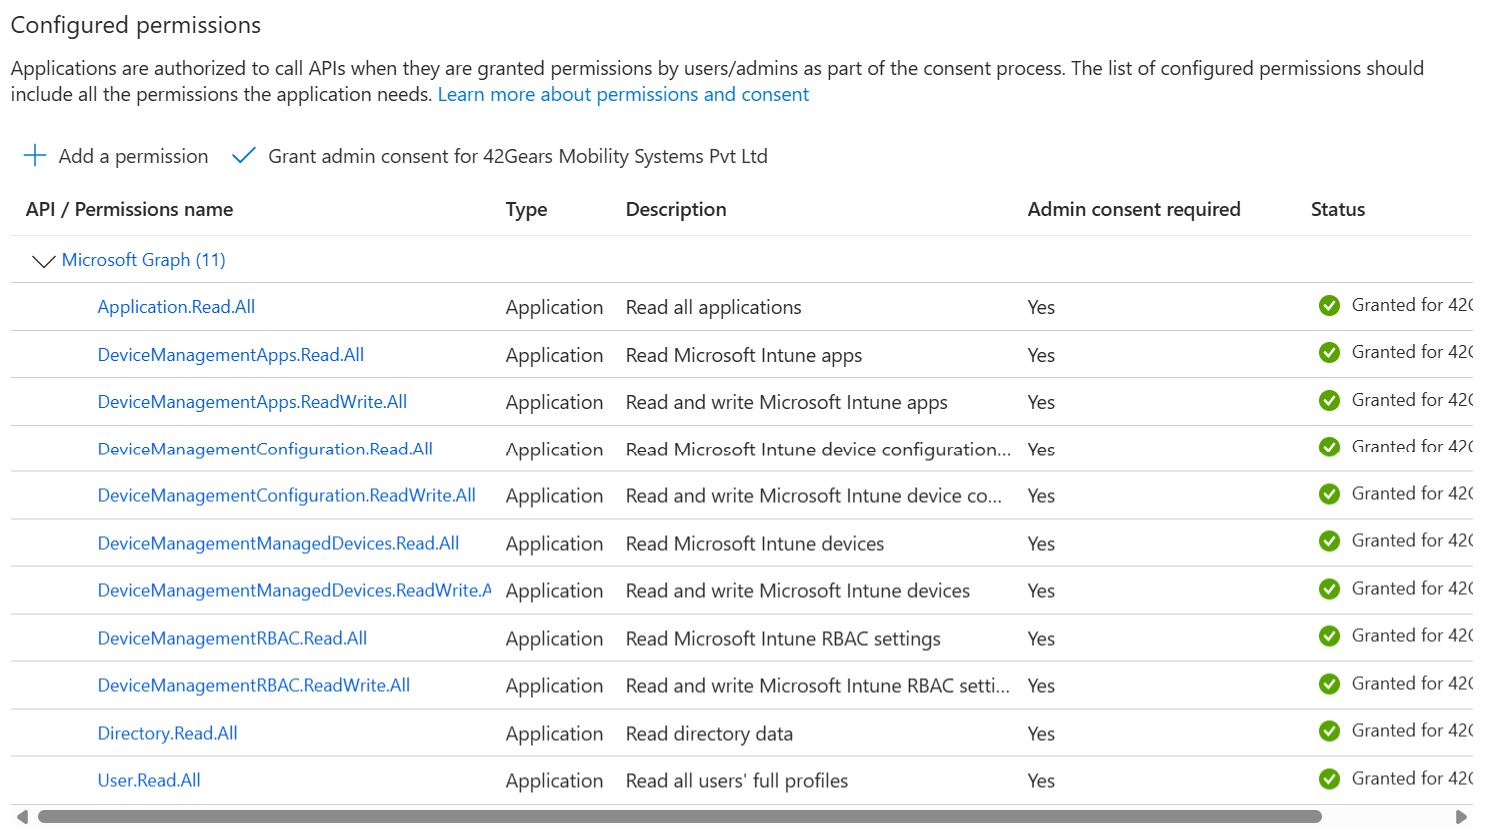
- Application.Read.All
- Read all applications
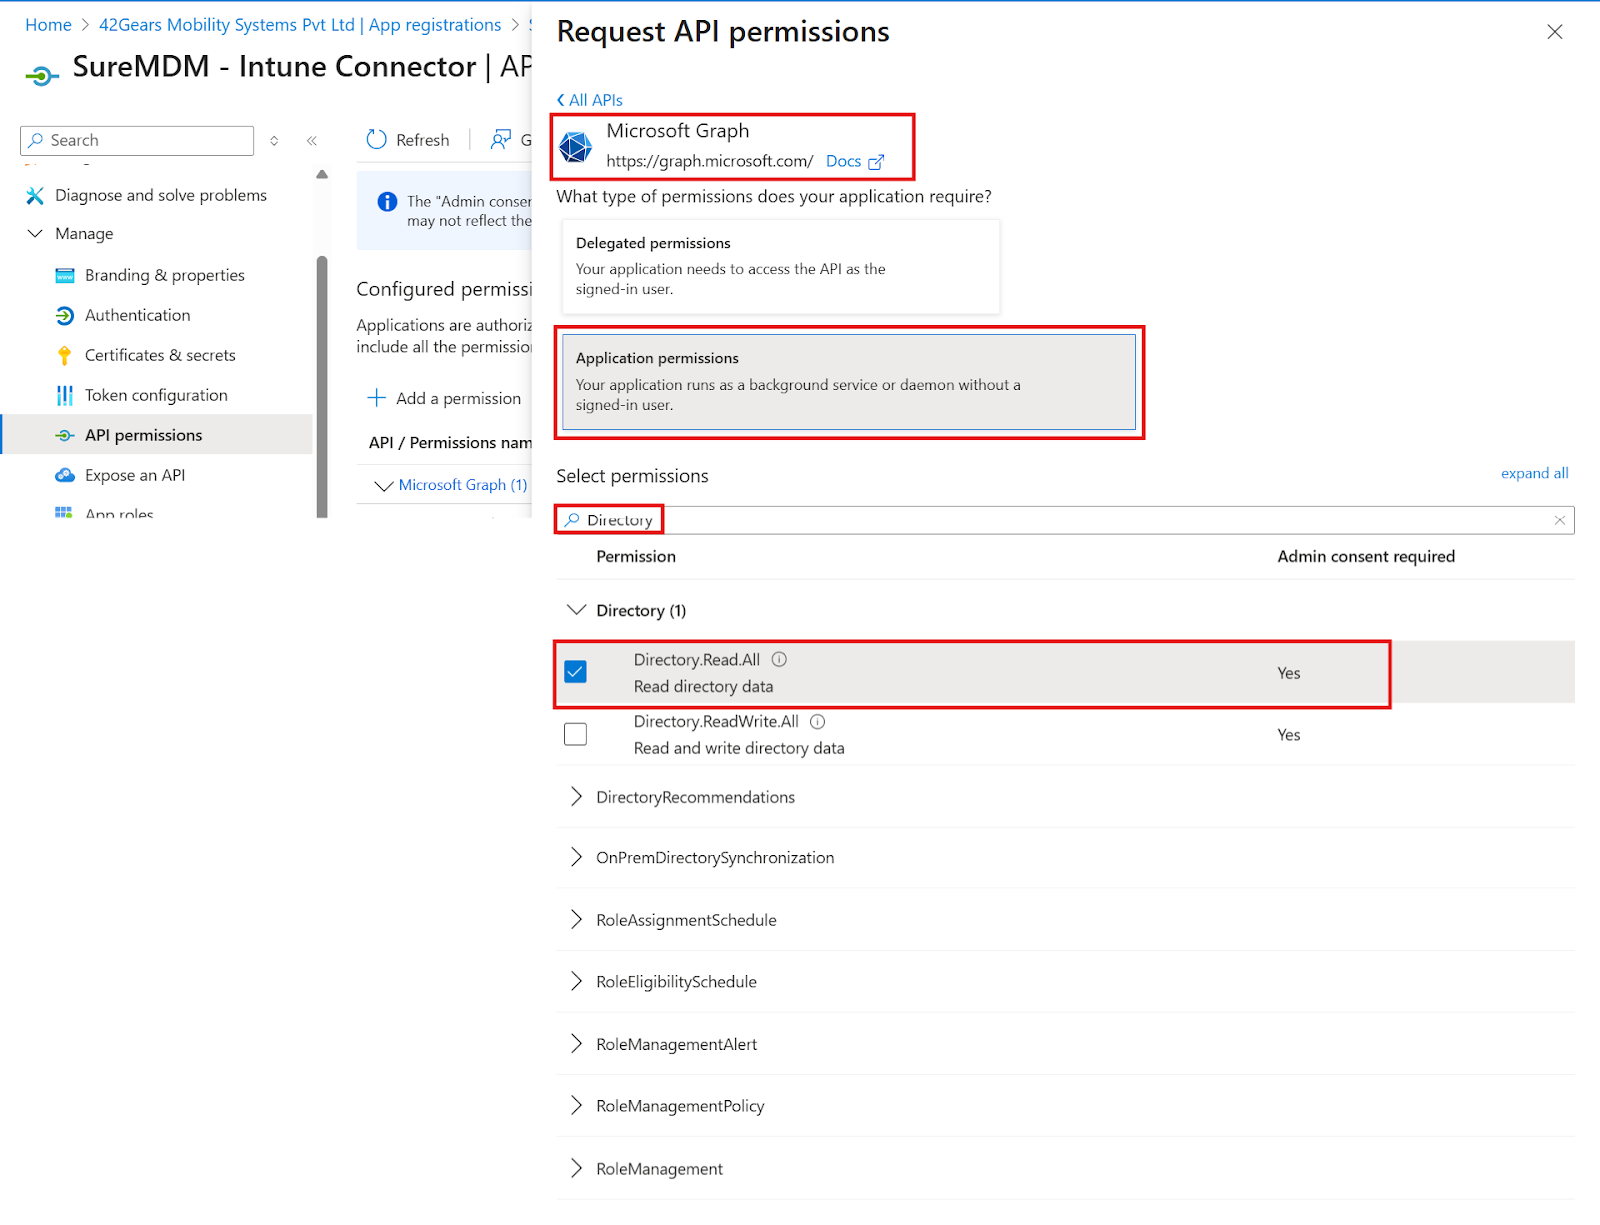
Next, search for “Directory”, and under Directory permissions, enable:
- Directory.Read.All
- Read directory data
Next, search for “User”, and under User permissions, enable:
- User.Read.All
- Read all users’ full profiles
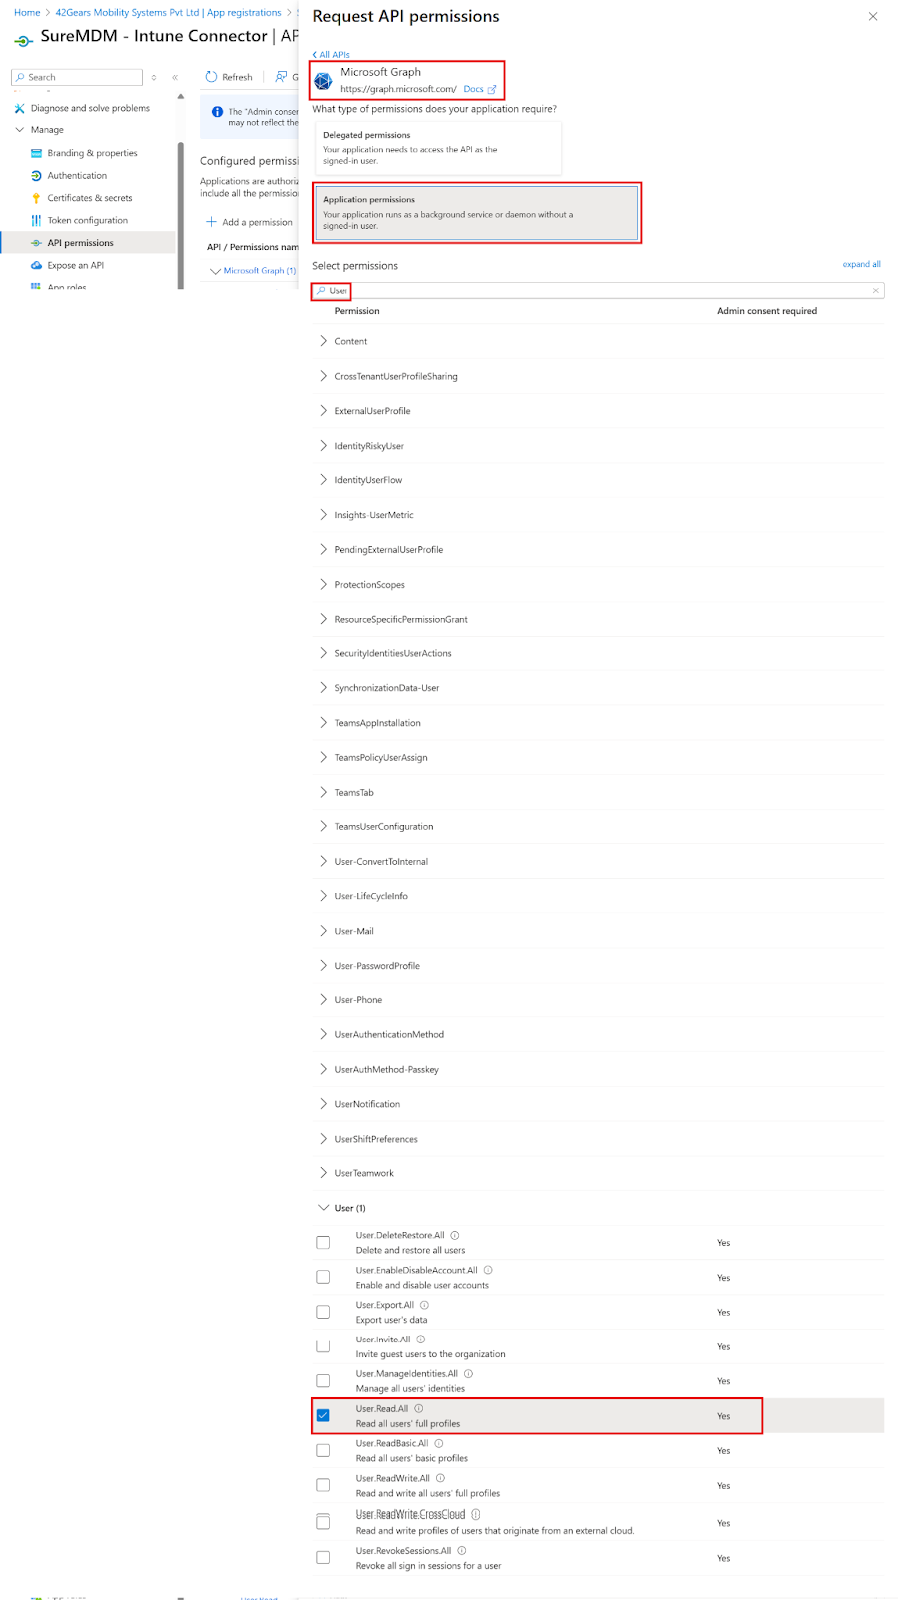
Click Add permissions.
To approve the new permissions, click Grant admin consent for. If prompted, choose Yes to consent to the required permissions. Make sure you are logged in to an Entra (FKA. AzureAD) account that has the necessary permissions to perform this task.
The result will appear as shown below.
Note: Granting admin consent may require one of the following roles: Global Administrator or Privileged Role Administrator.
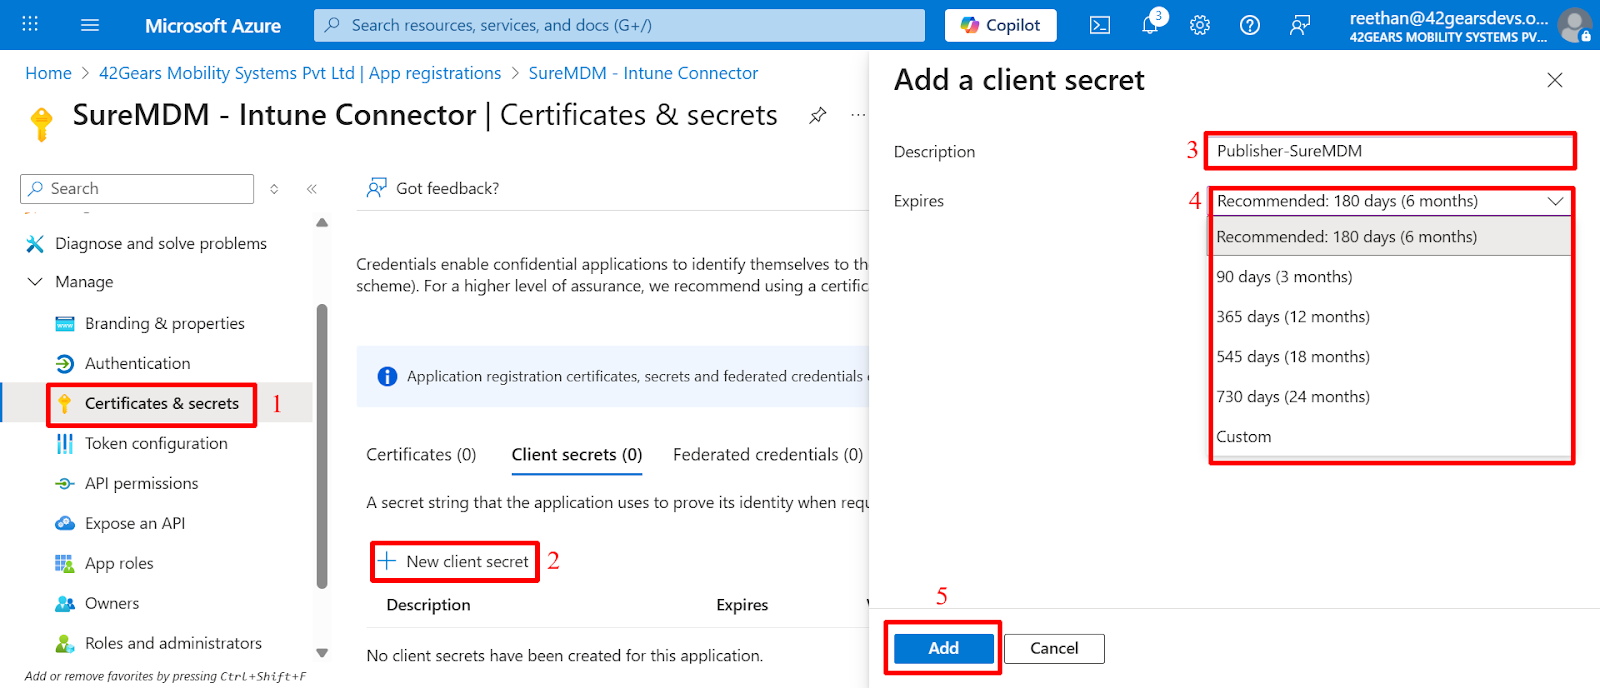
3: Getting the Client Secret and Application ID
Next, we must add a client secret, a string that your app will use to verify its identity when requesting a token. Navigate to the Certificates & secrets node in the left column, and click the button to add a New client secret. Enter a description and expiration date (in months) that best fits your organization’s needs, then click Add
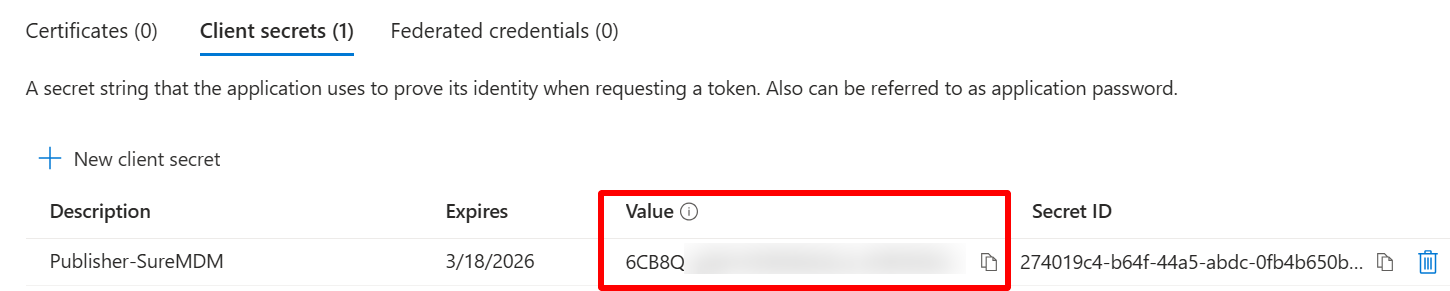
Copy the Value of the Client Secret you created and save it in a secure location. You will need to enter this value under Application Secret in the SureMDM console.
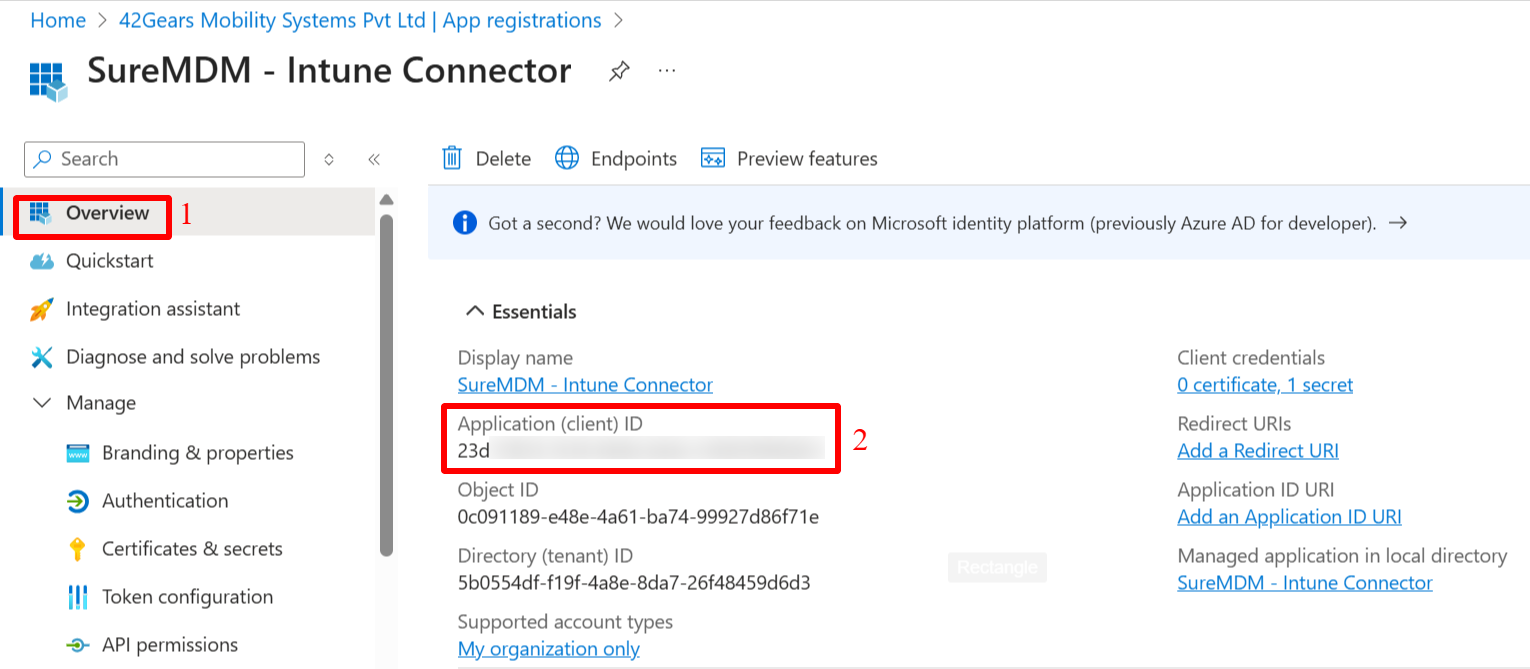
Then, navigate to the Overview section, and copy the Application (client) ID and Directory (tenant) ID. Save these values to a secure location along with your secret key value.
In addition to the client secret, certificate-based authentication is also available in the SureMDM. For more information, see the Microsoft documentation for more information: Create a self-signed public certificate to authenticate your application.
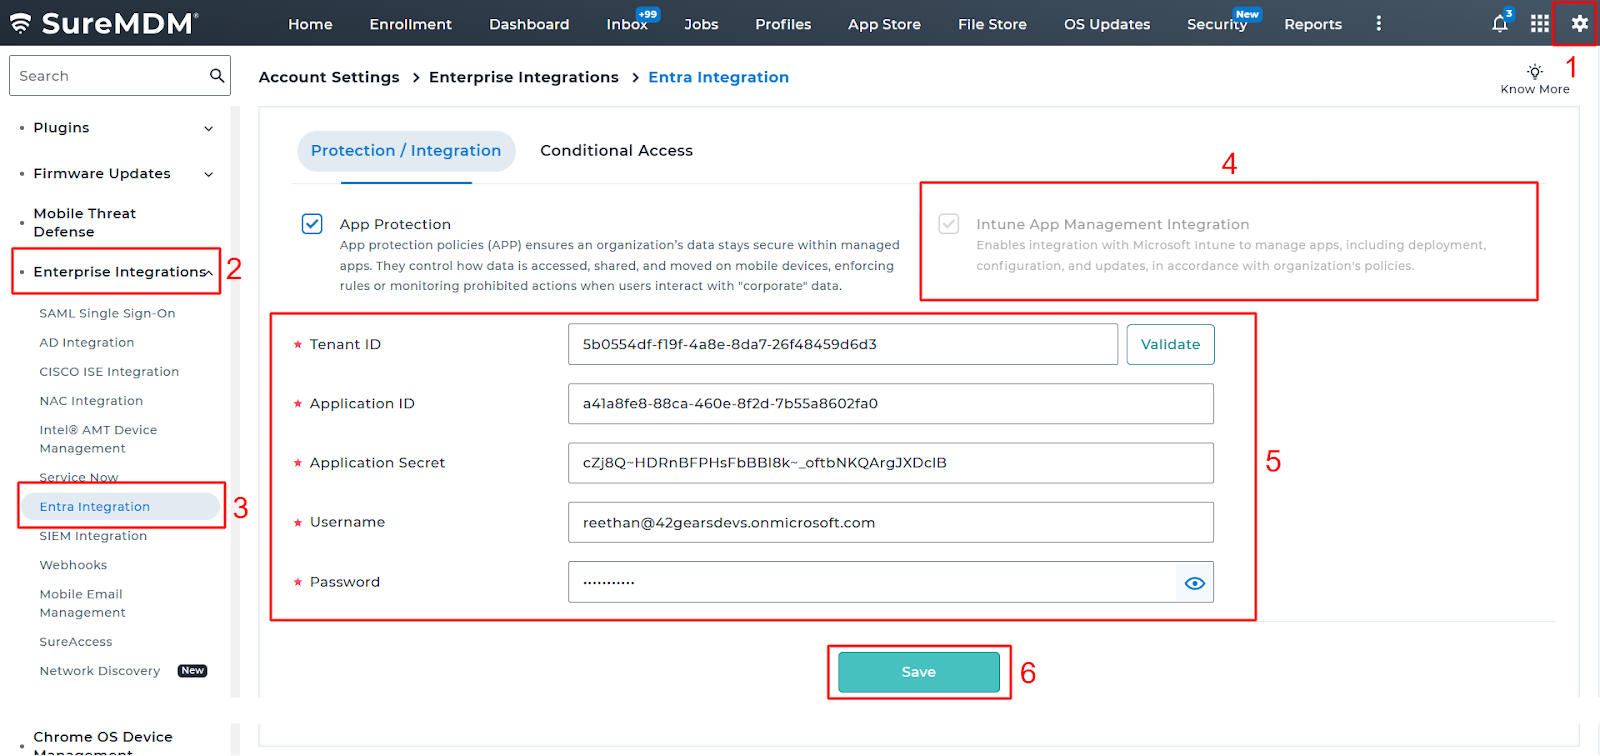
Now, navigate to SureMDM Console > Account Settings > Enterprise Integrations > Entra Integration. Enter the Tenant ID, Application ID, and Application Secret Username and Password into the ‘Intune App Management Integration’ section and click Save.
4: Deploying an App to Intune
After completing the previous steps, follow the instructions below to deploy an app to the Intune portal:
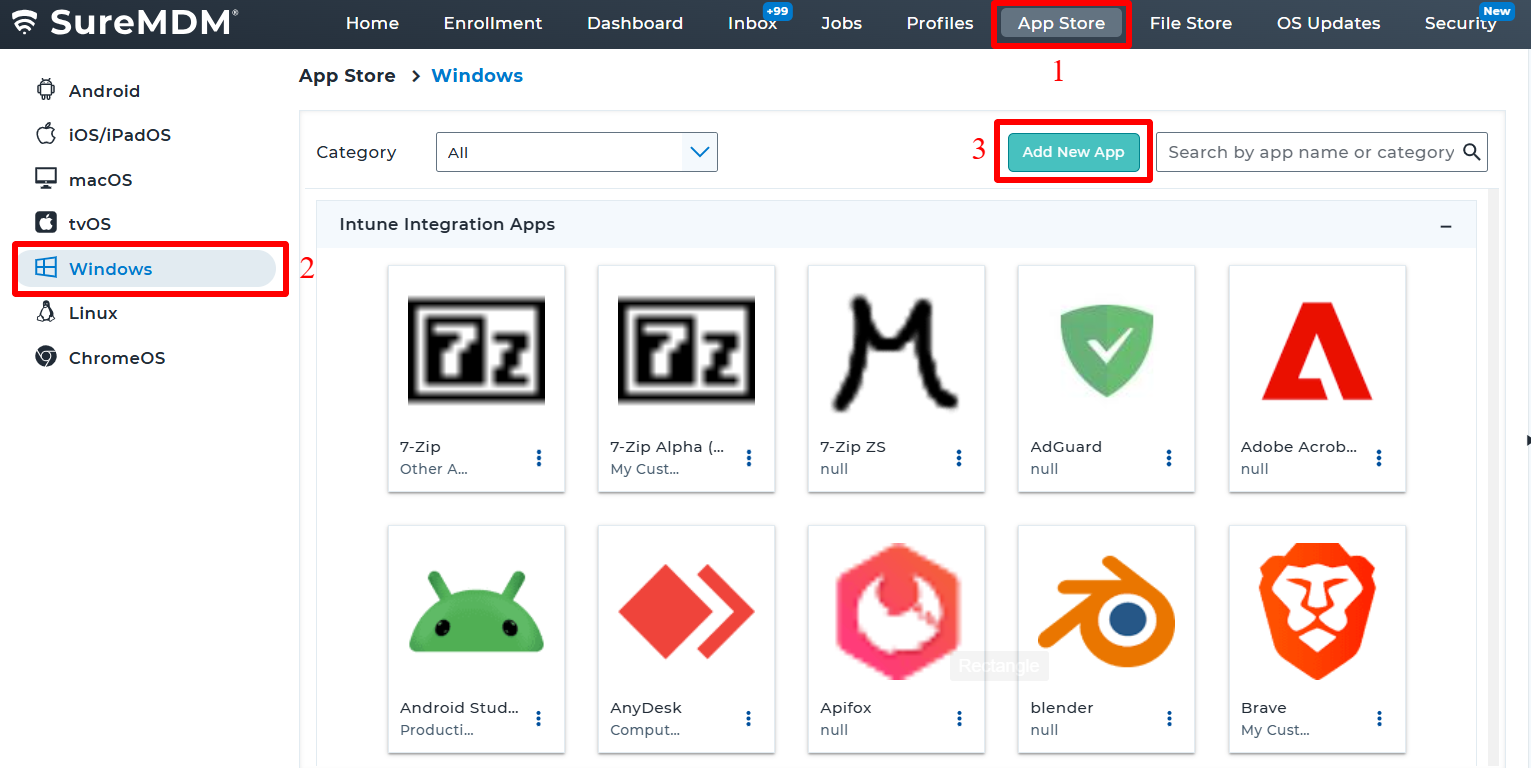
- Navigate to the SureMDM Console:
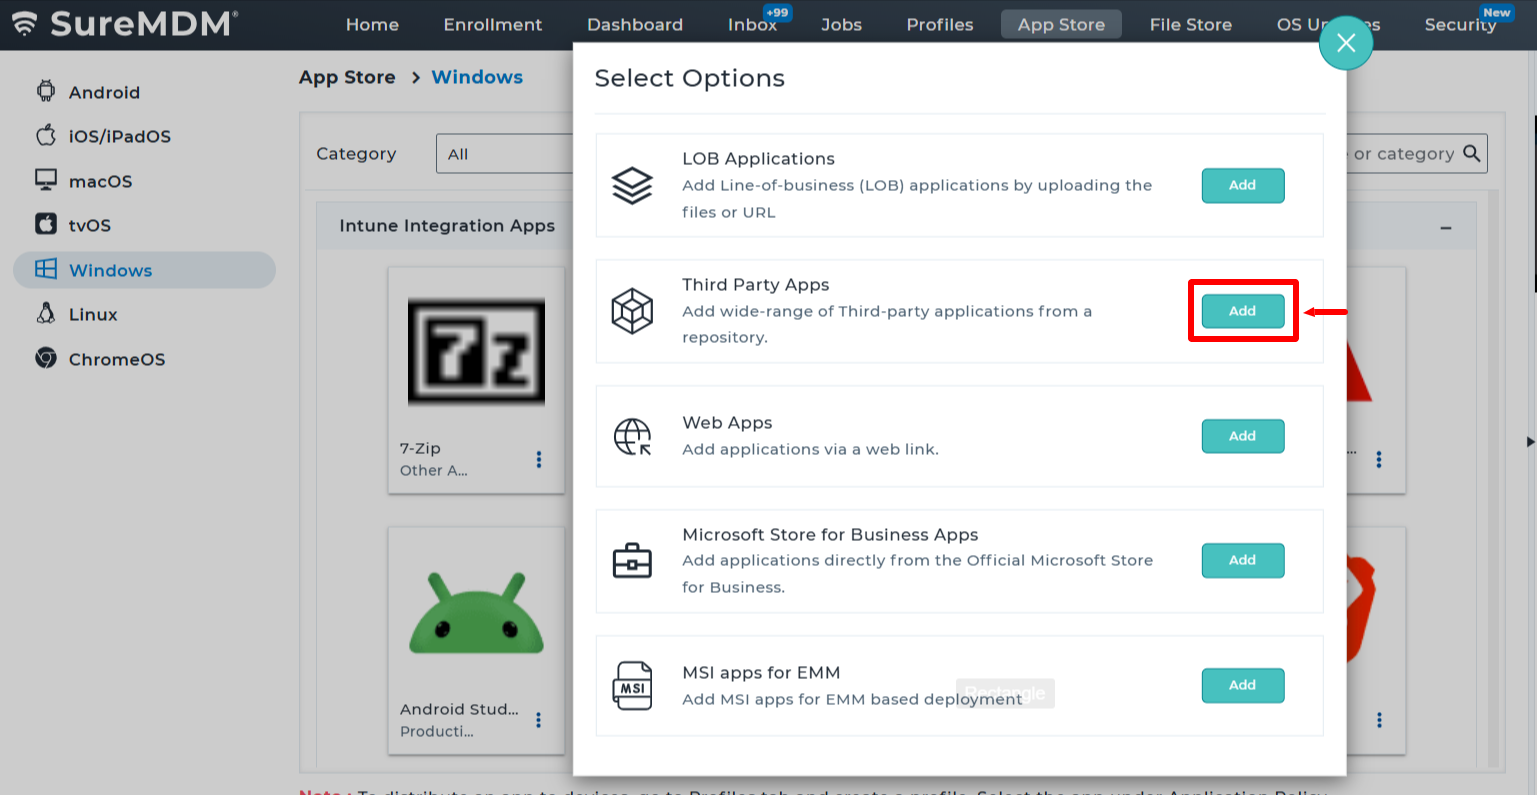
- SureMDM Console > AppStore > Windows > Add Apps > Third Party Apps
- Add the Desired App(s):
- Select the desired app(s) to add them into the SureMDM AppStore.
- Deploy the App to Intune:
- Once the app is added, click the three-dot menu (⋮) next to the app, then select Deploy to Intune.
- Configure Deployment Settings:
- Configure the required Intune app deployment settings. SureMDM console provides all the standard settings that Intune offers for Win32 app deployments.
- Publish the App:
Select Save to publish the app to the Intune console for deployment on enrolled devices.
For more information on deploying an app to Intune, please refer to this documentation:
Need more help? Here’s how to get help from our experts.