
The SureMDM Admin can restrict iOS/iPadOS devices from connecting to only networks that are whitelisted on the device. This prevents end users from connecting to unauthorized or unapproved open networks, thereby enhancing device security. It also ensures that users are unable to access blocked websites or be exposed to potential malware threats through non-whitelisted networks.
Purpose
This article provides a step-by-step guide on how SureMDM admins can enforce Wi-Fi network restrictions on iOS/iPadOS devices by allowing them to connect only to whitelisted networks.
Prerequisites:
- Device enrolled as Supervised on the SureMDM console
- Device OS should be running on 10.3 and above
Steps:
- Add the WiFi details that you want to whitelist from the iOS/iPadOS Profile via WiFi configuration. Refer to this article for the steps.
Note: You can add multiple networks by clicking on the Add button
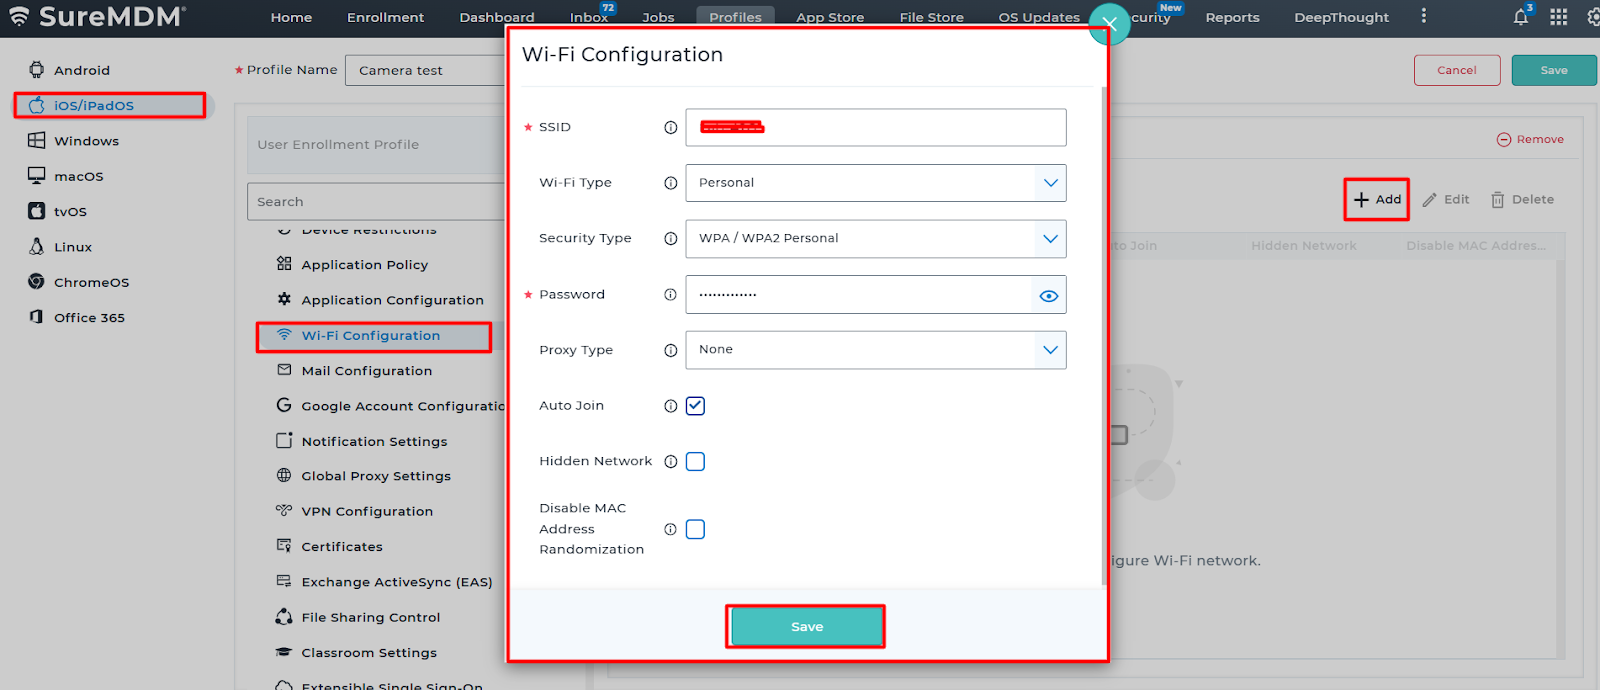
Note: When Wi-Fi is configured and deployed through a profile, the Wi-Fi password remains masked on the device. This ensures that end users cannot view or extract the password, thereby preventing them from connecting unauthorized personal devices to the corporate network.
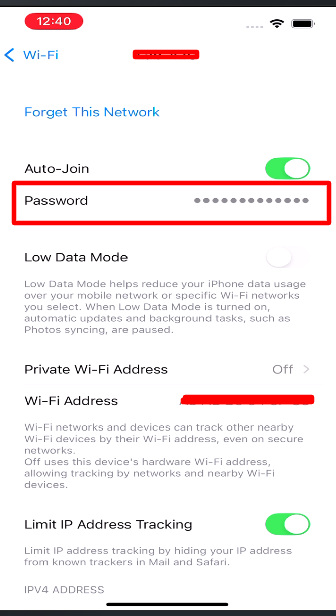
Below is the image depicting the Device on which the WiFi is connected manually by entering the password:
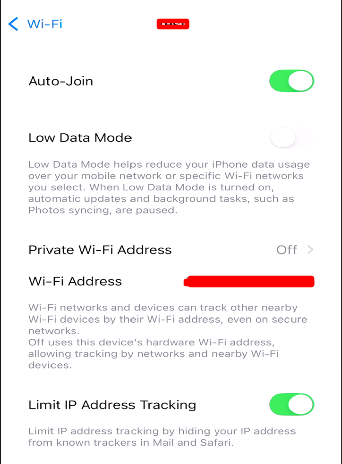
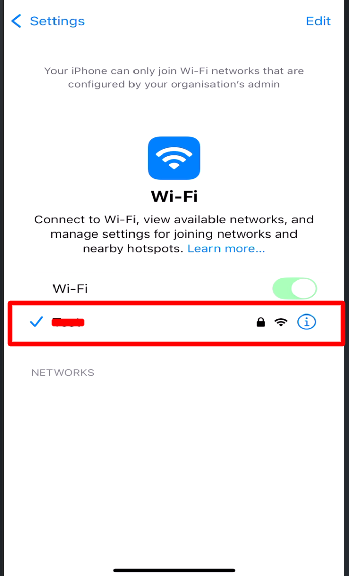
Below is the image depicting the Device on which the WiFi is configured via Profile:
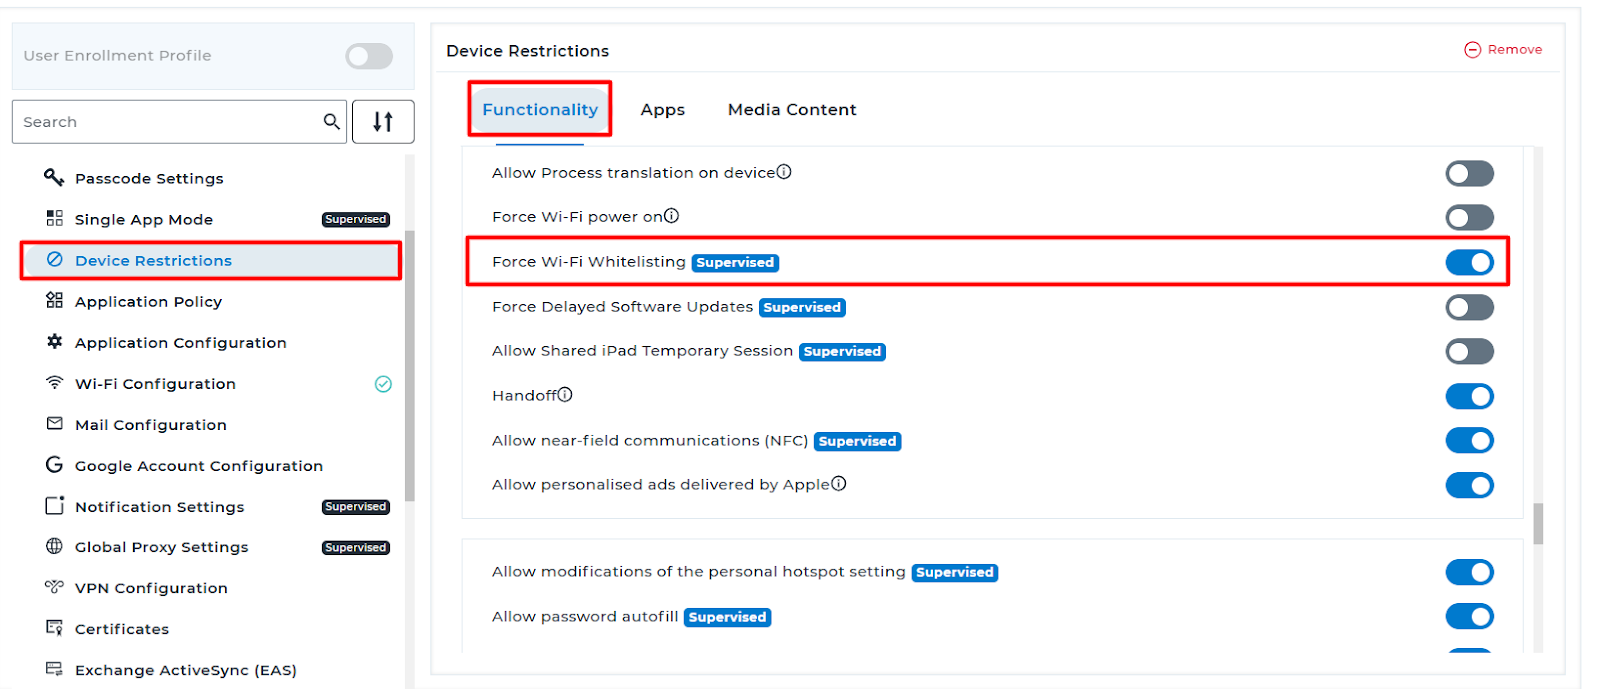
2. Once the WiFi details have been added through the WiFi Configuration Policy, navigate to the Device Restrictions > under Functionality > Enable “Force WiFi Whitelisting”.
Note:
When the “Force WiFi whitelisting” configuration is enabled, on the device, the end user will only be able to see the Wi-Fi networks that have been added through the Wi-Fi configuration profile. Any non-whitelisted networks, even if available in the vicinity, will not be displayed on the device.
3. Save the profile and deploy it on the device.
4. Once the profile is successfully deployed on the device, the Wi-Fi details configured through the Wi-Fi profile will be saved under Saved Networks on the device. As a result, users will be able to connect to the whitelisted networks without being prompted to enter the password.
Need more help? Here’s how to get help from our experts.