
Purpose
SureMDM allows admins to generate custom reports for allowed applications in Windows SureLock. This SureLock Analytics report can be generated for single or multiple devices for specific dates using the SureMDM Web Console.
This article provides step-by-step instructions on how to create and configure custom data analytics for Windows SureLock using the SureMDM Web Console. It guides administrators through enabling analytics, defining required fields, and generating reports for allowed applications across selected devices and date ranges.Organizations can track which applications are being actively used and for how long. This helps assess productivity and optimize app deployment based on real usage patterns.
The report typically includes:
List of allowed applications configured in SureLock
Application usage data, such as how long specific applications were used
Application launch and close events
User interaction timelines for each app
Device details, such as device name, serial number, group, and OS version
Date-wise activity logs that show how the device was used on specific days
Compliance indicators, such as apps accessed outside the allowed list (if applicable)
Prerequisites
- Active SureMDM account with Enterprise tier.
- Watchdog settings to be enabled in SureLock.
- Supported on Agent version v4.73 and above.
Steps:
Step1: Create/Enable a Custom Data Analytics Settings for Windows SureLock in SureMDM console
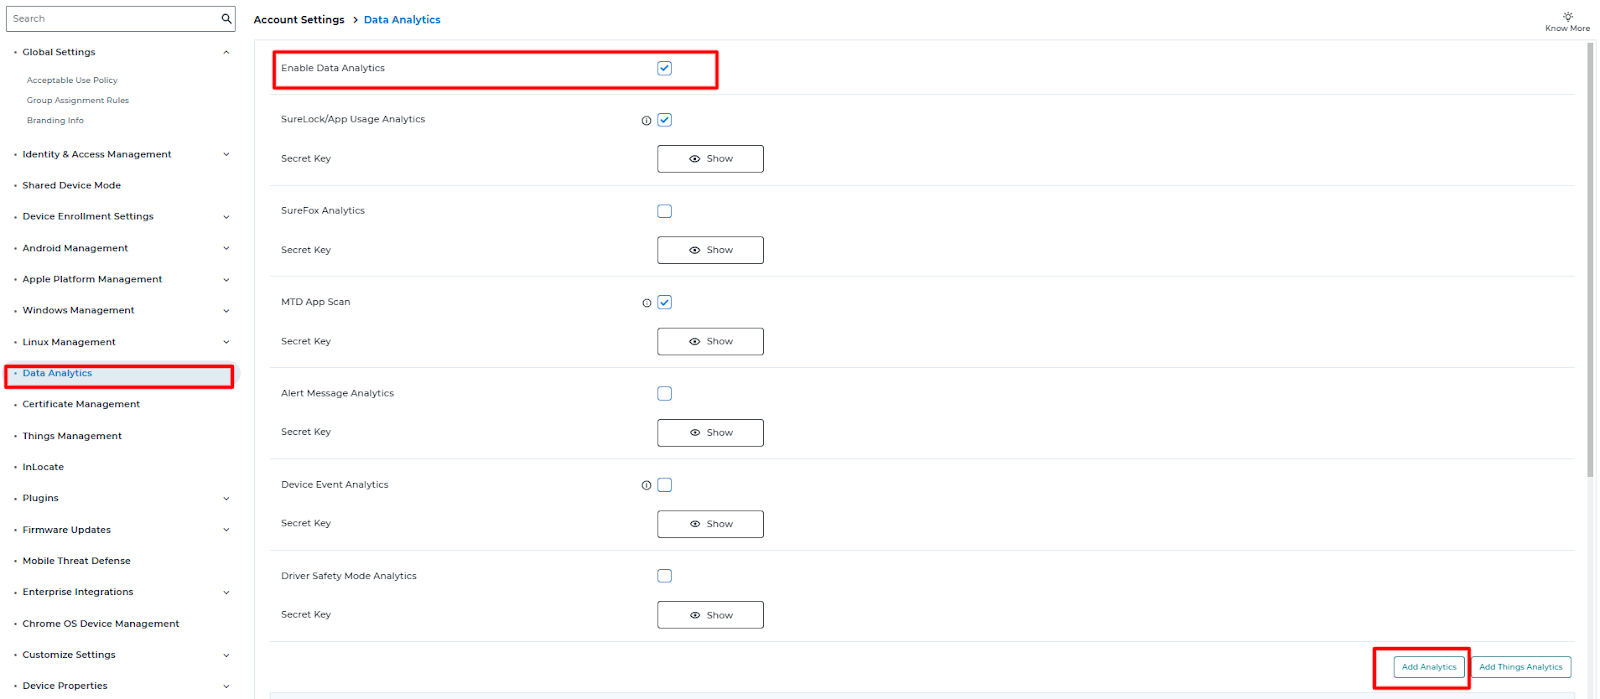
1. Log into the SureMDM Web Console > Select Account Settings > Select Data Analytics >Check the Enable Data Analytics checkbox > Click Add Analytics.
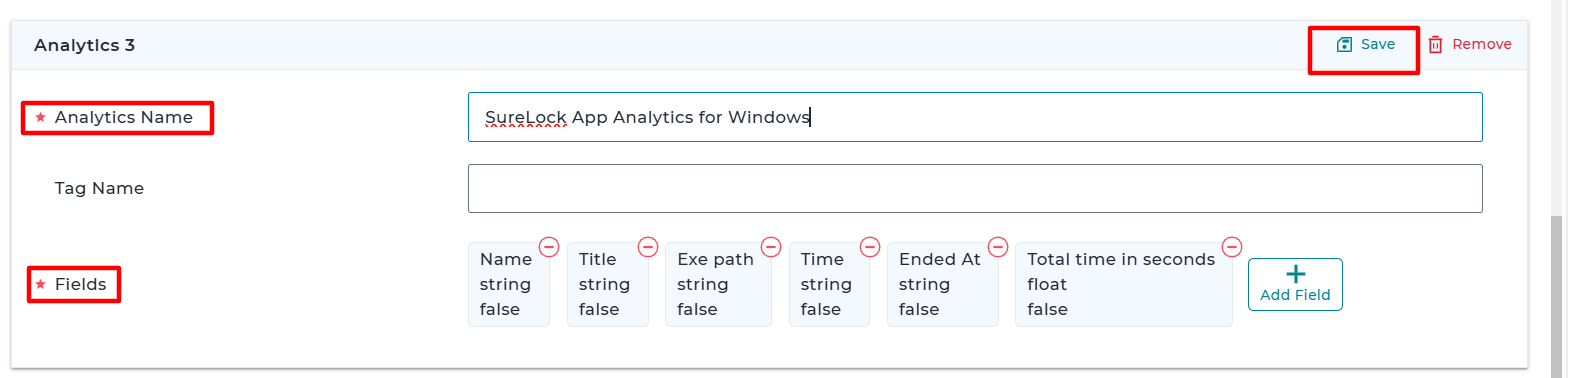
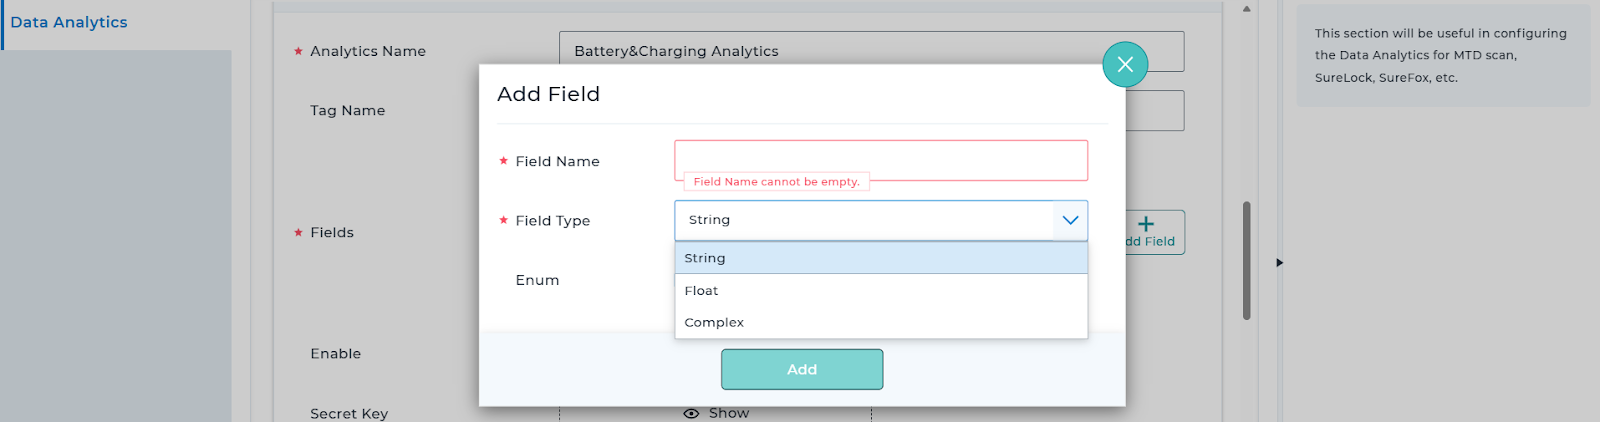
2. Give an Analytics Name and add the following fields and Save.
- Name value to be in String
- Title value to be in String
- Exe path value to be in string
- Time value to be in String
- Ended At value to be in String
- Total time in seconds value to be in float
Following are the options available for the file type: String, Float, Complex.
3. Once the Analytics has been saved click on Enable and the Secret Key will be visible. Apply the settings on the Console.
Step 2 : Configure Analytics for SureLock for Windows Device
1. Navigate to Jobs > New Job > Windows > Runscript.
2. Search for Enable SureLock Analytics, Enter the Secret Key from the pointer 3 of Step 1, Validate and Save the job.
3. Apply the Job to the target devices.
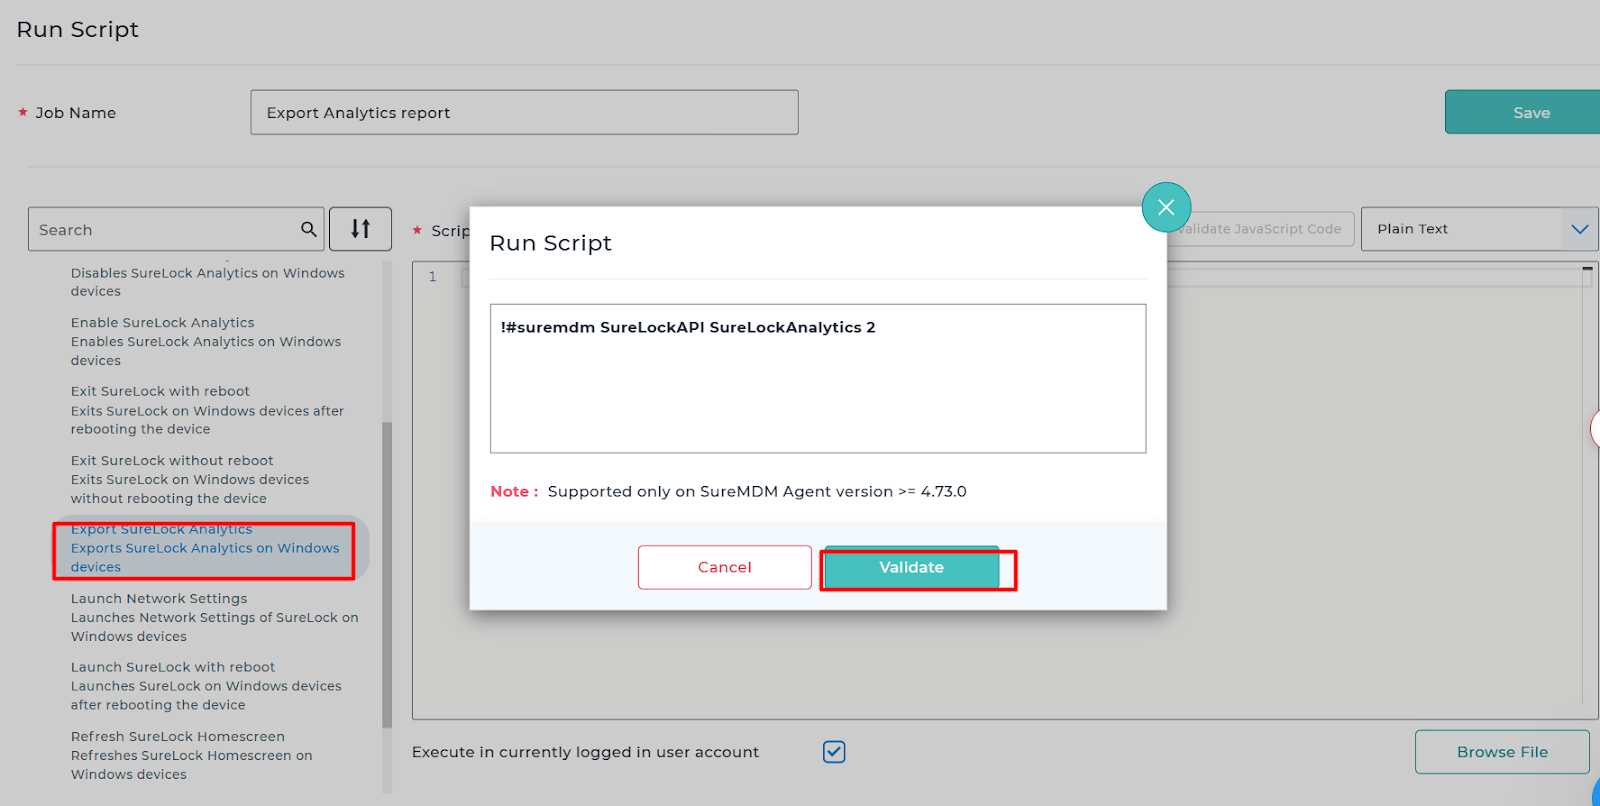
Step3 : Enable an Export Analytics report on Windows.
1. Navigate to Jobs > New Job > Windows > Runscript.
2. Search for Export SureLock Analytics, Validate and save the job.
Step4 : Create a Custom Report for the Windows SureLock App Analytics
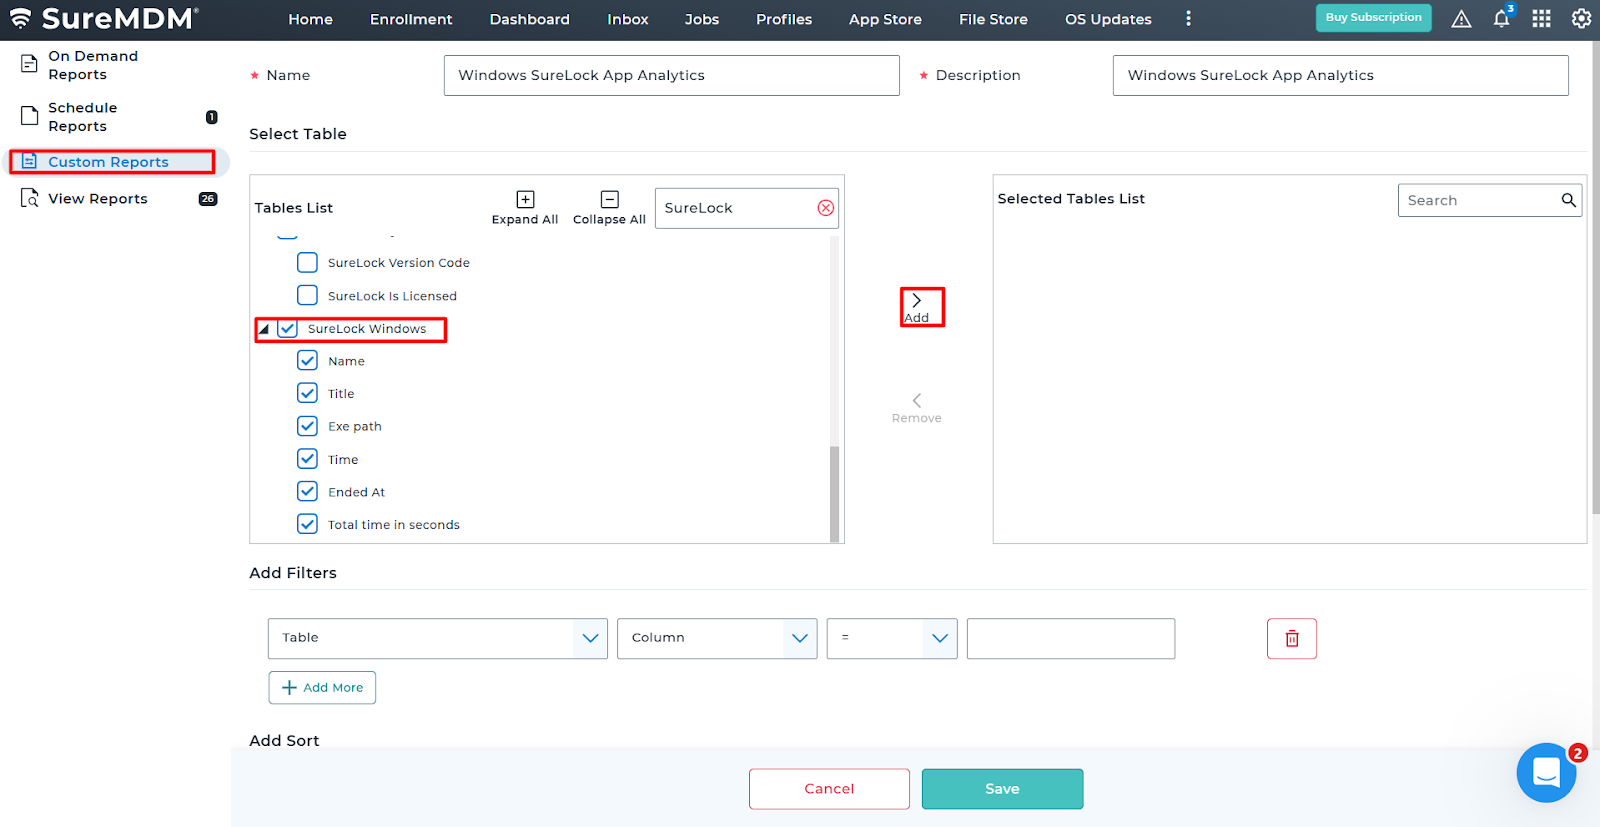
1. Go to Reports tab > select the Custom Reports tab > Add.
2. Provide a Name and Description for the report.(Example Name : Windows SureLock App Analytics)
3. From the Tables List section,Search for the SureLock Analytics we have created in Step1. > Add to l appear in the Selected Tables List > Save the report.
Note: Before Generating the report apply the export Analytics runscript Created in Step 3 on the device or group to fetch the updated report.
5. Navigate to On Demand report > Search for the created Custom Report “Windows SureLock App Analytics”.
6. Select the report, Choose the Device or Group for which the Analytics data is required to be analyzed within a time period > Click on Request Report.
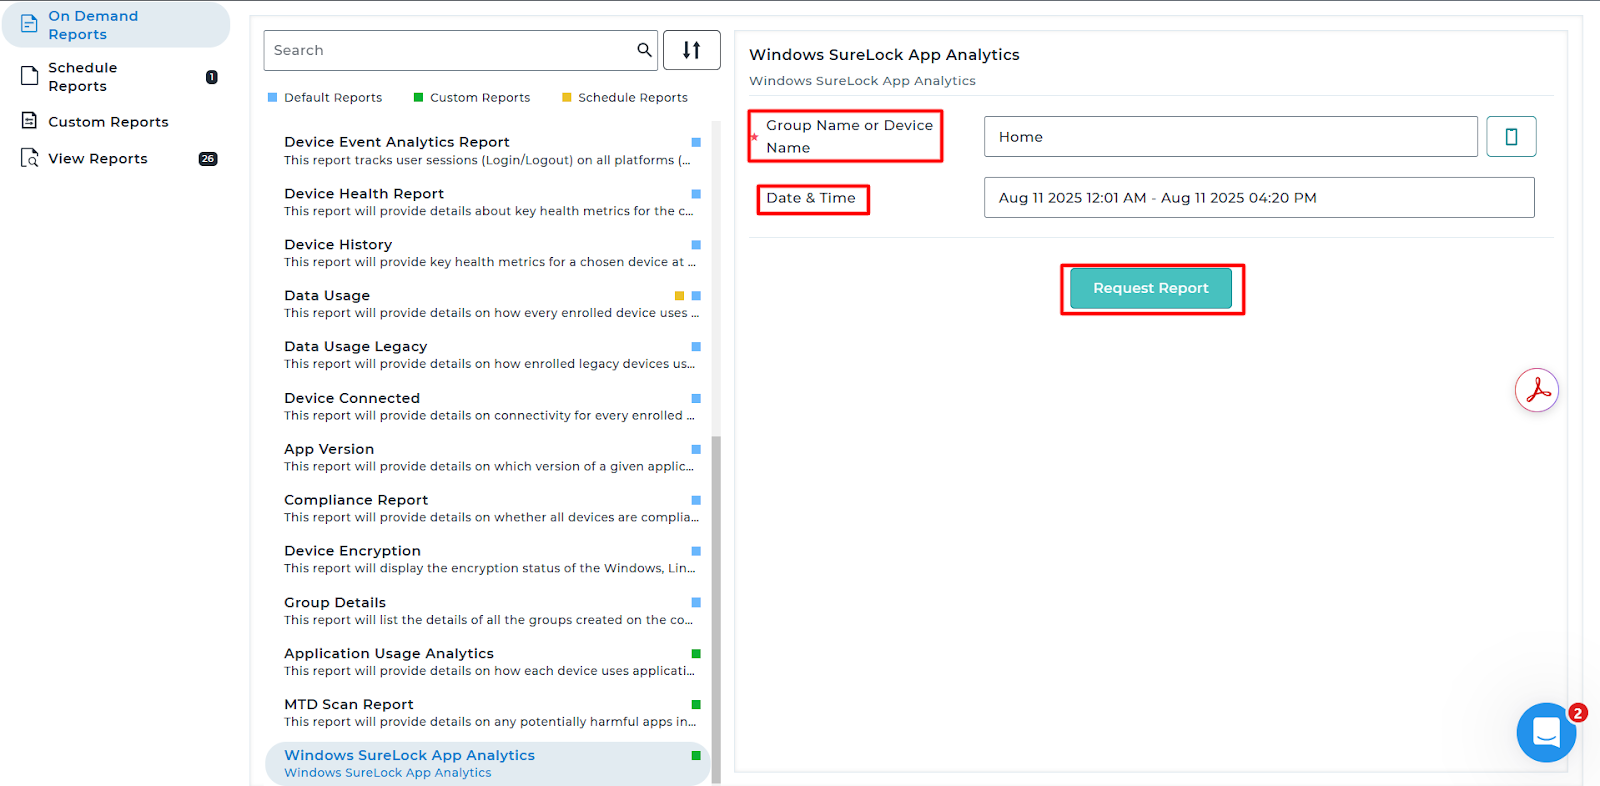
8. Go to View Reports and view or download the report.
Conclusion
This article exists to guide administrators through the complete process of generating a Windows SureLock Allowed Apps Analytics Report using SureMDM. The report helps organizations gain visibility into how devices locked with SureLock are being used. By following the steps outlined, admins can set up data analytics, collect usage information from Windows devices, and generate custom reports that provide insights into application activity and compliance.
Need more help? Here’s how to get help from our experts.