
Branding Configuration allows administrators to customize the organization’s login experience in SureIDP. These branding settings are applied globally to the SureIDP authentication page and are visible to all users across associated domains during login. This article explains how to configure branding settings in SureIDP (Identity Provider) within SureMDM, including logo, welcome message, and login page customization for all users.
Prerequisites
- Admin access to SureMDM console
- SureIDP module enabled
- Required branding assets (logo image, text content)
Steps
- Log in to the SureMDM console with administrator credentials.
- Navigate to: Settings → Account Settings → Identity & Access Management → SureIDP (Beta)
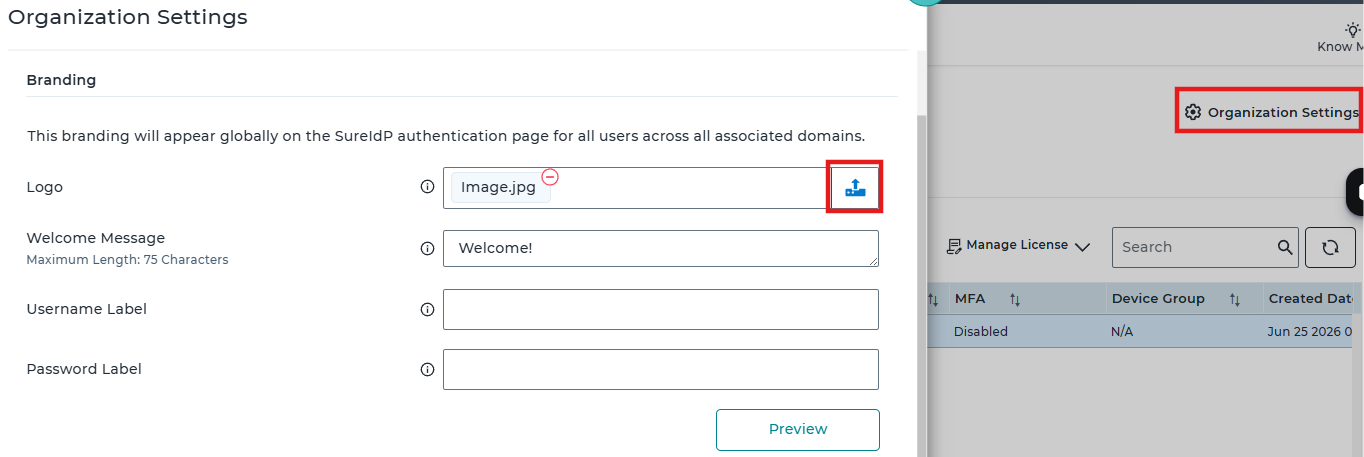
- Click on Organization Settings.
- Under the Branding section, configure the following:
• Upload Logo for the authentication page. Max Dimensions: 300 x 300, Supported file types: .png, .jpeg, .jpg.
• Enter Welcome Message (max 75 characters)
• Define Username Label (optional customization)
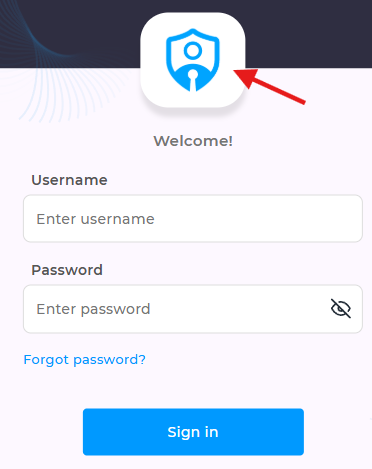
• Define Password Label (optional customization) - Click on Preview to verify how the login page will appear to users.
- Once verified, click Save to apply the branding changes globally across all associated domains.
Conclusion
Once saved, the updated branding will reflect on the SureIDP authentication page for all users across the organization. Any changes made here will apply globally and immediately after saving.
Need more help? Here’s how to get help from our experts.
Was this helpful?
YesNo