
APPLIES TO: Zebra devices
Pre- Requisites:
- The latest version of StageNow download link
- MX version on the devices should be 8.3 and above.
- The latest version of SureLock and SureMDM Agent link
Resolution:
- Install StageNow and create an admin account in the application.
- Log in with the admin account.
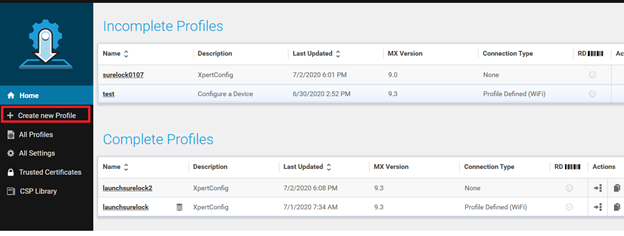
- Select Create a new profile option
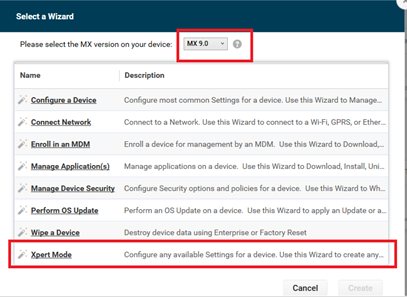
- Select the MX version of the device on which you would like to Install and Launch SureLock. Select Xpert Mode option
- Name the profile and click on Start.

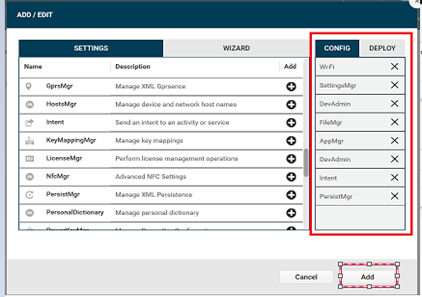
- The above will prompt a screen where you can select the required settings managers to install and launch SureLock. Select the managers and select ADD
Note: You can select all at once and rearrange them using the drag and drop process
- Configure all the above settings as per the requirement
a. Wi-Fi Manager:

i. Check the option to Save Setting for Re-use and name it.
Note: Important settings: Target OS, Wi-FI enable, Sleep policy,
ii. Once done selecting the necessary configurations, click on Continue.
b. Settings Mgr:

i.Check the option to Save Setting for Re-use and name it,
Note: Important settings:
Enterprise Reset in Settings >> Do Not Change,
WIfi >>Enable
Unknown Resources >>Enable
Please refer to the screenshot below.

ii. Once done selecting the necessary configurations, click on Continue.
C. Device admin Mgr

i.Check the option to Save Setting for Re-use and name it,
Note: Important settings:
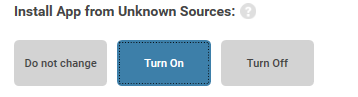
Install App from Unknown Sources >> Turn On
Please refer to the screenshot below.
ii. Once done selecting the necessary configurations, click on Continue.
D. File Mgr
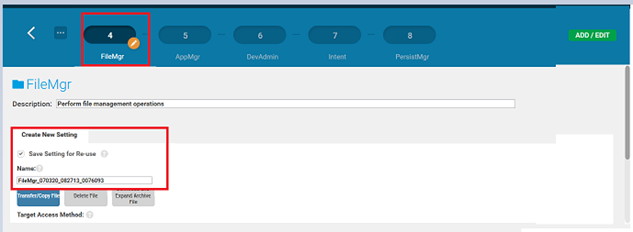
i.Check the option to Save Setting for Re-use and name it.
Note: File Action settings >> As required.
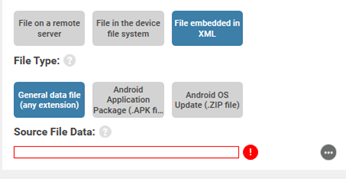
1. Transfer/copy file >> File in device system — share the target path and file name and add the Source access method.
File on remote server – mention the source file URL.
File in the device file system — share the exact path file located in the device.
File embedded in XML – choose the respective.
Please refer to the below screenshot.
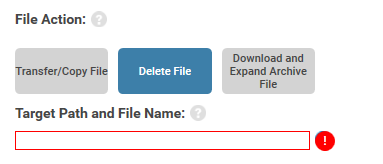
2. Delete File: share the exact path file located in the device. Please refer to the attached screenshot.
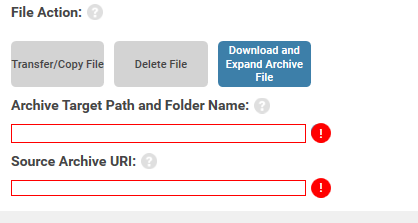
3. Download and Expand Archive File:
i. Archive target Path and Folder Name: Select the path where the SureLock file has to be copied on the device.
ii. Source Archive URI: Select the path from where SureLock apk has to be fetched to be copied to the device.
Note: You can use the browse options to search for the path or file.Please refer to the below screenshot.
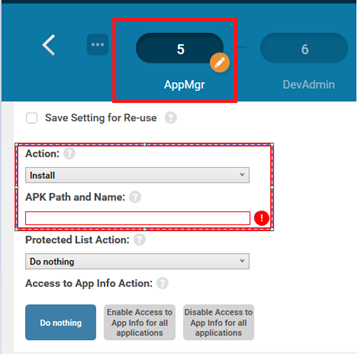
E. AppMgr.
i.Check the option to Save Setting for Re-use and name it,
Note:
a. Select Install from the Action dropdown menu.
b. Enter details under apk path,name
c. Select Do Nothing (for Access to App Info) under Protected List Action.
d.Click on continue. Please refer to the screenshot.
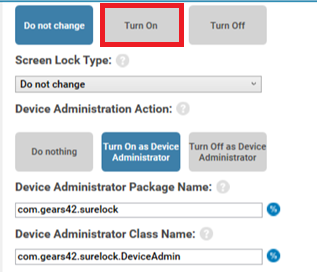
F. DevAdmin
i.Check the option to Save Setting for Re-use and name it,
Note:
a. Select Turn On for Device Administration.
b. Select Screen Lock Type — Do Not Change from the dropdown menu.
c. Select Turn On as Device Administrator under Device Administration Action.
d. Enter the Device Administrator Package Name and Class Name click continue.
Please refer to the screenshot.
G. Intent
i.Check the option to Save Setting for Re-use and name it,
Note:
a. Select Action as StartActivity, Launch as Android Action Name.
b. Enter Package Name, Class Name and click Continue.
Note: Other settings are not mandatory

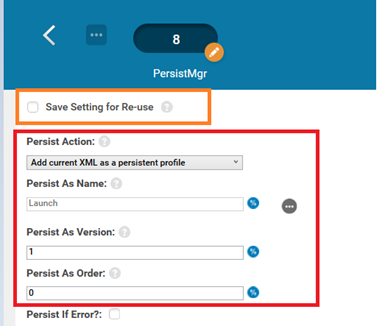
H. Persist Mgr
i.Check the option to Save Setting for Re-use and name it,
a. Select Add current XML as a persistent profile from Persist Action.
b. Enter Launch for Persist as Name
c. Enter 1 for Persist as Version.
d. Enter 0 for Persist as Order and click Continue.
Staging Profile:
We have configured all the managers. In the staging profile, we create the profile which has to be pushed on to the devices in order to configure them as per the deployment.
We will further test the created profile under the Publishing step.
Steps:
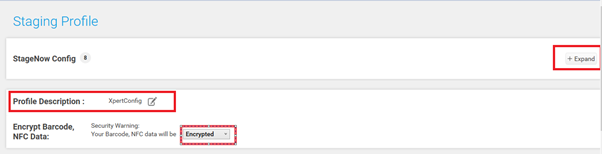
- Expand: Select this option, to view the configured managers which were setup earlier.
- Profile description: You can edit the name of the profile.
- NFC data: Select it as Encrypted.
- Click on >> Complete profiles
- Please refer to the below screenshot for details.
Publish:
As a part of the Staging profile step, in this stage, we will test the created profile before pushing it on the device.
- Export for MDM: Select and save the .xml file for further usage. You can use the file transfer job to transfer this .xml to the device from SureMDM.
- Export to Stage now: Saves the project in zip format. This can be imported/exported to other StageNow application.

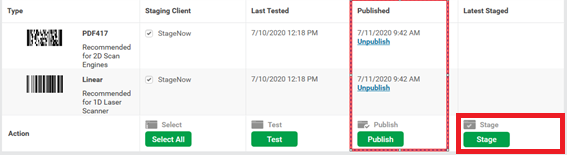
- Once done, choose the option select all and click on Test. This will generate a Pdf document with barcodes.
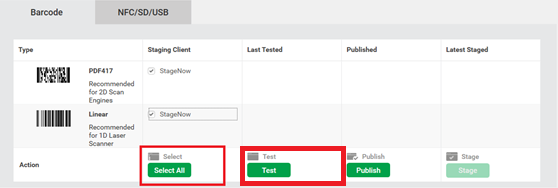
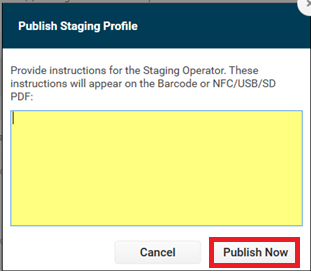
- After the profiles passes the testing phase, you can go ahead and select Publish. Here, you can share any guidelines/steps/ instructions to the admin who uses the staged document. Click on Publish Now to complete the publishing process.
- After the above step, you will be prompted back to the step 3 screen of Publish.
- Here, select Publish. Once done, you will notice the time stamp details of when the profile was published.
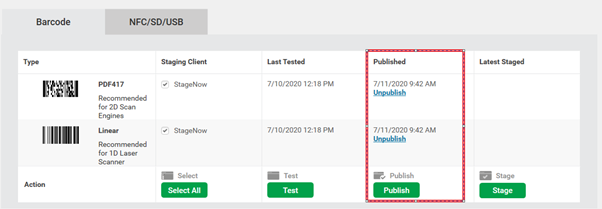
- Select Stage and where a pdf document will be opened. Save that document.
- Launch the StageNow Client from Zebra mobile device and scan the generated barcode (Available in the pdf doc saved from the above step).
- Once the barcode is scanned, Surelockwill be installed automatically on the devices and launched.
- Further, the user will have to grant the required mandatory permissions for SureLock. (Other than device admin permissions.)
To read more about SureLock, click here
To download a trial version, click here
If you need further assistance, please submit a ticket here