Single Sign–On (SSO) is an authentication process that allows a user to access multiple applications with one set of login credentials.
SureMDM is supported with SAML 2.0 WebSSO protocol with Active directory and OneLogin. For Active directory, ADFS roles must be installed on AD servers. To configure SSO into SureMDM, you need ADFS Service URL and Federation Service Identifier. Detailed instructions to enable and configure the same is as mentioned below:
How to obtain ADFS Service URL?
To obtain ADFS Service URL, follow the below mentioned steps:
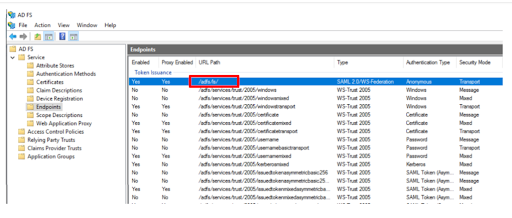
1. In AD FS Console ( Server Manager > ADFS > Tools > ADFS Management), expand Service, click on End Point
2. Note the URL Path for SAM 2.0
3. Prefix it with the machine endpoint
How to obtain a Federation Service Identifier?
To obtain Federation Service URL, follow the below-mentioned steps:
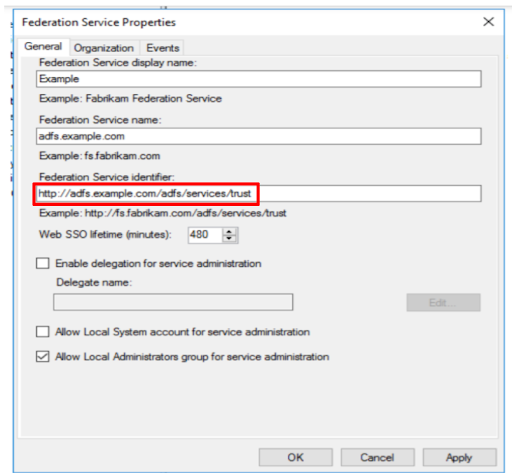
1. In your AD FS Console, right-click on Service and click Edit Federation Service Properties
2. Note the URL mentioned in Federation Service identifier field(see image below):
Enabling Single Sign On in SureMDM console
To enable Single Sign On in SureMDM SaaS, follow the below mentioned steps:
1. Login to your SureMDM console using admin account
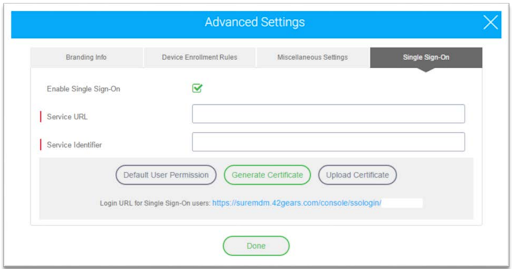
2. Click on Settings Icon on top right of the console and click on Advanced Settings
3. Now, click on Single Sign-On tab
4. Check Enable Single Sign-On option and click on Done
5. Enter the ADFS Service URL and Federation Service Identifier retrieved from AD server in the above steps
6. Select Default User Permissions for the SSO user by clicking on Default User Permission, select the permission which will be assigned to any SSO user by default on first login into SureMDM SaaS.
7. Click on Generate Certificate. This will generate a self-signed certificate on the server and make it ready for download
8. Click on Download Certificate button to download this self-signed certificate (adfs_xxxxxxx.cer) and save it on your PC.
Configuring the Certificate on ADFS Server
1. RDP into your ADFS Server and launch AD FS Console from Server Manager. Click on Tools and select AD FS Management
2. Click on Relying Party Trusts and go to Add Relying Party Trust
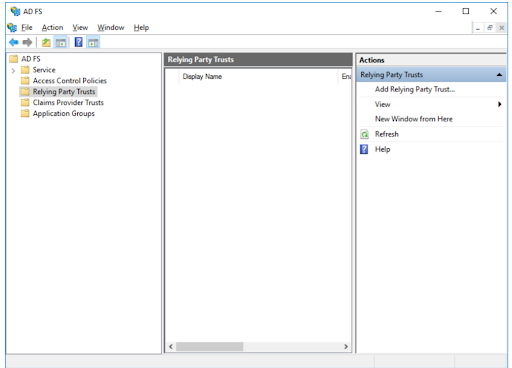
3. Select Claims Aware and click on Start
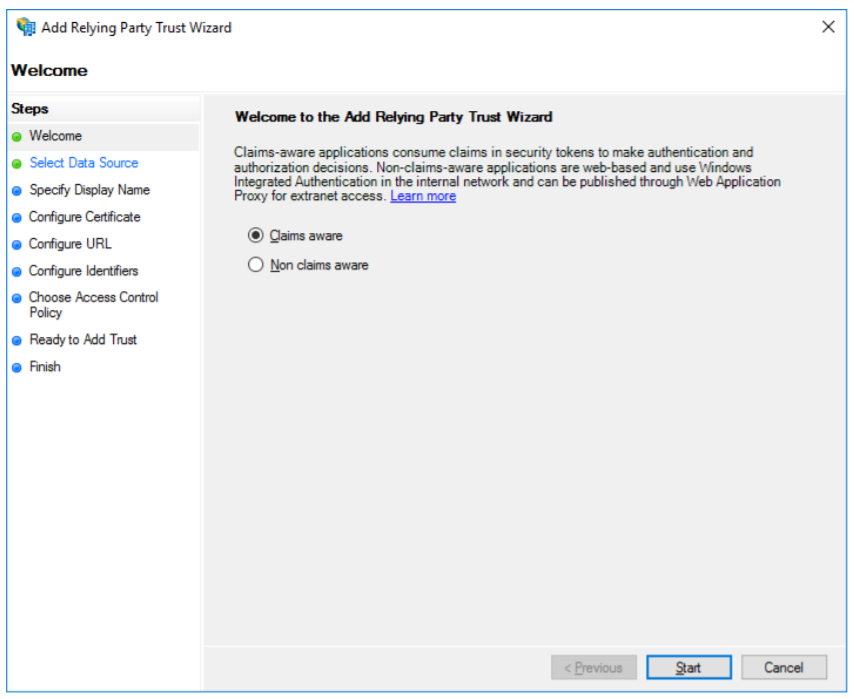
4. Select Enter data about relying party manually and click Next
5. Fill in the Display Name as SureMDM and click Next
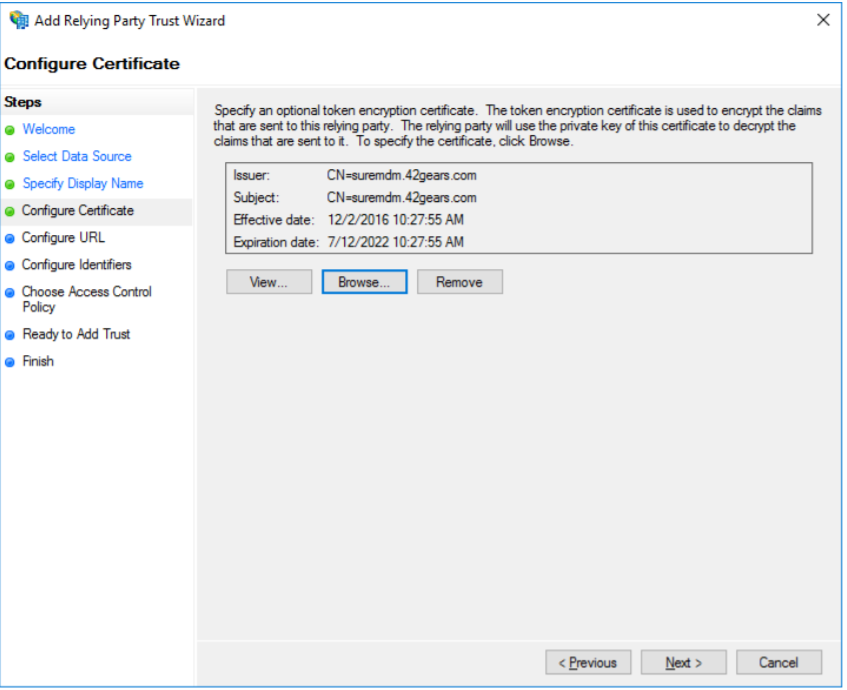
6. In Configure Certificate section, browse and select the downloaded certificate (adfs_xxxxxxx.cer).
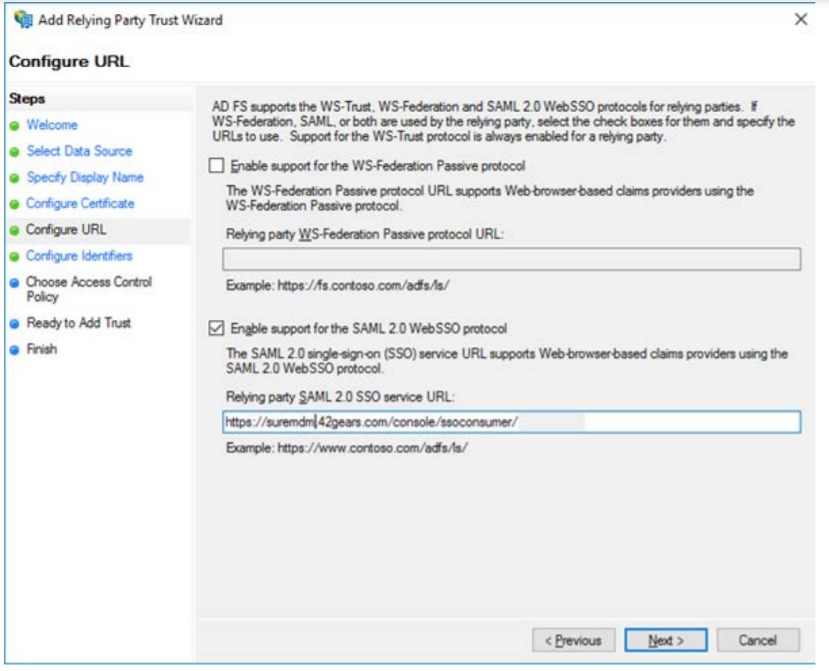
7. Check the option Enable support for the SAML 2.0 WebSSO protocol and enter URL as in this format: https://suremdm.42gears.com/console/ssoconsumer/XXXXXXX
(replace XXXXXXX with your SureMDM Account ID)
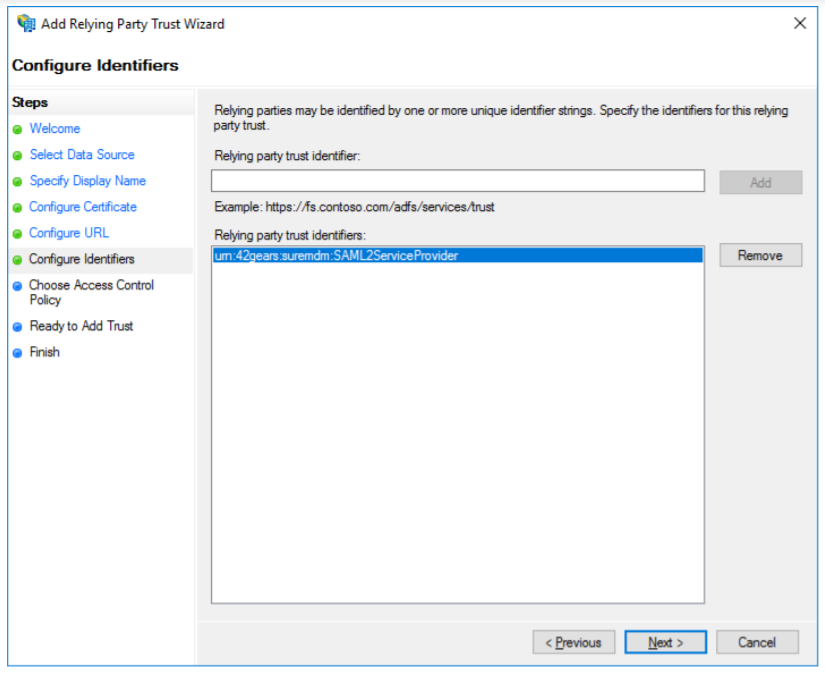
8. Enter and add urn:42gears:suremdm:SAML2ServiceProvider in Relying party trust identifier field
9. Select Permit everyone or select a specific group based on your requirement
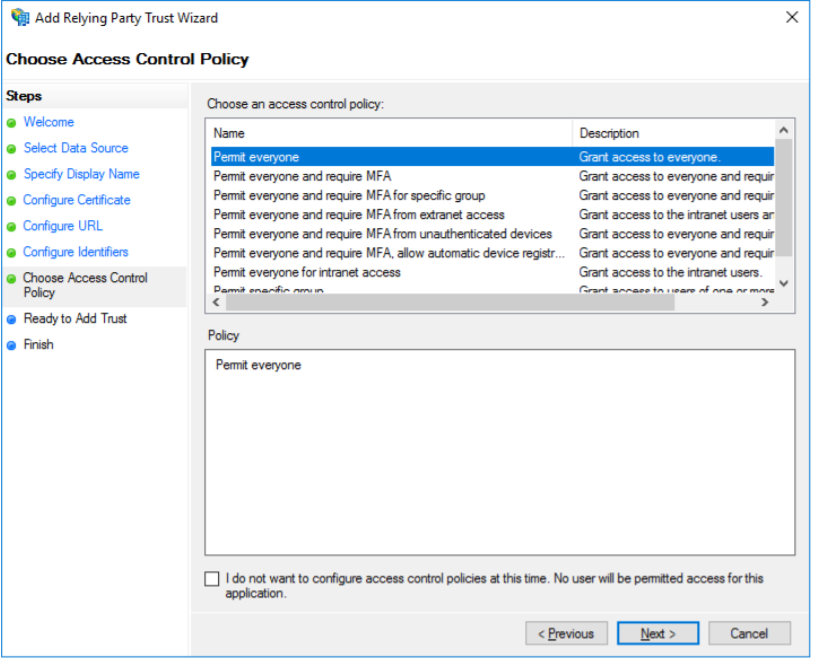
10. Click Next and then Close.
11. Now go back to the main AD FS Console, right click on SureMDM and select Properties
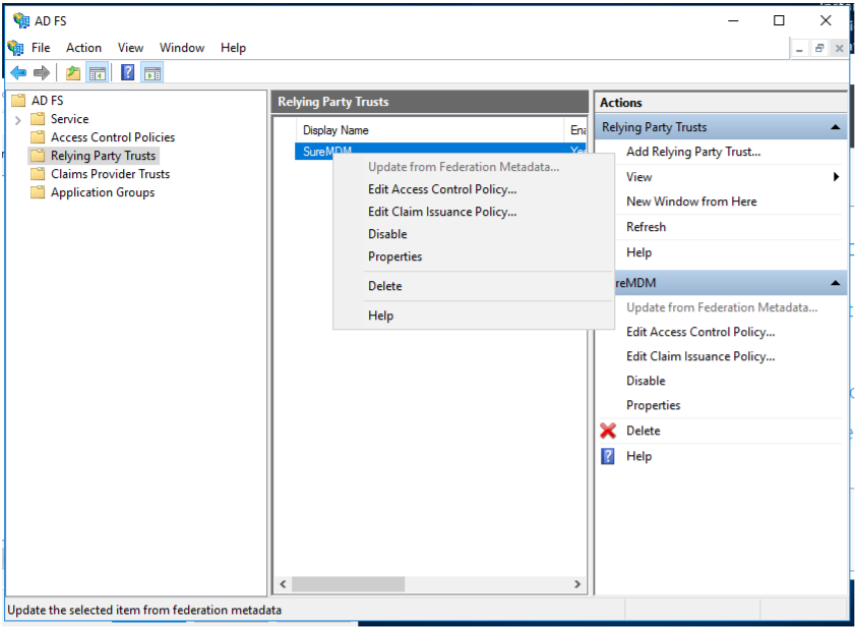
12. Select Signature Tab and then click on Add
13. Now, select the certificate (adfs_xxxxxxx.cer) which was downloaded earlier and click Apply
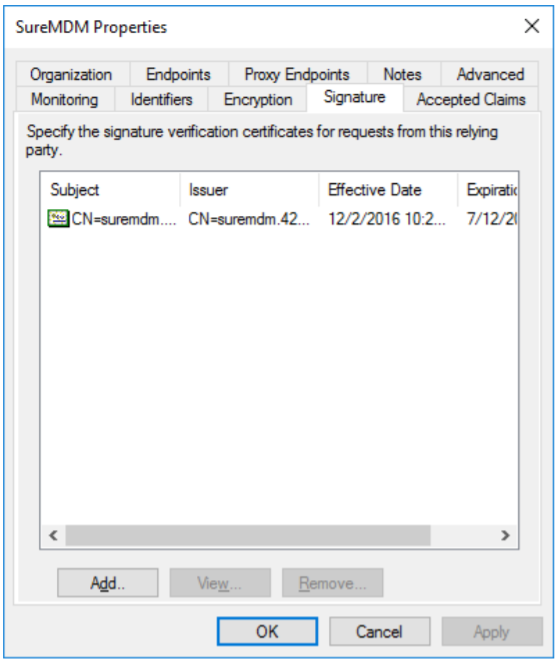
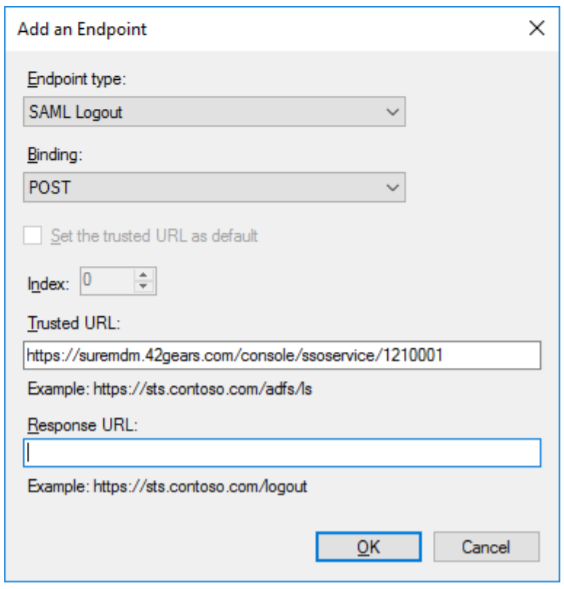
14. Next, select Endpoints tab and click on Add SAML
15. After that, select Endpoint type as SAML Logout and Trusted URL in the format below and click OK:
https://suremdm.42gears.com/console/ssoservice/XXXXXXX
(replace XXXXXXX – SureMDM account ID)
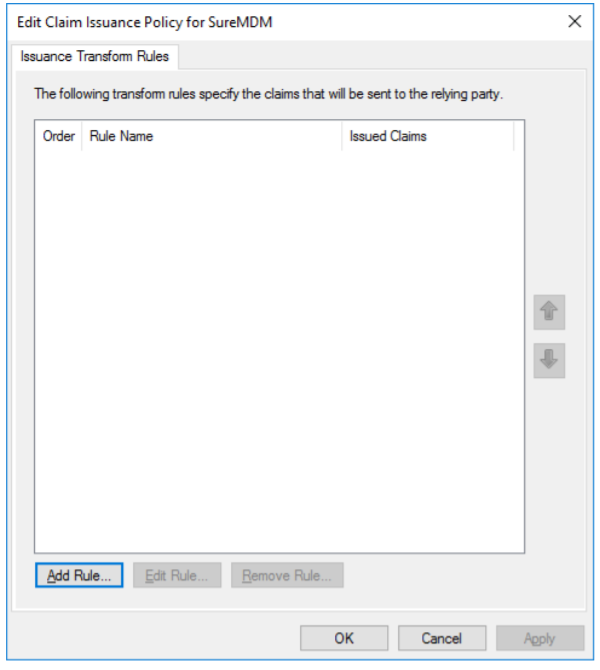
16. You will see a prompt to Edit Claim Issuance Policy prompt. On that window, click Add Rule and click Next
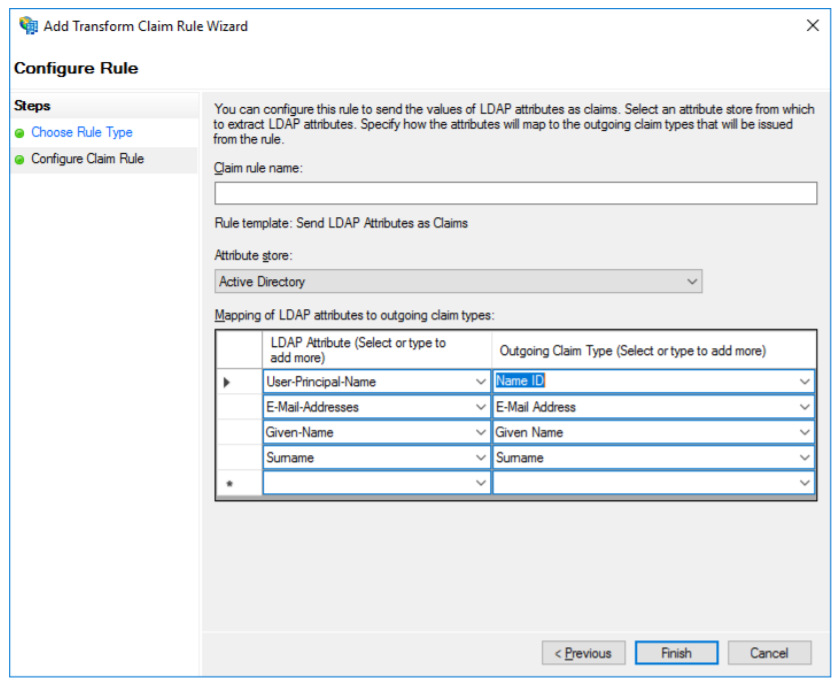
17. In Claim rule name field enter SureMDM, select Attribute store as Active Directory. Now add the below mappings and click on Finish and then click OK.
18. Use the URL in below format and replace XXXXXXX with your account ID. https://suremdm.42gears.com/console/ssologin/XXXXXXX
Now, you can use the above URL for your SSO user login and therefore authenticate through your AD.
SureMDM also supports Single Sign-On feature with many other SSO providers. To know more, click here.
To know more about SureMDM and its features, click here.
If you need further assistance, please submit a ticket here.
