
Apple will update the Apple Push Notification Service (APNs) root certificate on February 24, 2025.
Administrators should ensure that applications using APNs must update a new SHA-2 Root(USERTrust RSA Certification Authority) certificate in their Trust Stores. This step is required to maintain uninterrupted connectivity between SureMDM servers and the Apple Push Notification Service.
Note:
- This article applies only to On-Premises deployments on Windows servers. For Linux On-Premise serves, no action is required.
- For SaaS accounts, the SureMDM internal team will take care of it.
How to Install the Apple Push Notification Service (APNs) Server Certificate
For on-premises SureMDM instances, the new SHA-2 root certificate (USERTrust RSA Certification Authority) must be installed on the Windows Server hosting SureMDM to maintain uninterrupted APNS functionality.
Steps
Install the New Root Certificate:
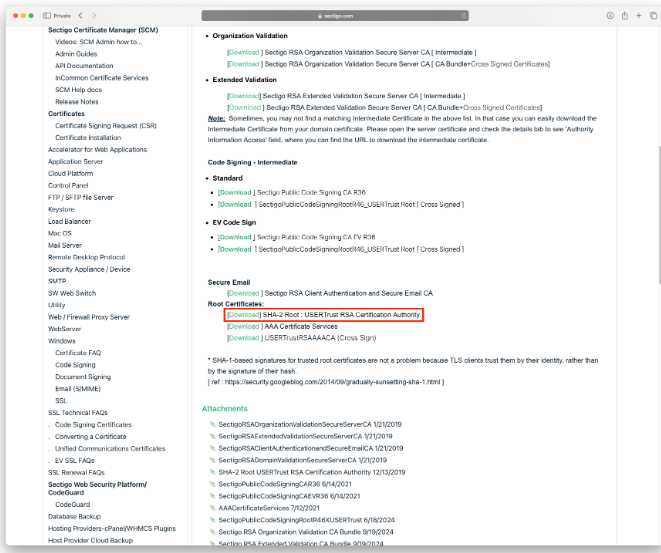
- Visit Apple’s Announcement – Navigate to Apple’s Push Notification service server certificate update announcement and follow the provided link to Sectigo.
- Download the Certificate – Obtain the SHA-2 Root: USERTrust RSA Certification Authority Certificate and save it to your server.
- Open PowerShell as Administrator – Launch PowerShell with administrative privileges.
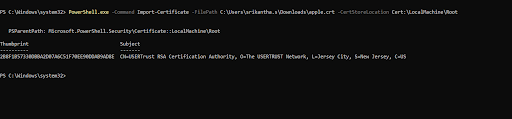
- Run the Import Command – Execute the following PowerShell command, replacing {FolderPath} with the full directory path where the certificate is stored and {CertName} with the certificate’s filename.
PowerShell.exe -Command Import-Certificate -FilePath “{FolderPath}\{CertName}.crt” -CertStoreLocation Cert:\LocalMachine\Root
Validate the New Root Certificate installed:
- After running the command above, the output should appear as follows:
- You can also validate this using UI. Follow the below steps:
- Open the Microsoft Management Console – Press Windows + R to open the Run dialog and type mmc and enter.
- Add the Certificates Snap-In – In the MMC windows, go to File -> Add/Remove Snap-In, and from the left-hand list of available snap-ins, select Certificates and click Add.
- Select the Computer Account – When prompted to choose which account the snap-in will manage, select Computer account and click Next. On the next screen select Local computer (the one this console is running on) and click Finish.
- View the Certificates – Click OK to return to the main MMC console, expand Certificates – Local Machine ( in the left-hand panel and select Trusted Root Certification Authorities and expand Certificates here you should see the new certificate.

Need help? CONTACT US