
If you are enrolling and approving multiple devices in your MDM, the process of manually approving each of those devices can be time-consuming.
SureMDM makes it easy by allowing importing of a list with pre-approved device details. Once this list is imported in SureMDM, whenever a new device is enrolled, SureMDM checks the pre-approved list and approves the device automatically if listed.
To create this setup, below are three steps to be followed:
1. Creating a pre-approved list with device details
2. Importing the file with the list of pre-approved devices in SureMDM
3. Configuring SureMDM Agent
STEP 1:
To create a pre-approved list follow the below-mentioned steps:
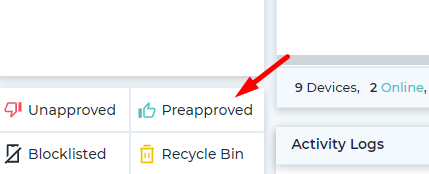
1. Log into SureMDM web console and navigate to the Pre-approved Section of the console.
2. Click Download Preapprove Template to download the format to pre-approve the devices.
3. Open the format in NotePad and edit the following details.
- Device Name
- Hardware Address(IMEI or Mac or SerialNumber or AppleID)
- Hardware Address Type
- Group Path
- Device Notes
- Device Tag
- Phone Number
- Email Id
4. Once done, save the file in .csv format
STEP 2:
To import the pre-approved list of devices in SureMDM Web Console, follow the below-mentioned steps:
1. Log into SureMDM Web Console
2. On SureMDM Home, click on the Preapproved option under home
3. On the Preapproved screen, click on Import
4. Browse and select the .csv file
Now, whenever the devices with the listed Hardware Address and Hardware Address Type in the .csv file get enrolled, they will be automatically approved and added to the Device List section or assigned group.
STEP 3:
To configure SureMDM Agent, follow the below-mentioned steps:
1. Launch SureMDM Agent
2. The device can be enrolled in 2 ways.
A) Work Profile Enrollment
The work profile keeps your work apps separate and it is managed by your organization. This model is preferred for employee-owned devices
Entering SureMDM Acount ID and Server path
- Enter the SureMDM Account ID and then click Next
- Configure Server Path – ( It’s your SureMDM console URL )
- Configure Device Name. select from the following options to set the device name.
- Set Device Name Manually
- Use MAC Address
- Use System Generated Name
- Use IMEI Number
- Use Phone Number
- Use Serial Number
- Tap Set Device Name
- Click Register.
- Accept & Continue (It takes a while to set up the work profile)
- Click Next to complete the work profile setup
Scan QR Code
- Click Scan QR
- Configure Device Name. select from the following options to set the device name.
- Set Device Name Manually
- Use MAC Address
- Use System Generated Name
- Use IMEI Number
- Use Phone Number
- Use Serial Number
- Tap Set Device Name
- Click Register.
- Accept & Continue (It takes a while to set up the work profile)
- Click Next to complete the work profile setup
B) Device Admin Enrollment
Warning: This enrollment method is no longer supported as this Enrollment type is deprecated and is replaced by the Device Owner Enrollment.
Entering SureMDM Acount ID and Server path
- Grant all the permissions and click Continue
- Enter the SureMDM Account ID and then click Next
- Configure Server Path – ( It’s your SureMDM console URL )
- Configure Device Name. select from the following options to set the device name.
- Set Device Name Manually
- Use MAC Address
- Use System Generated Name
- Use IMEI Number
- Use Phone Number
- Use Serial Number
- Tap Set Device Name
- Click Register.
Scan QR Code
- Click Scan QR
- Configure Device Name. select from the following options to set the device name.
- Set Device Name Manually
- Use MAC Address
- Use System Generated Name
- Use IMEI Number
- Use Phone Number
- Use Serial Number
- Tap Set Device Name
- Click Register.
Note: Ensure to use these as Hardware Address and Hardware Address Type in the .csv file which will be uploaded to the SureMDM web console.
5. The device will get enrolled directly in the SureMDM console.
Click here to learn more about SureMDM.
For more details on our products, click here
If you need further assistance, please submit a ticket here