Purpose
This article outlines the steps to launch and configure a customized SureMDM Agent application on Windows devices using the SureMDM Web Console. This allows administrators to pre-configure essential settings like Account ID, Server Path, Password, and Device Group Path before deployment.
Prerequisites
Before launching a customized SureMDM Agent, ensure the following:
- Access to the SureMDM Web Console.
- Administrative privileges on the console.
- Devices must support SureMDM Windows Agent version 4.39 or higher.
Steps
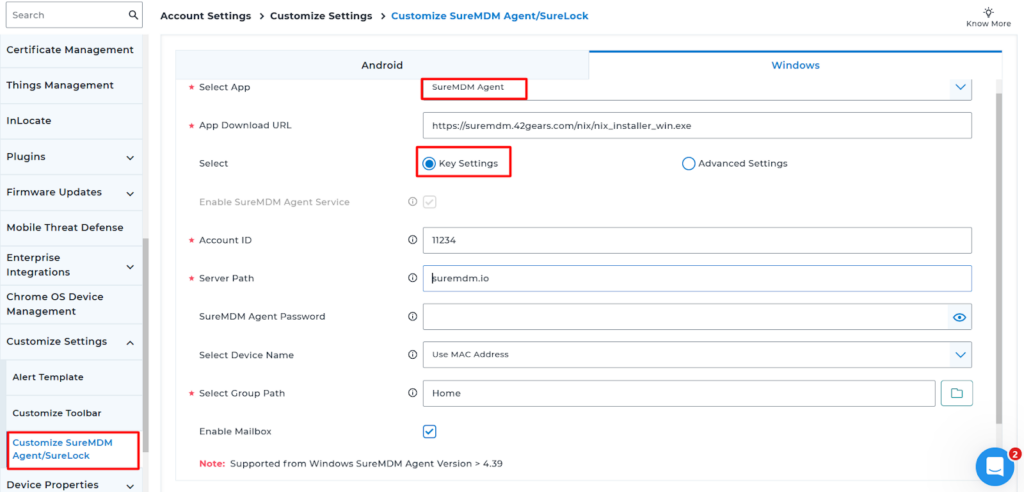
- Log in to the SureMDM Web Console. Navigate to Settings > Account Settings > Customize SureMDM Agent/SureLock > Windows
- Select SureMDM Agent from the Select App drop-down.
- The URL will be auto-populated based on your selected application. Optionally, you may enter a custom download URL based on a specific agent version from the 42Gears website.
Key Settings:
- SureMDM Account ID, Server Path, Device name,SureMDM Agent Password

- Assign Group Path: Specify the Group Path where the device should be placed in the console.
- Note: If setting this up in a test environment and the group does not exist, create the group first in the test console.
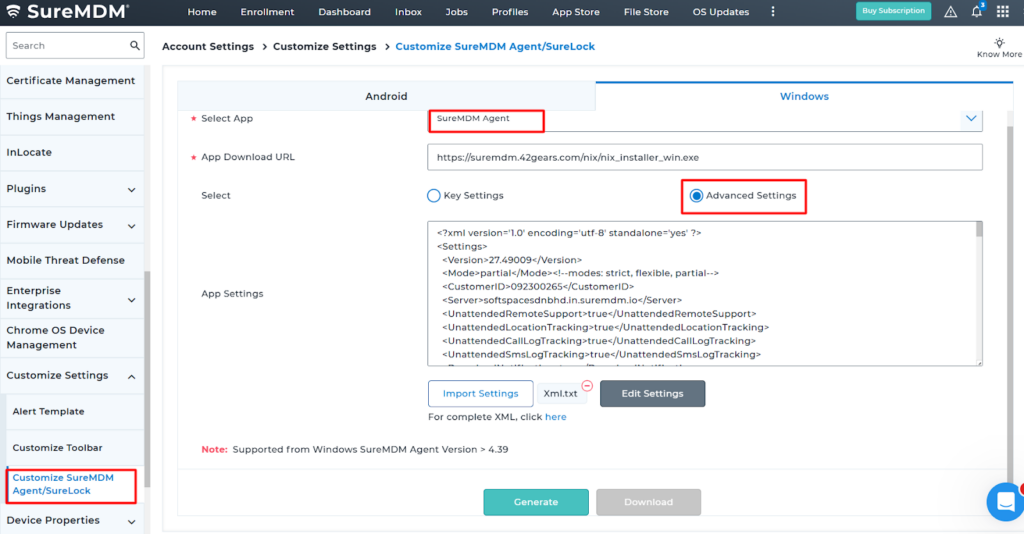
Advanced Settings:
- In the App Settings box, click Import Settings to import the XML app settings file and click Edit Settings to edit the app settings if required.
- Click Generate to process the application, and click Download.

- An exe file will download. Using the Install application job, the application will be launched as a system app on the device.
Notes: This feature is supported only from Windows SureMDM Agent version 4.39 and above.
Need help?
Was this helpful?
YesNo
