
This article provides step-by-step instructions to configure branding in AstroContacts by uploading a custom logo that will be displayed across the platform interface.
Prerequisites
- Admin access to the AstroContacts console
- A logo file in one of the supported formats: .jpeg, .jpg, .png, or .gif
- File size should be within 1 MB
Steps
- Log in to AstroContacts Console
Access the AstroContacts admin panel using your credentials. - Navigate to Account Settings
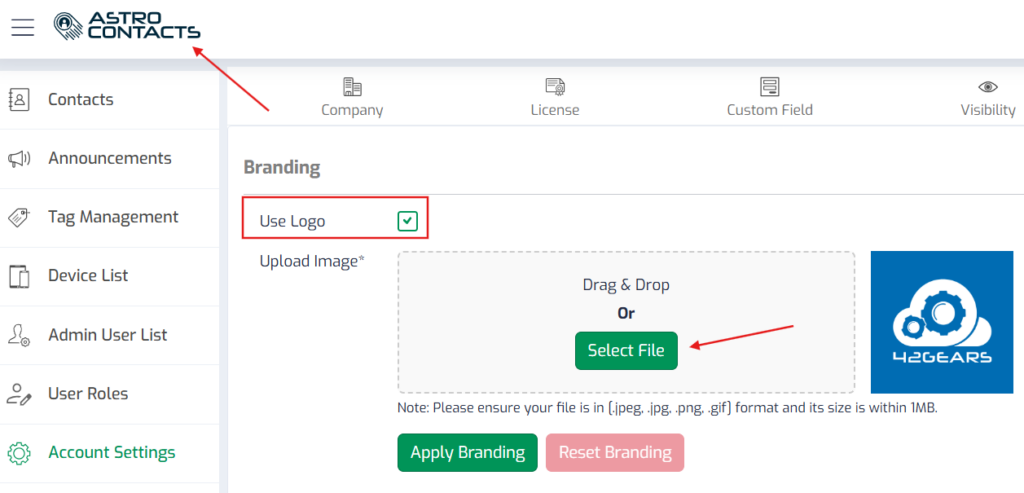
From the left-hand menu, click on Account Settings. - Open Branding Tab
In the top navigation bar, click on the Branding tab. - Enable Logo Option
- Locate the Use Logo checkbox
- Ensure it is checked to enable custom branding
- Upload Logo Image
- Click on Select File or use the Drag & Drop area
- Choose your logo file from your system
- Verify Image Preview
- Once uploaded, a preview of the logo will appear on the right side
- Confirm that the correct image is selected
- Apply Branding
- Click on Apply Branding to save the changes
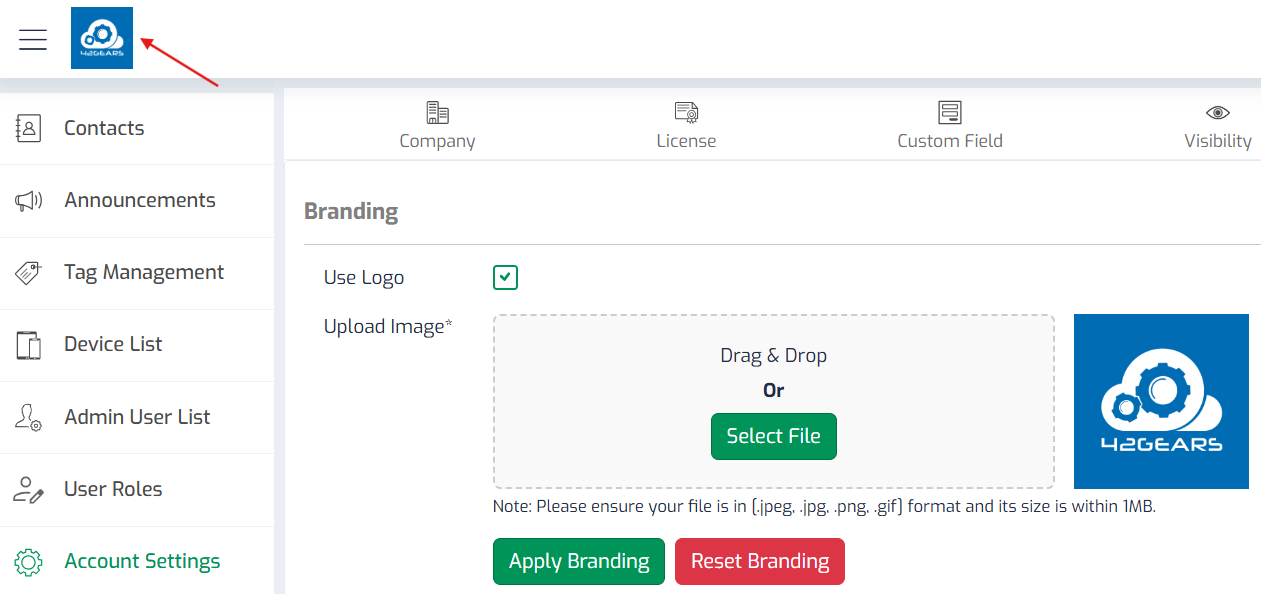
- Confirm Logo Update
- The uploaded logo will now be visible in the top-left corner of the console interface
Reset Branding (If Required)
- Click on the Reset Branding button (as shown in the screenshot)
- This will remove the custom logo and revert to the default AstroContacts branding
Conclusion
By following the above steps, you can successfully configure branding in AstroContacts. This allows you to personalize the platform with your organization’s logo, ensuring a consistent brand identity across the interface.
Need more help? Here’s how to get help from our experts.
Was this helpful?
YesNo