
Overview
The AstroContacts Admin Portal allows organizations to delegate administrative responsibilities to multiple users by creating Admin Users and assigning User Roles. User Roles help control access by defining the permissions available to each administrator, such as managing contacts, viewing licenses, sending announcements, or administering other users.
This article explains how to create a User Role, add an Admin User, and manage existing administrator accounts.
Prerequisites
Before creating an Admin User, ensure you have Super User privileges or an account with permission to manage Admin Users.
Steps
- Create a user role
Before adding a new administrator, you must create a User Role that defines the permissions assigned to that user.
- Log in to the AstroContacts Admin Portal.
- Navigate to User Roles from the left-hand navigation menu.
- Click Add on the top toolbar.
- Enter a Role Name (for example, HR Manager or Support Lead).
- Select the required permissions for the role. Available permissions include:
- Contacts – List, Add, Edit, and Delete contacts.
- Announcements – Create and send company-wide announcements.
- Device List -List, delete, export, push update
- Tag Management -List, Add, Edit, Delete, Default/Remove Default and Restrict Access
- Admin User – Create, edit, and manage administrator accounts.
- License – View or manage subscription details.
- Click Save.
Note: Assign only the permissions required for the administrator’s responsibilities to maintain security and follow the principle of least privilege.
2) Create an Admin user
After creating the required User Role, you can add a new administrator.
- Navigate to Admin User List.
- Click Add from the top toolbar.
- Enter the following information:
- Name – Full name of the administrator.
- Email Address – This will be used as the administrator’s login ID.
- Password – Enter a temporary password.
- User Type– Select the role created in Step 1, or choose Super User if full administrative access is required.
- Click Save.
The new administrator can now log in using the configured email address and password.
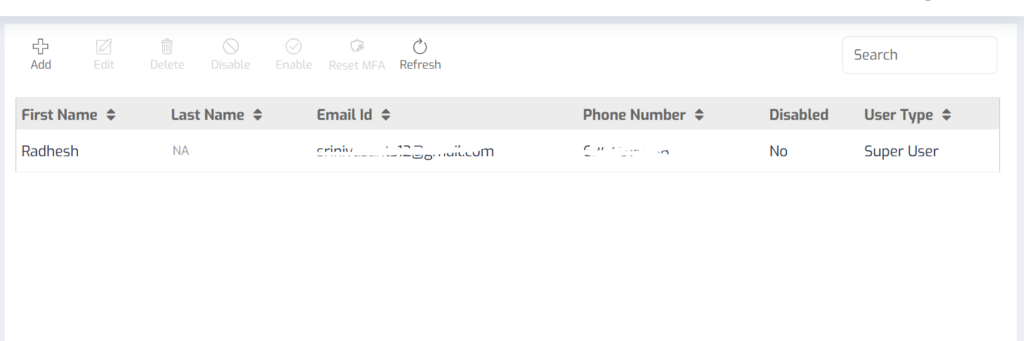
Managing Existing Admin Users
Edit an Admin User
To modify an administrator’s details or assigned role:
- Navigate to Admin User List.
- Select the administrator.
- Click Edit.
- Update the required information.
- Click Save.
Delete an Admin User
To revoke an administrator’s access:
- Navigate to Admin User List.
- Select the administrator.
- Click Delete.
- Confirm the deletion.
Note: Deleting an administrator account does not delete the contacts or other data previously created by that administrator.
Result
After completing the above steps, a new administrator will be created with the assigned User Role and permissions. Administrators can be managed at any time by editing their roles, resetting passwords, or removing access as required.
Need more help? Here’s how to get help from our experts.
CONTACT US