A provisioning package (.ppkg) is a container for a collection of configuration settings and can be created using the Windows Configuration Designer tool. Once a provisioning package has been created, you can use it to enroll Windows 10 devices in bulk to SureMDM.
To enroll Windows 10 devices in SureMDM, you must:
- Create a provisioning package using Windows Configuration Designer app
- Enroll devices using a provisioning package
Creating a provisioning package using Windows Configuration app
To create a provisioning package (.ppkg), follow these steps:
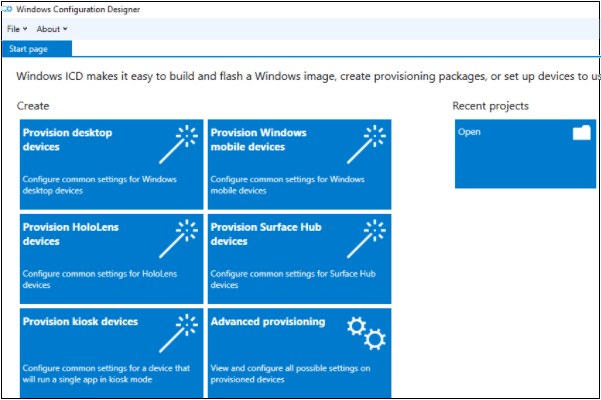
1. Launch the Windows Configuration Designer app.
Note: If the Windows Configuration Designer app is not installed on your system, download the app from Microsoft Store.
2. On the Windows Configuration Designer window, select Advanced Provisioning.
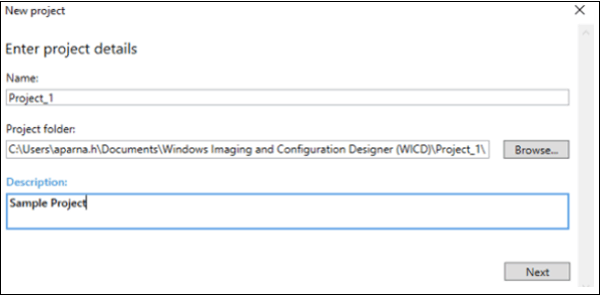
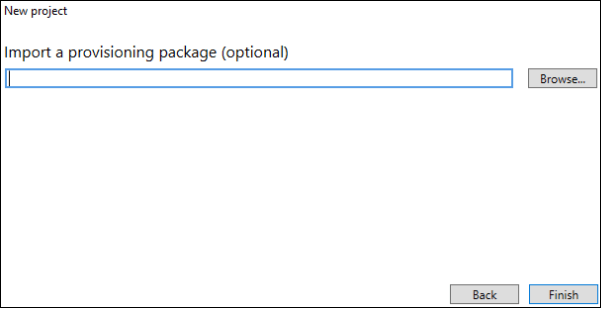
3. On the New Project dialog box, enter the project name, browse and choose a folder to save the project, enter the project description, and then click Next.
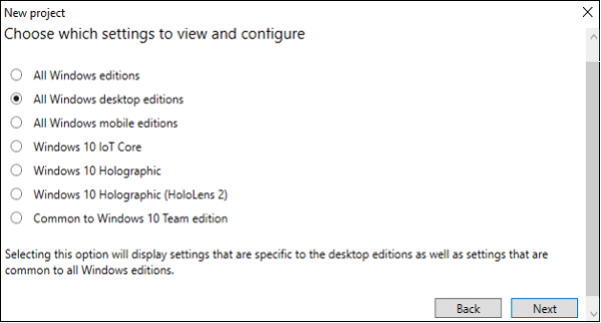
4. Select All Windows desktop editions and click Next.
5. Click Finish.
The newly created project will be displayed on the Windows Configuration Designer screen, as shown in the screenshot below:
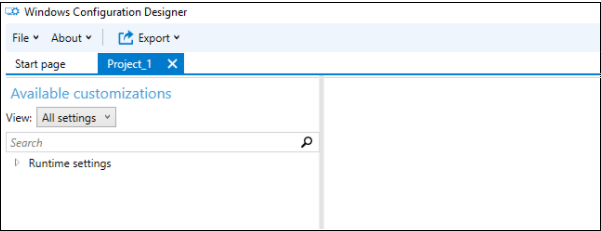
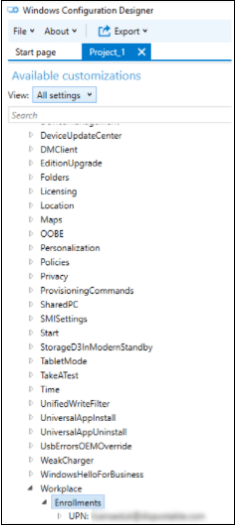
6. Click Runtime settings > Workplace > Enrollments.
7. Enter UPN and click Add.
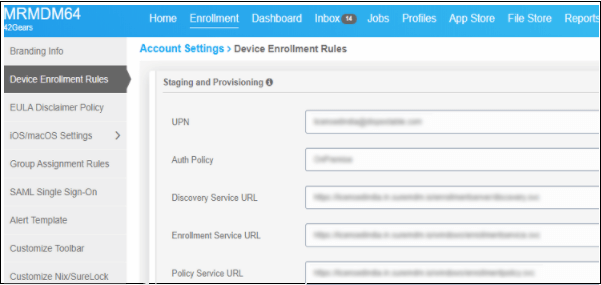
Note: To get the UPN value, navigate to the SureMDM Web Console > Settings > Account Settings > Device Enrollment Rules > Staging and Provisioning, and copy the value.

The newly added UPN will reflect under Workplace > Enrollments.
8. Click the UPN and fill the following details:
AuthPolicy – Onpremise
DiscoveryServiceFullUrl
EnrollmentServiceFullUrl
PolicyServiceFullUrl
Secret – <Console Password>:<SureMDM Account ID>
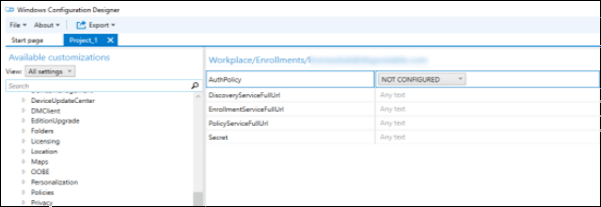
Note: To get the values of DiscoveryServiceFullUrl, EnrollmentServiceFullUrl, and PolicyServiceFullUrl, navigate to the SureMDM Web Console > Settings > Account Settings > Device Enrollment Rules > Staging and Provisioning, and copy the values.
9. Go to File and click Save to save the project.
10. Click Export > Provisioning package.
11. Select Encrypt Package and enter the desired Encryption password.
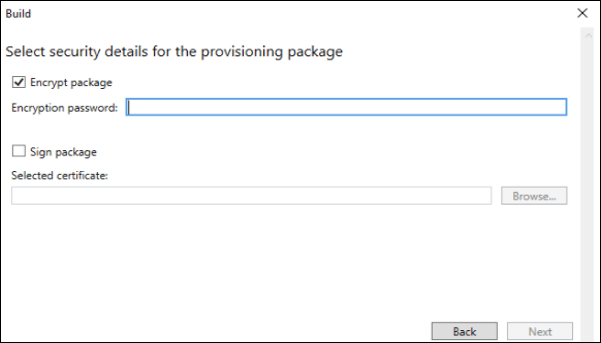
Note: You can skip this step if you don’t want to encrypt the package.
12. Browse and select the folder/removable media disk to save the package file and click Next > Build > Finish.
The provisioning package (.ppkg) file will be saved in the specified location.
Enroll devices using a provisioning package
To enroll devices in bulk using a provisioning package, follow these steps:
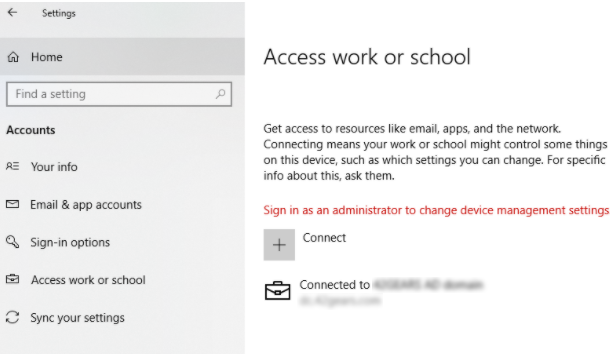
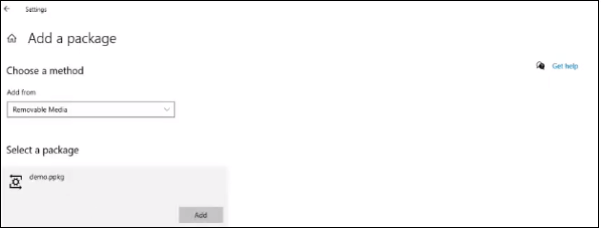
1. Navigate to device’s Settings > Accounts > Access work or school.
2. Click Add or remove a provisioning package > Add a package, select the package created from the removable media, and then click Add.
A password prompt will appear to enter the encryption password. Once the user enters the correct encryption password, the package gets decrypted.
Note: The prompt appears only when Encrypt Package is enabled and Encryption Password is set. Refer step no.11 under Create a Provisioning Package using Windows Configuration Designer App.
Once this is done, the device will get enrolled in EMM mode and added to the device grid.
To verify this, go to the device’s Settings > Accounts > Access work or school. Here you can see the device enrolled in EMM mode: