
How to integrate Azure AD with AstroContacts
Azure Active Directory (AD) offers a faster, secure, and scalable user database for the corporate environment. It is a convenient way for IT admins to manage a large number of users. AstroContacts allows IT admins to sync the user information and contacts of the users who have an account in an Azure Active Directory domain.
Prerequisites:
An Azure account that has an active subscription.
The Azure account must have permission to manage applications in Azure Active Directory (Azure AD).
Register Astrocontact Application in Azure AD portal:
1. log in to the Azure AD portal.
2. Click Azure Active Directory. If Azure Active Directory is not visible in your account then look for Azure Active Directory by visiting All services.
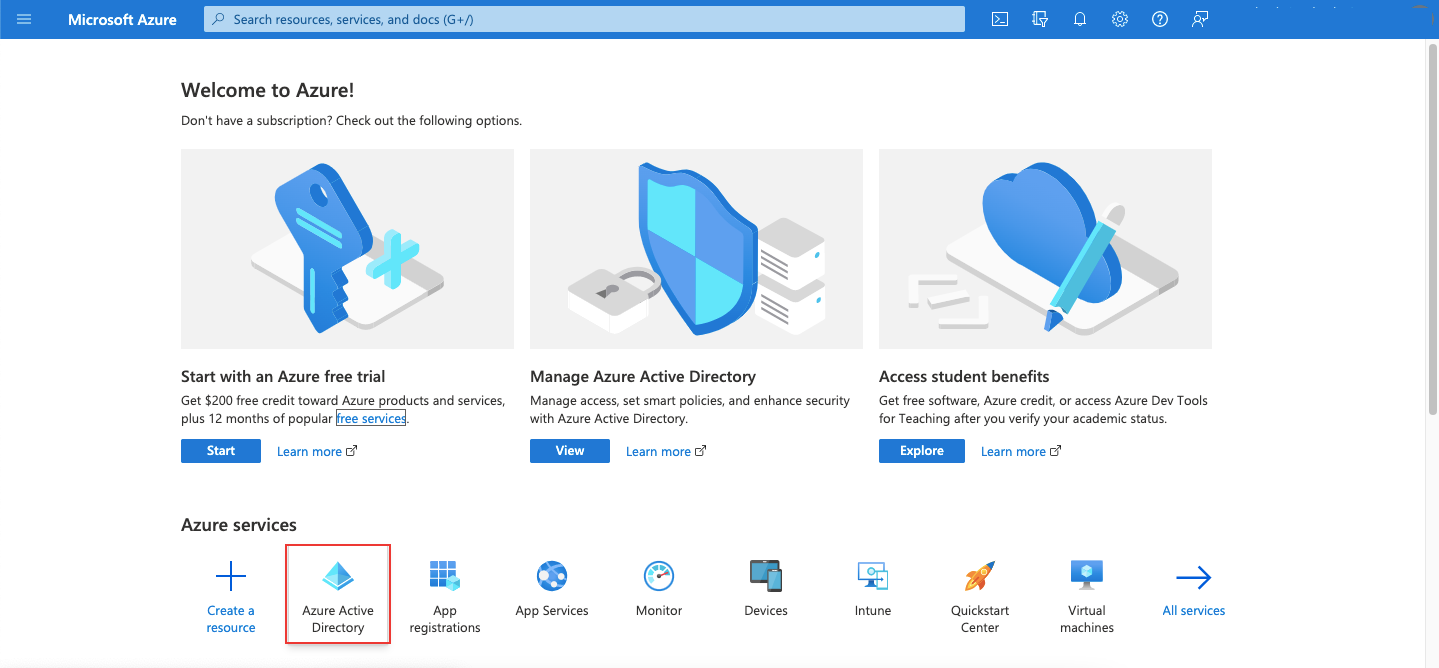
3. Under Azure Active Directory windows, Click on App registrations under Manage.
4. Click on New Registration > Add the Application name as AstroContacts

5. Select account type from any of the below-listed options based on your requirements.

6. To get the Redirect URI, You need to login to AstroContacts Web Console.
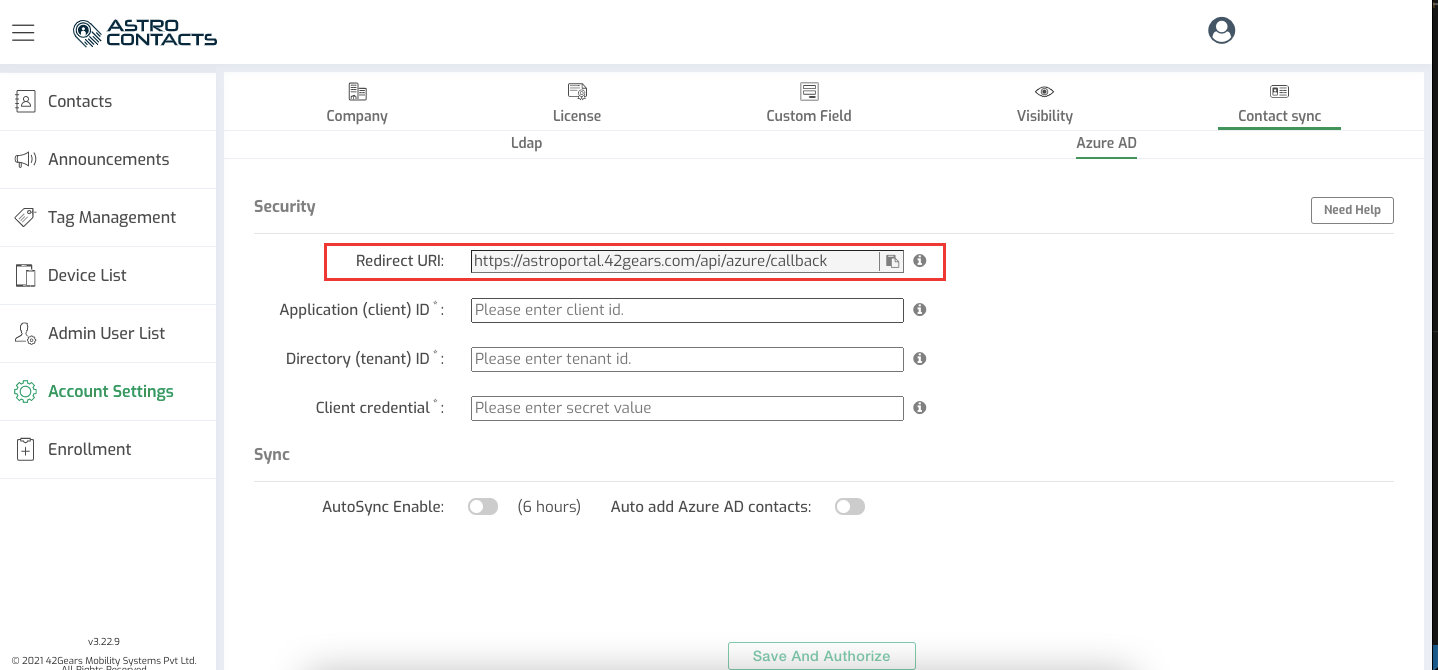
7. Go to Account Settings > Contact Sync > Azure AD > Security
8. You will get the redirect URI, Copy the same from the AstroContacts portal.
9. Again navigate back to the Azure portal.
10. Paste the Redirect URI in the field and select the platform type as Web > Click on Register

11. Now, You will see the AstroContacts under the tab owned applications

Configure AstroContacts and Azure AD :
12. Click on the AstroContacts application which is configured by following steps from 1 to 11
13. On the AstroContacts application window, Click on Certificates & secrets under Manage
14. Click on Client secrets tab > Click on New Client secret
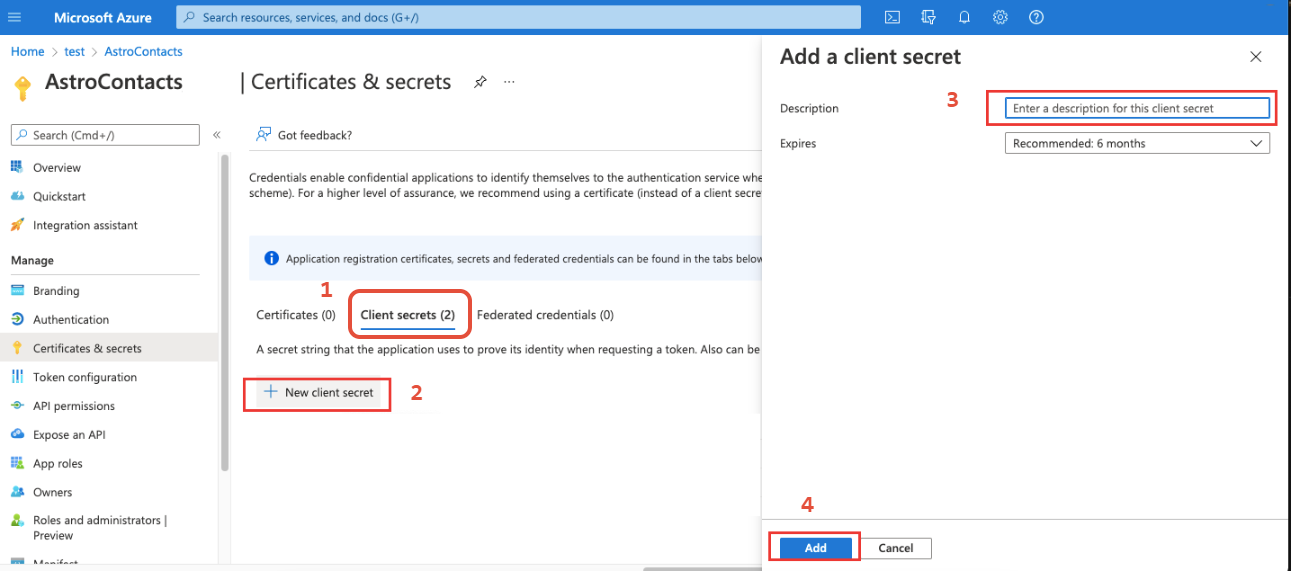
15. Enter the Description name and Set the Expires as per your requirement > Click on Save
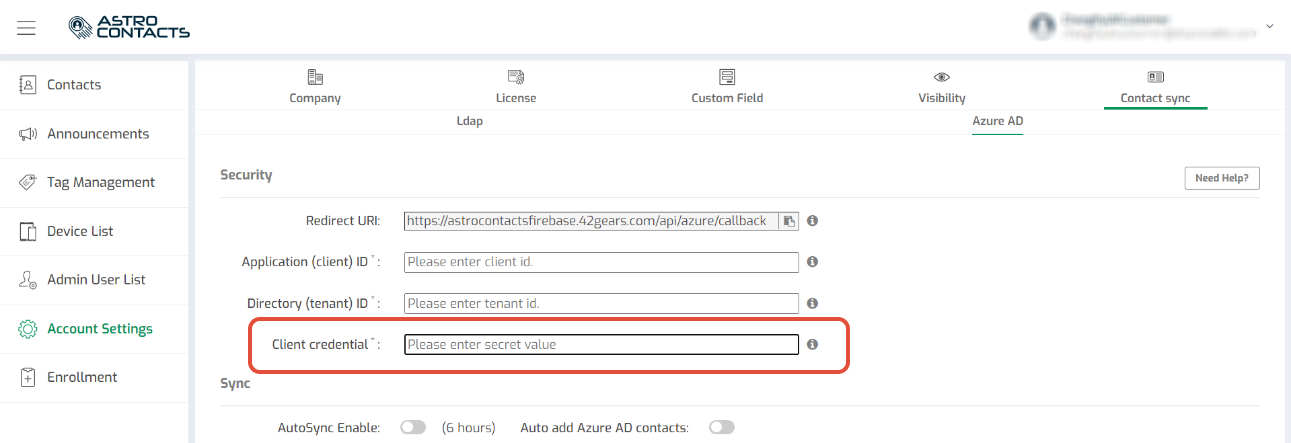
Copy the Client secret value from the value column as per the below mentioned screenshot and paste the same in AstroConatacts Portal in the Client credential

Note: Copy the secret value and store it in a safe place because Client secret values cannot be viewed, except for immediately after creation. Be sure to save the secret when created before leaving the page.
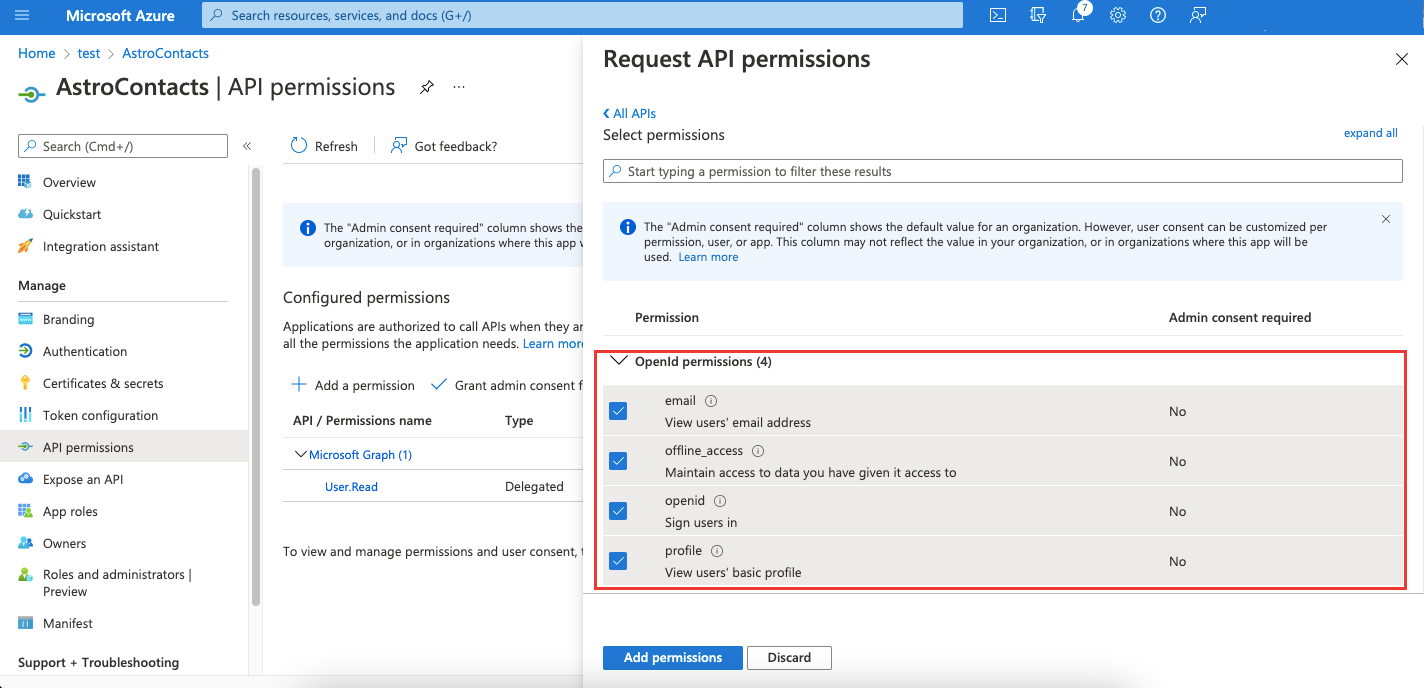
16. Now, click on API permissions under Manage
17. Click on Add a permission > Select Mircosoft Graph > Delegated permissions
18. Grant the below permission from each tab and click on Add permission.
openId permissions (4) : email, offline_access, openid, profile
User permissions (2) : User.Read, User.Read.Al

19. Now click on Grant admin consent > Yes

20. Click on the AstroContacts application window > Click on Overview

21. Copy the value from the Application (Client) ID and Directory (tenant) ID and paste the same in AstroContacts Portal
22. Now, Click on Save And Authorize, It will redirect to the Microsoft consent page and you have to grant consent with mark the checkbox and do sign in with admin credentials.
For more details on our products, click here
If you need further assistance, please submit a ticket here