
Device Tags enable the correct mapping of devices and enable Dynamic list creation. SureMDM allows users to create multiple Tags on a single device and manage the Tags at the same time. Tags make it easy for users to categorize and apply Jobs or Profiles to a list of devices having the same Tag name.
Purpose
The purpose of this knowledge article is to provide a guide on how to manage Device Tags in SureMDM Web console.
Prerequisites
NA
Steps
Step 1 : Create.
This option helps the Admin in creating a new Tag.
- Login to the SureMDM web console.
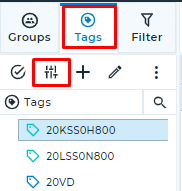
- In the console click on Tags on the Top-Left corner of the SureMDM web console. (next to Groups.)
- Click on the Add(+) symbol to add a New Tag.
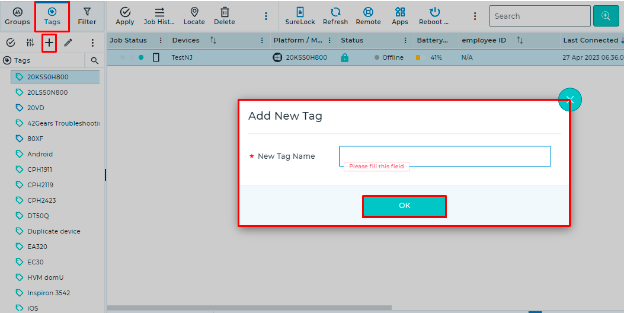
- In the pop up enter Tag name and click OK. This will create a Tag.
Note : To add device(s) under a specific tag, please follow the below-mentioned steps.
- Login to the SureMDM web console.
- In the SureMDM home Select the device(s) and Right-click and go to Tags. Click on Add Tags.
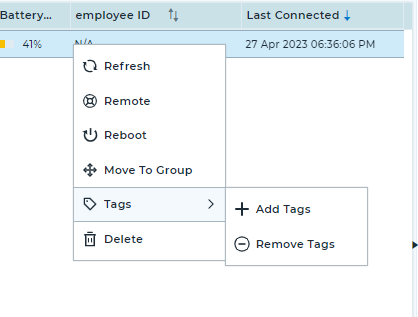
- From the pop up select the Tag you desire and click Save.
Step 2 : Rename.
This option helps the Admin in renaming the existing Tag.
- Login to the SureMDM web console.
- In the console click on Tags on the Top-Left corner of the SureMDM web console. (next to Groups.)
- From the list of Tags, select a tag you wish to rename and click on the Rename symbol.
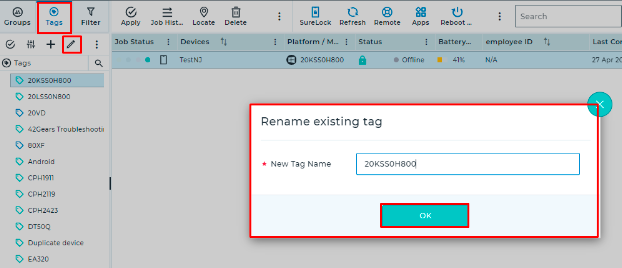
- In the Rename pop-up enter the New Tag Name and click OK. This will rename the Tag.
Step 3 : Delete.
This option helps the Admin in deleting an existing Tag.
- Login to the SureMDM web console.
- In the console click on Tags on the Top-Left corner of the SureMDM web console. (next to Groups.)
- From the list of Tags, select a tag you wish to delete and click on the Delete symbol.
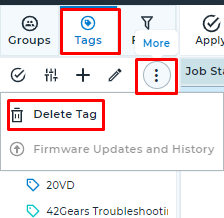
- Confirm the choice in the confirmation screen by clicking OK. This will delete the Tag.
Step 4 : Properties.
This option helps Admin push Job(s)/Profiles to be pushed on the devices with this Tag by default.
- Login to the SureMDM web console.
- In the console click on Tags on the Top-Left corner of the SureMDM web console. (next to Groups.)
- From the list of Tags, select a tag you wish to check the properties of and click on the Properties symbol.
- This will display a Tag Properties prompt, select the desired Job(s) and click OK to push the Job by default to all the devices under the Tag.
Once done, all the devices with the Tag name will get the specified Job applied by default. Admin will also get the details of the Job(s) and Profile pushed to the devices under this Tag.
Step 5 : Apply a Job to a Tag.
This option helps the Admin apply Job(s)/Profiles (Not set as Default) to the devices with this Tag.
- Login to the SureMDM web console.
- In the console click on Tags on the Top-Left corner of the SureMDM web console. (next to Groups.)
- From the list of Tags, select a tag you wish to Apply Job to and click on click on Apply Job to a Tag option.
- This will display a Apply Job/Profile To Tag prompt, select the desired Job(s) you wish to apply to the devices under the selected Tag.
- Select Configure Schedule Time to launch Schedule Job prompt.
- Select an option from the following for Push the Job to device and click OK.
- Immediately
- Periodically
- Schedule Days and Time
- Select Date and Time
- Click Apply. This will apply selected Job(s)/Profile to the devices under the selected Tag.
Need more help? Here’s how to get help from our experts.