
Test DPC is a sample device policy controller for use with Android Enterprise. It gives developers the ability to see how their App will behave in a managed context, such as a Device Owner or within a managed Profile.
Purpose
The purpose of this knowledge article is to provide a guide on how to configure the OEM Agent manually using TestDPC.
E.g : We will configure Lenovo OEM config manually using TestDPC.
Prerequisites
- Ensure that the device does not contain any user accounts (e.g. those used to log into online services). To verify, check Settings > Accounts.
- Factory Reset.
Steps
- Factory Reset the target device.
- Select the language.

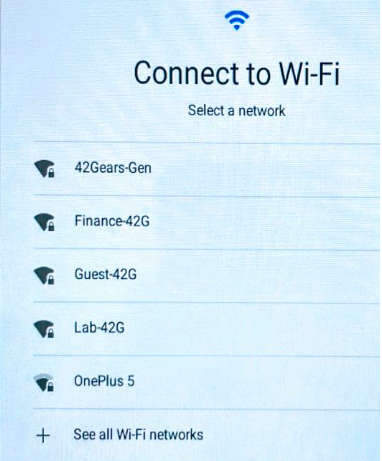
3. Connect the device to Wi-Fi (if a mobile network is not available).
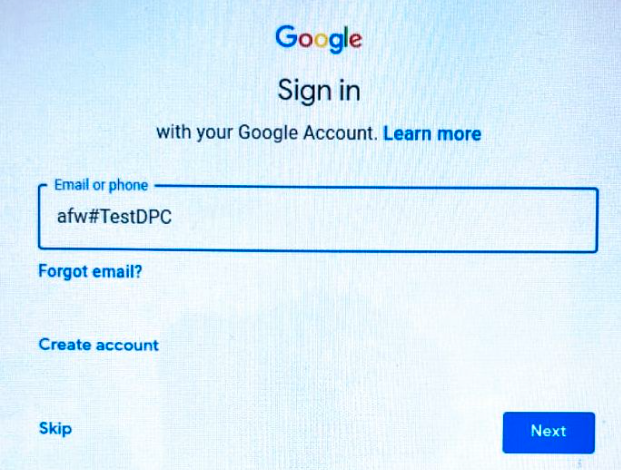
4. Device policy controller ID (afw#TestDPC)
– In the Google Sign in page, enter afw#TestDPC in the Email or Phone section.
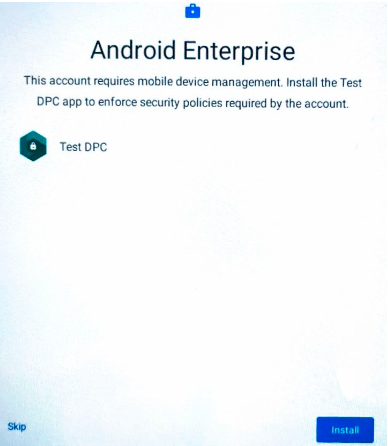
5. Install TestDPC.
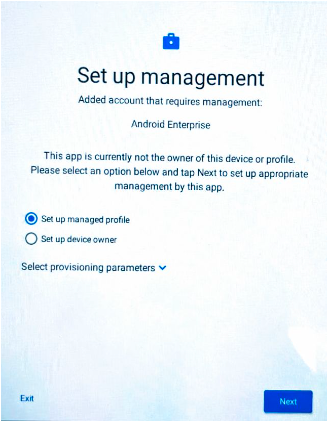
6. Set up management, In our example, we will set up the Device Owner.
7. Install the OEM Config Application on the device, In our example, we have installed the Lenovo OEM Config Application.
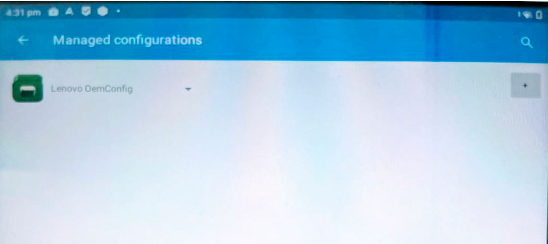
8. Open the TestDPC App and click on Managed Configuration under App Management and select the OEM Agent Application.
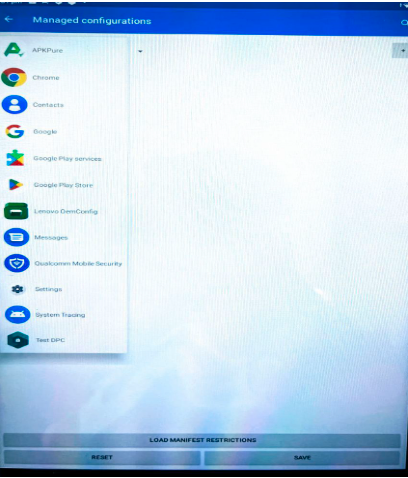
9. Click on “Load Manifest Restrictions” and configure the restrictions.
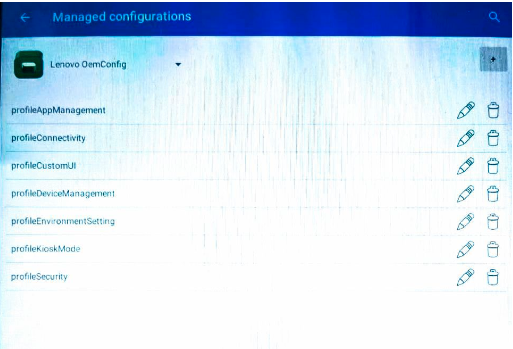
10. We can change the Profile for Device Management by selecting the Edit button and setting the limits accordingly.
11. Save the configurations.
Need more help? Here’s how to get help from our experts.