42Gears has partnered with Zebra Technologies to address the challenges associated with the mass deployment of Zebra Android rugged devices with SureMDM. With the help of Zebra Android Staging Solution– StageNow, IT administrators can rapidly enroll Zebra Android devices into SureMDM, by simply scanning a configuration barcode. This saves a lot of time and avoids manual effort.
Please follow the below-mentioned steps:
- Launch and log into StageNow on the laptop.
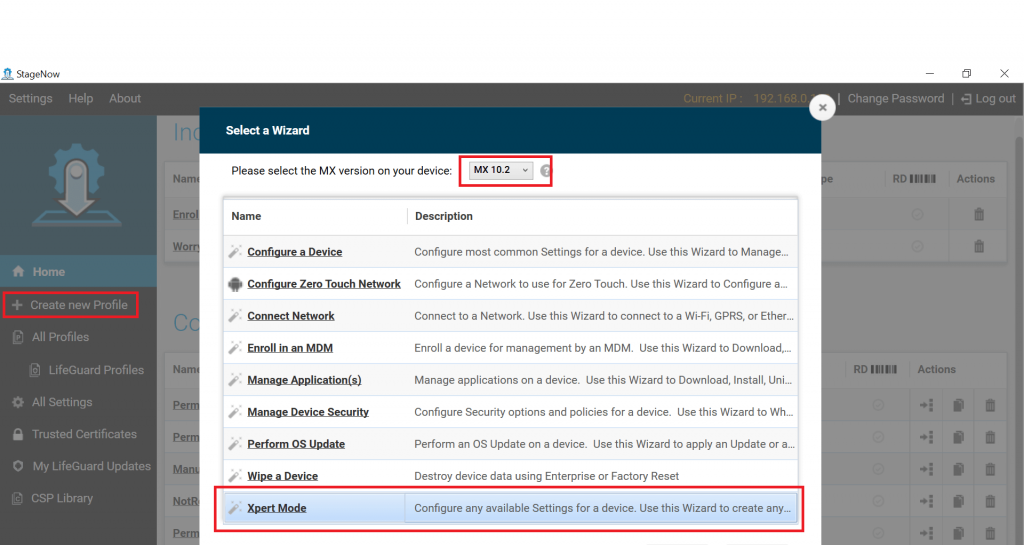
- On the Homepage of StageNow, click on Create New Profile
- In the Select a Wizard screen, select the MX version of the device on which you would like to Install and Launch the SureMDM Agent. Select Xpert Mode option and click on Create
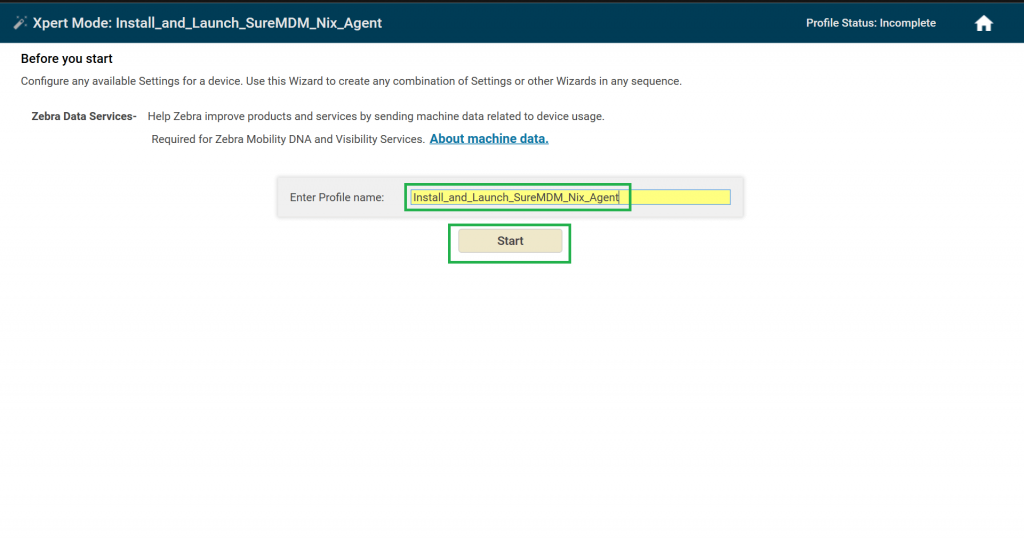
4.You will be navigated to the Xpert Mode option. Enter the Profile Name and click on Start.
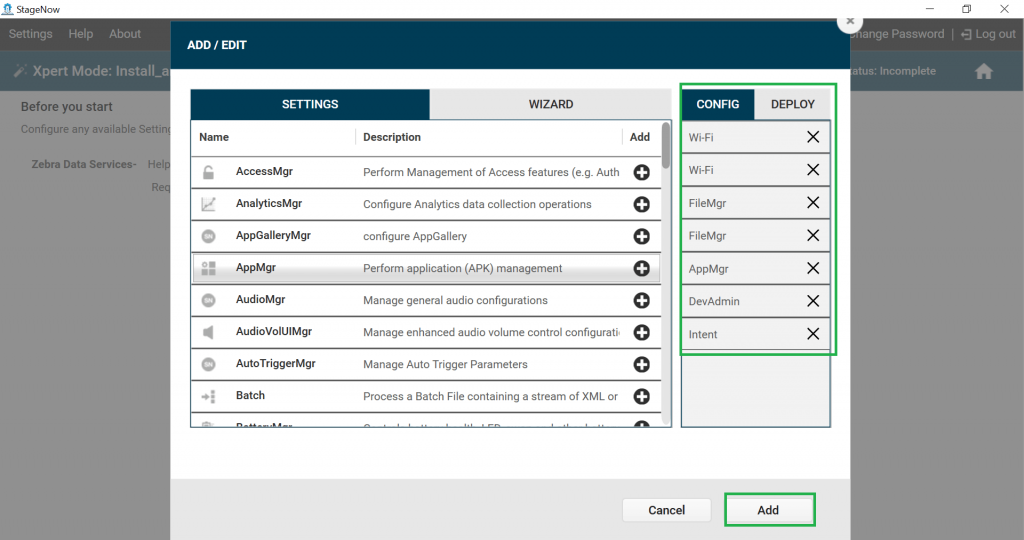
5. You will be navigated to Add/Edit Screen. Here add the below settings. Click Add once done.
- Select Wifi and click on the + button to add it twice.
- Select FileMgr and click on the + button to add it twice.
- Select AppMgr and click on the + button to add it once.
- Select DevAdmin and click on the + button to add it once.
- Select Intent and click on the + button to add it once.
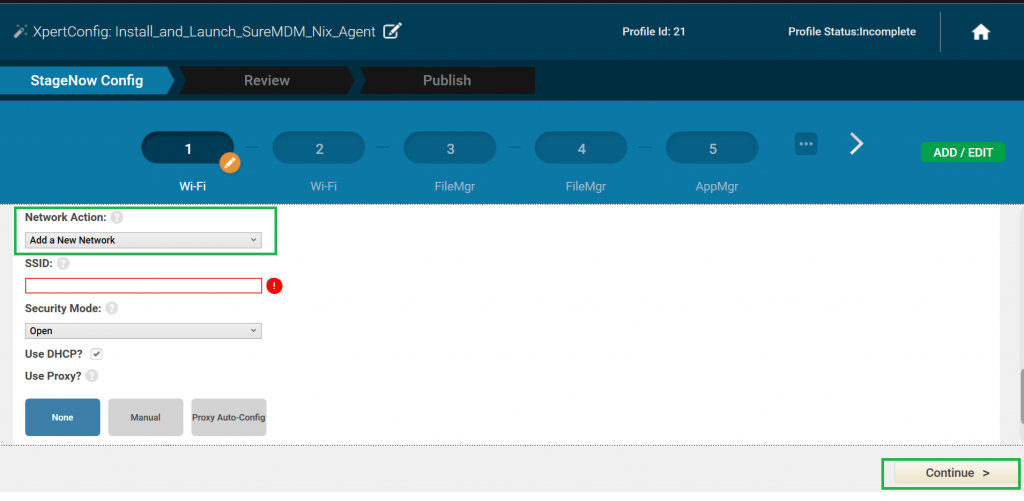
6. You will be navigated to the StageNow Config screen. Under the Wi-Fi tab, select Network action as Add a New Network, then add other details such as SSID, Security Mode, WPA-Personal Mode, Encryption Type, Key type, etc., Click Continue to proceed.
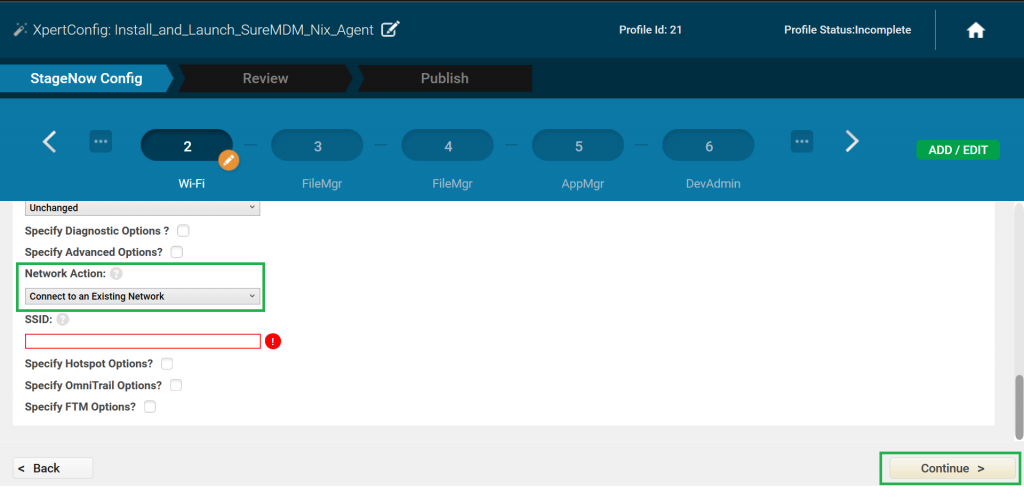
7. This will take you to the 2nd Wi-fi Tab. Here, select the Network action as Connect to an existing network, and set SSID mentioned in Step 6. Click Continue to proceed.
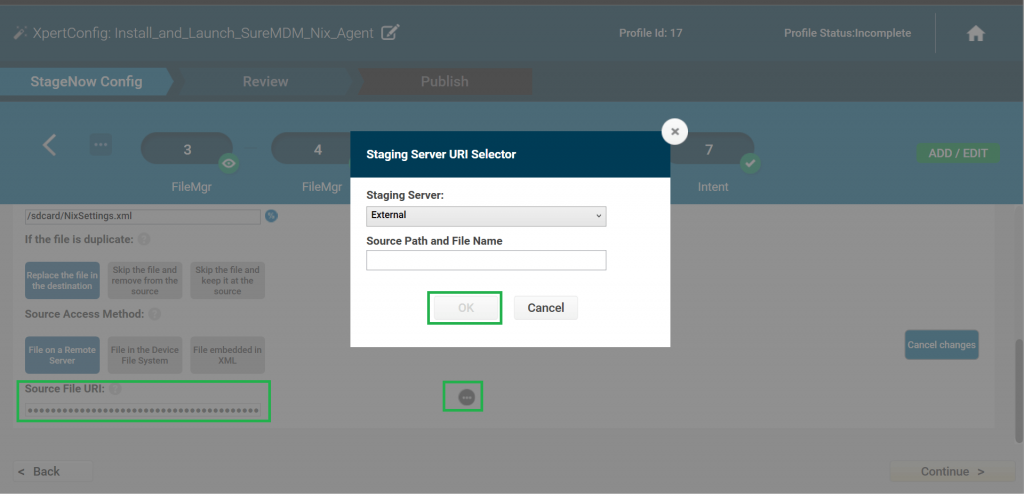
8. This will navigate you to the FileMgr tab. Select File Action as Transfer/copy file. Further, provide the Target path and Filename as /sdcard/NixSettings.xml. Once done, navigate to the Source File URI section and click Browse to set the Source File URI. Click Continue to proceed.
Note: Upload the SureMDM Agent settings to any server and mention the direct download link in the Browse section of this option.
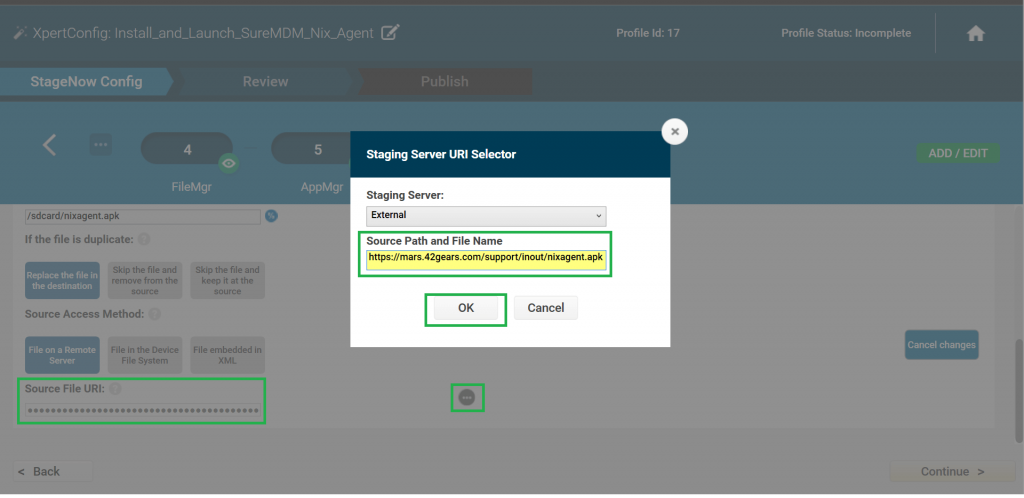
9. Further, you will be navigated to the 2nd FileMgr tab. Select File action as Transfer/copy file and provide Target path and Filename as /sdcard/Nixagent.apk. Once done, navigate to the Source File URI section and click Browse and enter the SureMDM Agent downloadable link in the Staging server URI selector screen. Click Continue to proceed.
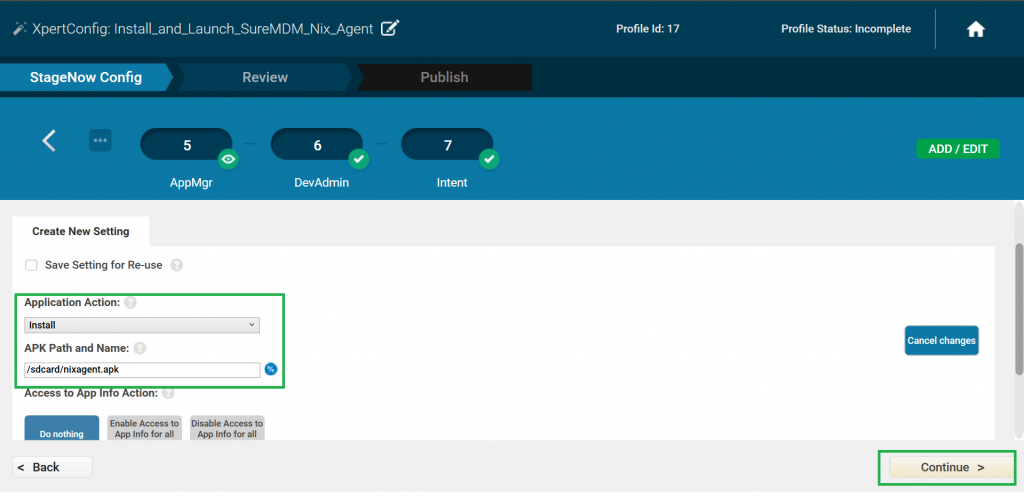
10. Goto AppMgr tab and select Application Action as Install and enter /sdcard/Nixagent.apk as the path in Apk Path and Name. Click Continue to proceed.
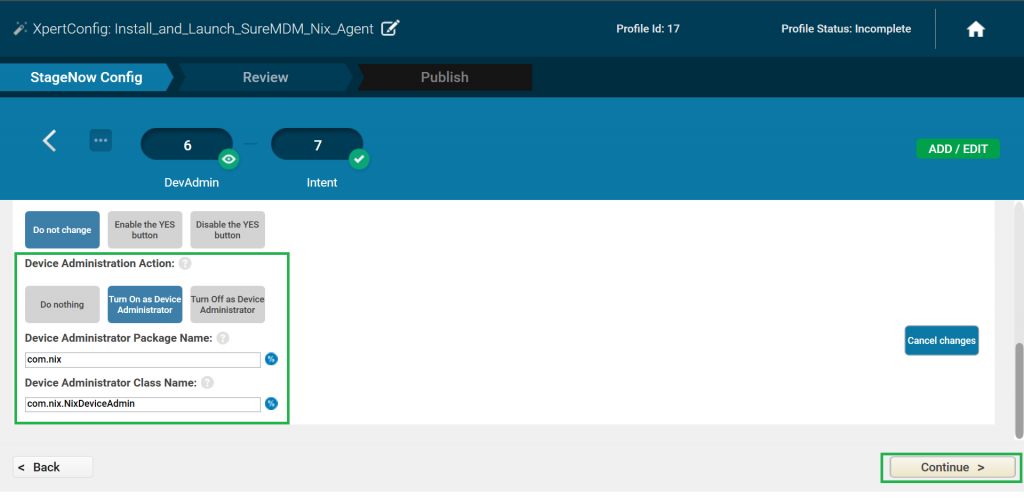
11. You will be navigated to the DevAdmin tab. Set Device Administration Action as Turn on as Device Administrator, Enter Device Administrator Package Name as com.nix, and enter Device Administrator Class Name as com.nix.NixDeviceAdmin. Click Continue to proceed.
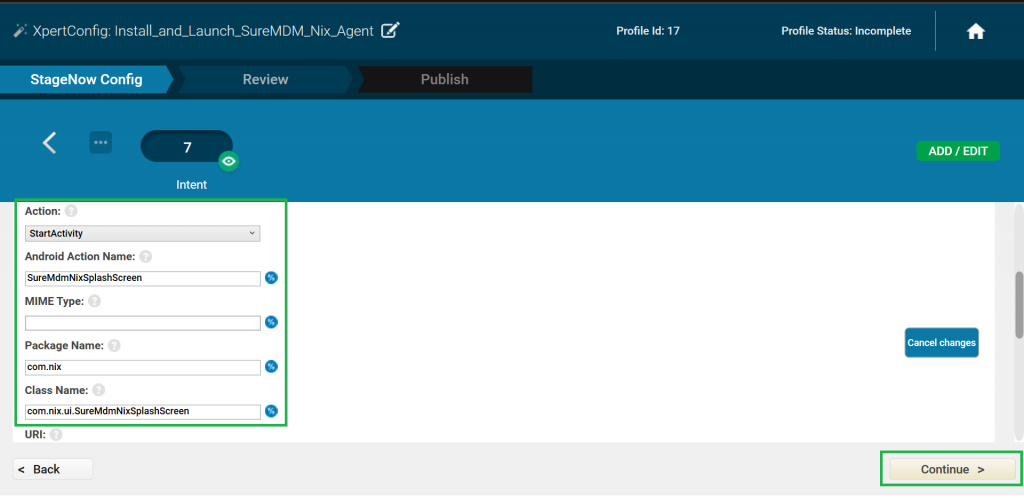
12. In the Intent tab, select the below options. Click Continue to proceed once done.
- Tap on Action and select Start Activity from the drop-down menu,
- Tap on the Android Action name and enter SureMdmNixSplashScreen.
- Select Package Name and enter com.nix
- Select Class Name and enter com.nix.ui.SureMdmNixSplashScreen
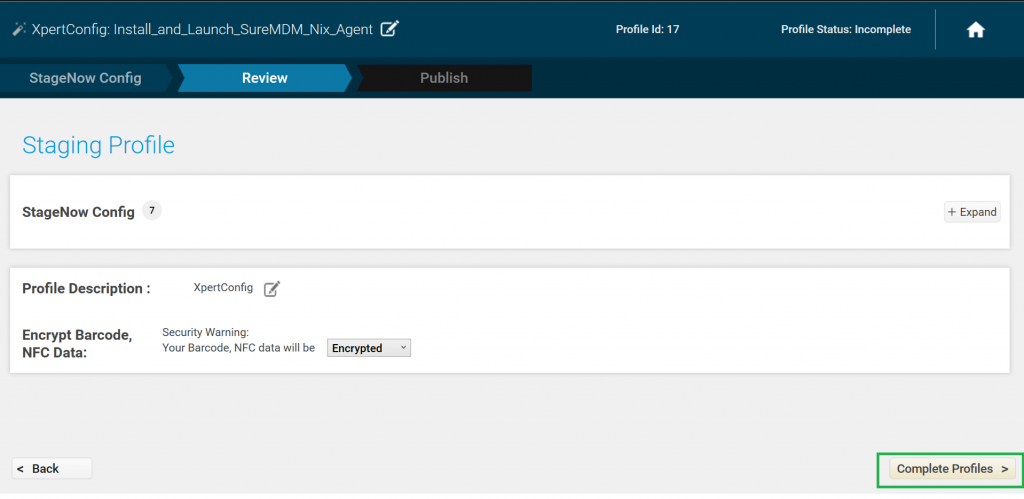
13. You will be navigated to Staging Profile under the Review tab. Click on Complete Profiles.
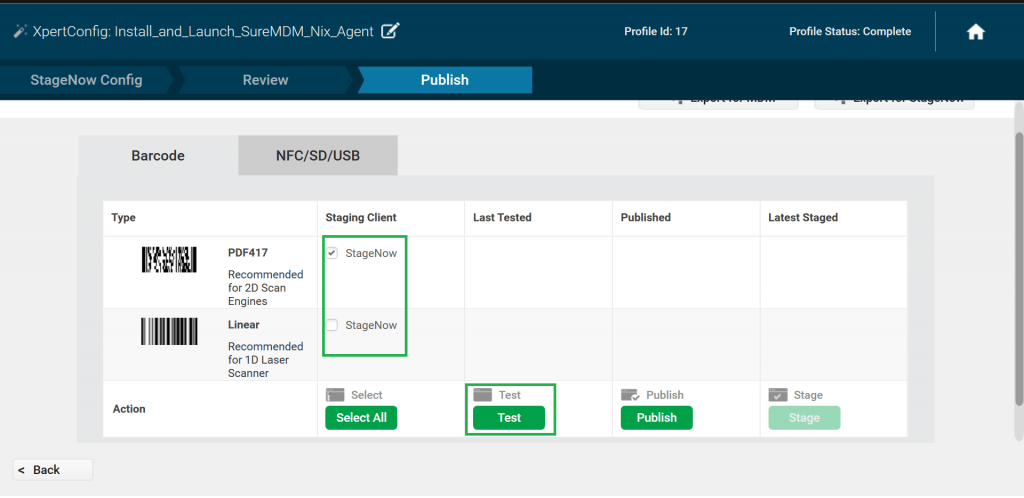
14. Under the Publish Tab, select the Staging client based on the scanner type available on the device and click on Test.
15. Once done, a pdf file with QR codes will be generated. Scan all the generated QR codes in the same order mentioned in the document.
The device will install and start configuring SureMDM Agent and eventually get enrolled in the SureMDM web console.
Click here to know about SureMDM.
Click here to register for a free SureMDM trial.
