
Purpose
Screen savers are widely used in enterprise environments to enhance device security, enforce idle-time policies, or display branding and informational content. Configuring these settings manually on individual Windows devices can be time-consuming and inconsistent.The SureMDM allows the admin to set the desired Screensaver on the windows devices.The solution supports multiple screen saver formats, including .png, .scr, and .exe, allowing flexibility based on organizational requirements.
This document explains how administrators can set a default screen saver on Windows devices using SureMDM by leveraging File Transfer, Windows Install, and RunScript jobs.
Prerequists
The admin should have the .scr, .exe or .png file for the default screen saver that wants to be set on the Windows devices.
- To create Windows File transfer job: Refer to the document Windows File Transfer Job
- To Create the Windows Install job: Refer to the document Windows Install Job
To create a Windows Runscript job: Refer to the document Windows RunScript Job
Steps
Method 1: Using a .PNG File
Step 1: Transfer the Image File
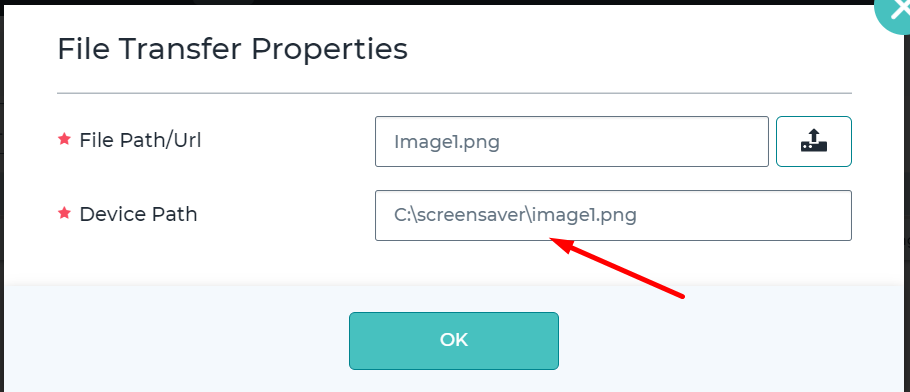
- Create a File Transfer job from the SureMDM console.
- Transfer the image file to a dedicated folder on the device.
- In this example, the image is placed under the following path:
Step 2: Configure the Screen Saver Using RunScript
Deploy a RunScript job in User Context with the following commands:
reg add “HKCU\Control Panel\Desktop” /v “SCRNSAVE.EXE” /t REG_SZ /d “PhotoScreensaver.scr” /f
reg add “HKCU\Control Panel\Desktop” /v “ScreenSaveActive” /t REG_SZ /d “1” /f
reg add “HKCU\Control Panel\Desktop” /v “ScreenSaveTimeOut” /t REG_SZ /d “60” /f
reg add “HKCU\Software\Microsoft\Windows Photo Viewer\Slideshow\Screensaver” /v “EncryptedPIDL” /t REG_SZ /d “<EncryptedPIDL value for the folder>” /f
shutdown -r -t 0
Example with EncryptedPIDL Value for C/screensaver folder
reg add “HKCU\Control Panel\Desktop” /v “SCRNSAVE.EXE” /t REG_SZ /d “PhotoScreensaver.scr” /f
reg add “HKCU\Control Panel\Desktop” /v “ScreenSaveActive” /t REG_SZ /d “1” /f
reg add “HKCU\Control Panel\Desktop” /v “ScreenSaveTimeOut” /t REG_SZ /d “60” /f
reg add “HKCU\Software\Microsoft\Windows Photo Viewer\Slideshow\Screensaver” /v “EncryptedPIDL” /t REG_SZ /d “FAAfUOBP0CDqOmkQotgIACswMJ0ZAC9DOlwAAAAAAAAAAAAAAAAAAAAAAAAAYAAxAAAAAACJURs0EABTQ1JFRU5+MQAASAAJAAQA776JUWszilGPJi4AAACZ4AAAAAAEAAAAAAAAAAAAAAAAAAAAZfpTAHMAYwByAGUAZQBuAHMAYQB2AGUAcgAAABgAAAA=” /f
shutdown -r -t 0
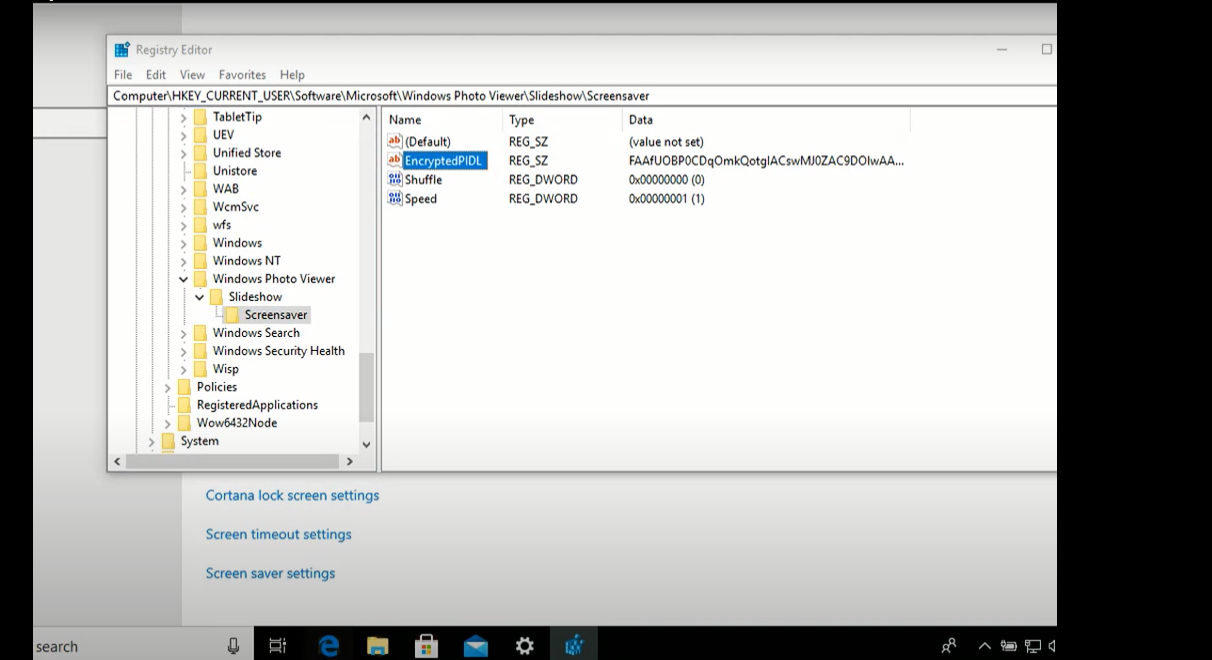
Note: The EncryptedPIDL value for a specific folder can be retrieved from the Windows Registry Editor.
EncryptedPIDL for a certain folder can be found through Registry Editor as shown below,
Method 2: Using a .SCR File
When using a standard .scr file, the EncryptedPIDL value is not required.
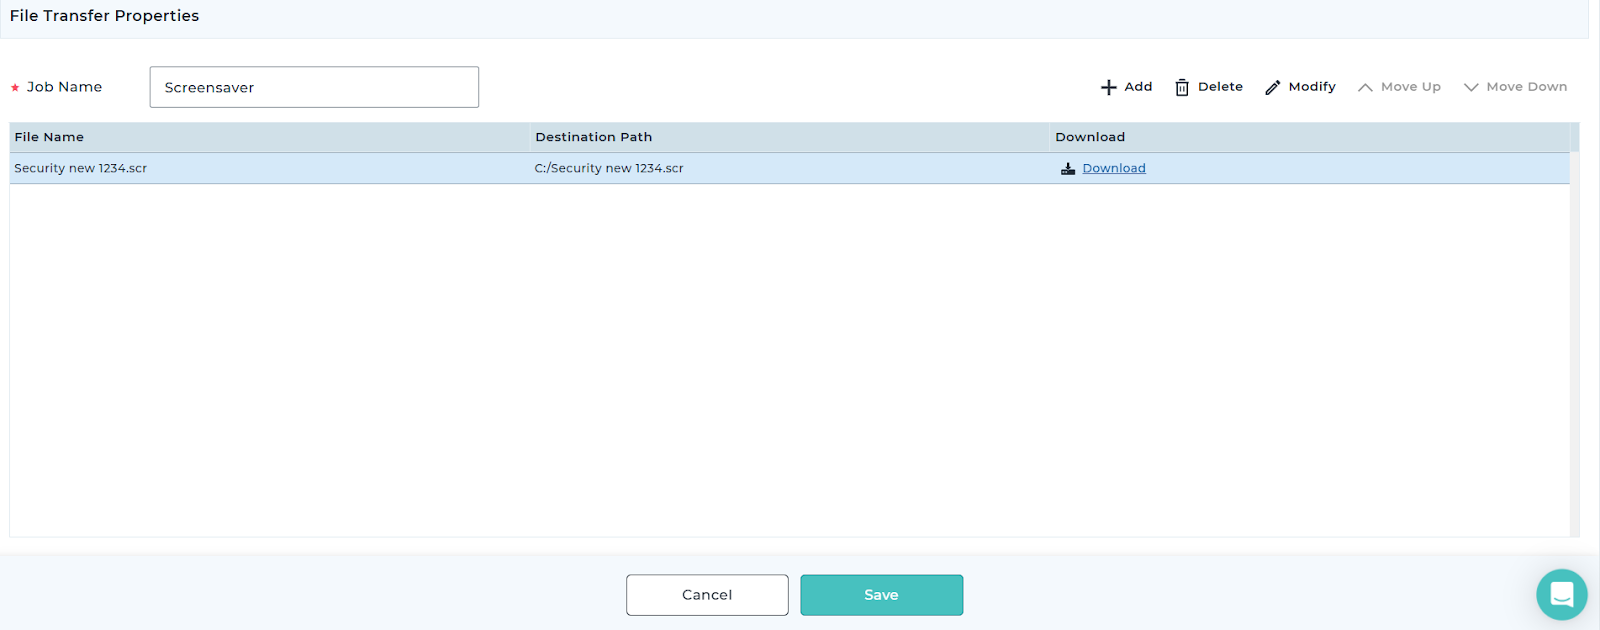
Step 1: Transfer the SCR File
- Use a File Transfer job to copy the .scr file to a desired location.
Step 2: Set the Screen Saver Using RunScript
Deploy a RunScript job in User Context with the following PowerShell commands:
Set-ItemProperty -Path ‘HKCU:\Control Panel\Desktop\’ -Name ScreenSaveActive -Value “1”
Set-ItemProperty -Path ‘HKCU:\Control Panel\Desktop\’ -Name ScreenSaveTimeOut -Value “60” # 60 seconds
Set-ItemProperty -Path ‘HKCU:\Control Panel\Desktop\’ -Name SCRNSAVE.EXE -Value “C:\Windows\System32\logon.scr”
Method 3: Using an .EXE File
Step 1: Install the EXE File
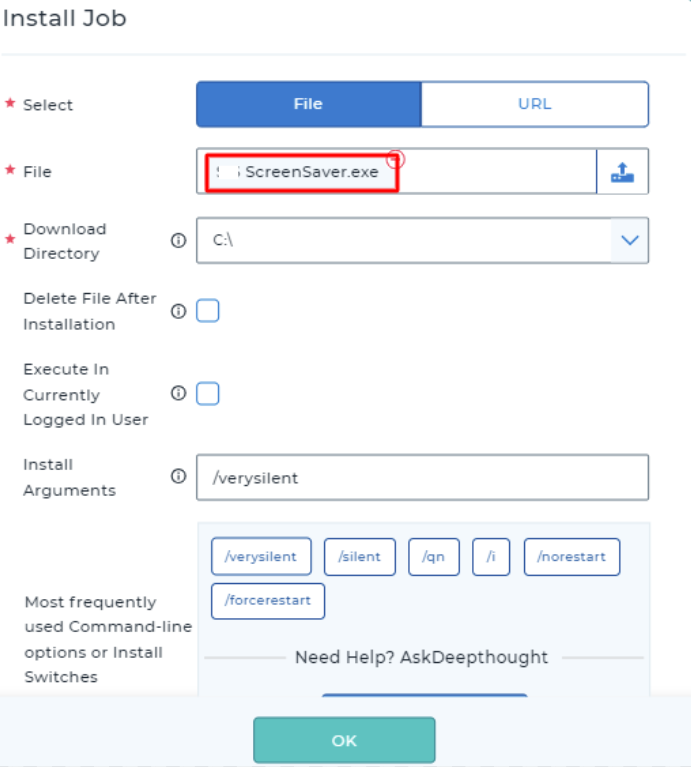
- Create a Windows Install job in the SureMDM console.
- Deploy the .exe screen saver installer to the target Windows devices.
Step 2: Configure the Screen Saver Using RunScript
After installation, deploy a RunScript job in User Context with the following commands:
reg add “HKCU\Control Panel\Desktop” /v “ScreenSaveTimeOut” /t REG_SZ /d “60” /f
reg add “HKCU\Control Panel\Desktop” /v “SCRNSAVE.EXE” /t REG_SZ /d “C:\WINDOWS\SysWOW64\50THFO~1.SCR” /f
reg add “HKCU\Control Panel\Desktop” /v “ScreenSaveActive” /t REG_SZ /d “1” /f
Conclusion
By using SureMDM’s File Transfer, Windows Install, and RunScript jobs, administrators can centrally configure and enforce default screen saver settings across Windows devices. This approach ensures consistency, improves security, and reduces the need for manual configuration on individual devices.
Need more help? Here’s how to get help from our experts.