
Purpose
This article is intended to help customers unassign devices from an active ring under Automated Patching for Windows devices.
IT administrators may unassign a device from an OS update ring to isolate and troubleshoot issues caused by recent updates or to prevent further patch deployments on devices. This action is also useful when managing devices under a different update strategy(assign a new Ring) or during testing and validation. Additionally, devices can be removed from a ring when they are being repurposed or prepared for decommissioning.
Prerequisite
Windows, the ring should be active on the device.
Steps
- Log in to the SureMDM console.
- Navigate to the OS Update section.
- Select Windows as the operating system.
- Click on Automated Patching.
- Under Configuration, choose the ring currently assigned to the device.
- Click on Assign Devices to view the list of devices associated with the ring.
Note: Only devices with an active ring status will appear as selected (checked).
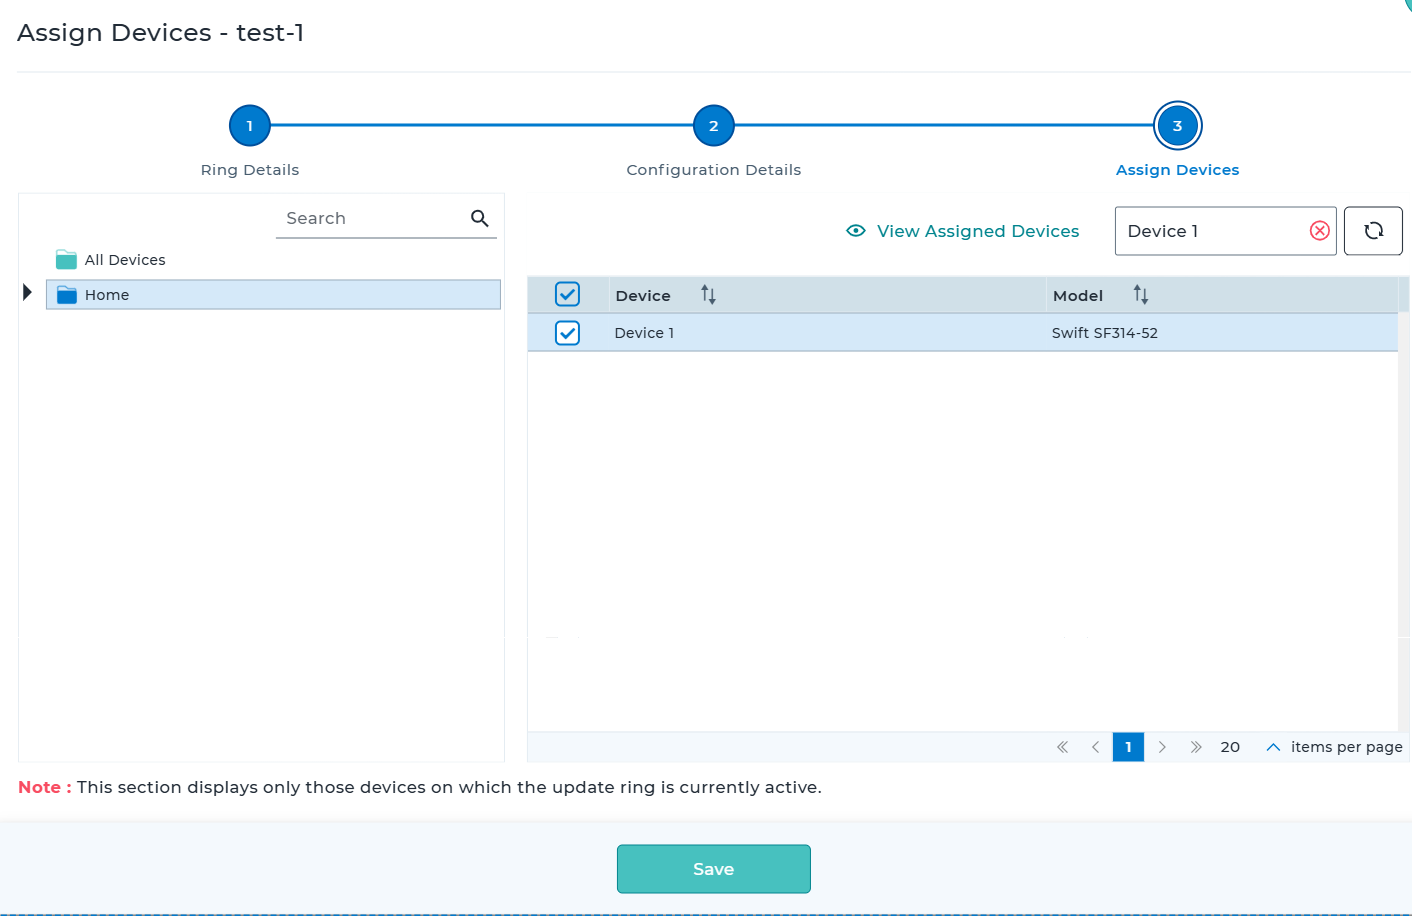
- Uncheck the devices you want to unassign from the ring.
- Click Save to apply the changes.
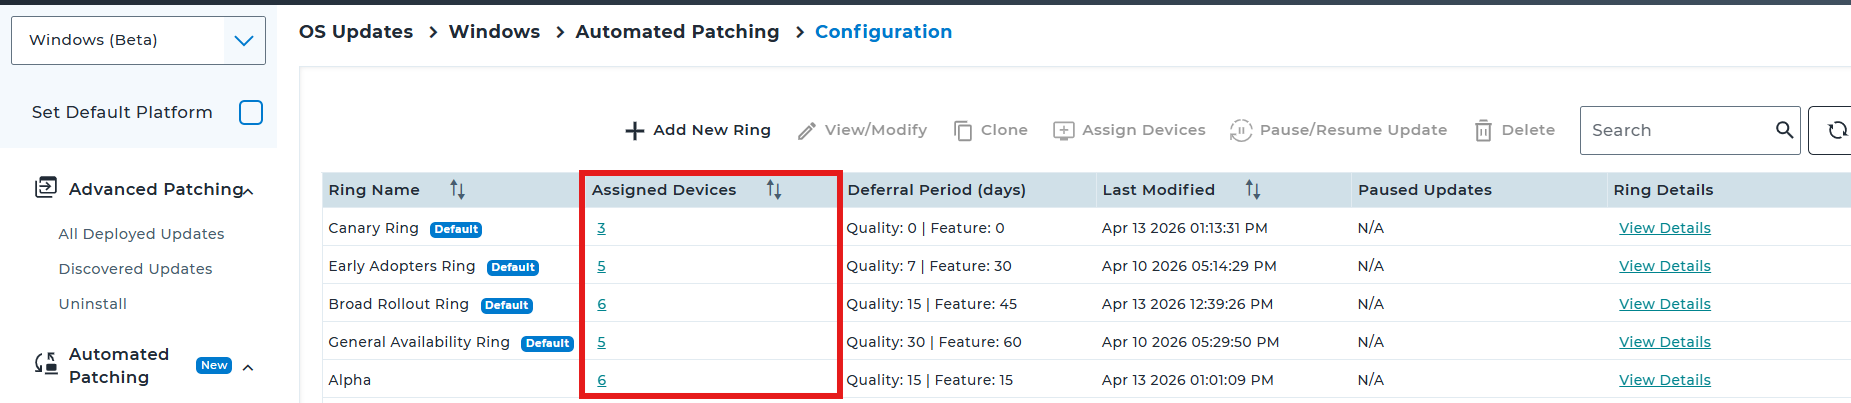
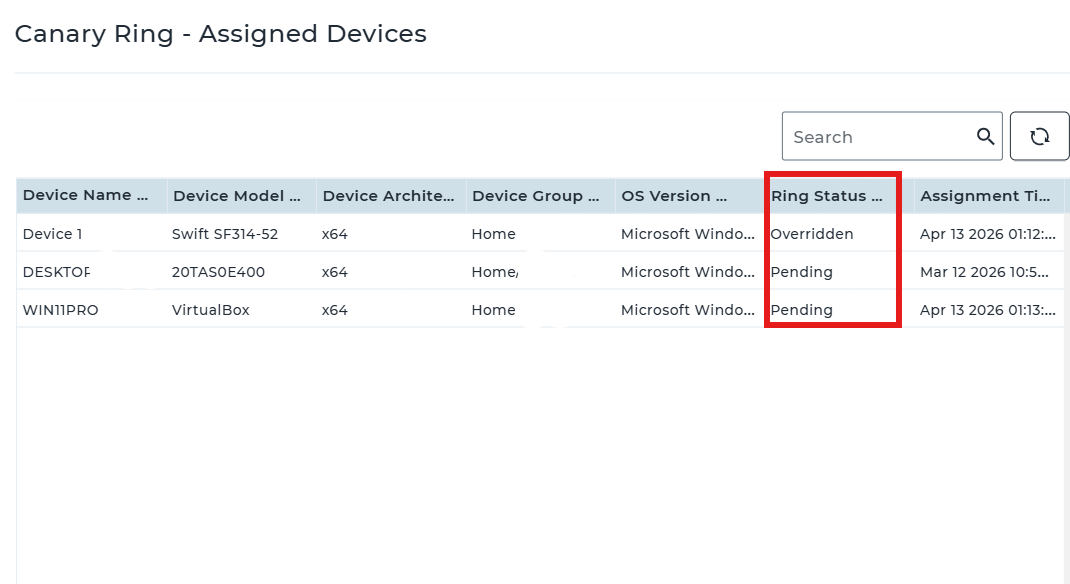
Note: When you select the number displayed in the Assigned Devices column for a ring, it opens a list of all associated devices, including those in pending, active, failed, overridden, and other states. The current status of each device can be reviewed in this section.
Conclusion
The devices associated with the ring will be unassigned once they are unchecked from the list.
Need more help? Here’s how to get help from our experts.