
SureFox is a lock-down web browser for Android that allows the end-user to access only the allowed websites.
SureFox has a feature that allows the admin to organize the list of allowed websites into categories. This is an important feature to help the user coordinate and communicate among the various teams he interacts with.
For example, a restaurant using a tablet to assist customers can use SureFox to allow the menu of different cuisines to be in one category and the customer feedback form and bill to be paid in another category. This will help the customer be certain about which file or category he has to look into to do what.
Purpose
The purpose of this knowledge article is to provide a guide on how to organize allowed websites into Categories in the SureFox Kiosk Browser for Android.
Prerequisites
NA
Steps
Step 1: To create categories on SureFox Home Screen
1. Go to SureFox Settings.
2. Tap on Manage Categories.

3. Tap on Add to create a new category. You can also tap on any existing category to rename or delete it.
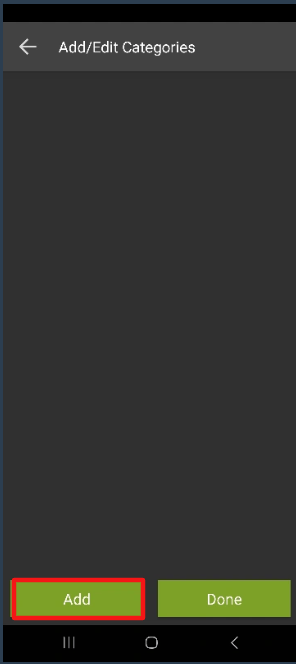
4. This will create a category on the SureFox home screen. Once this is done, you will need to add allowed websites to categories.
Step 2: To add Allowed Websites to Categories
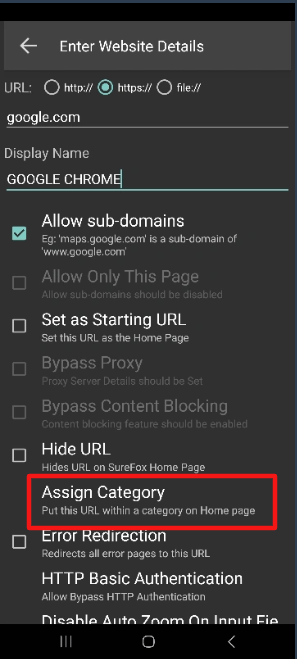
1. Tap on Allowed Websites in SureFox settings.
2. Enter the details of the website and tap on Assign Category to open the list of categories.
3. Select the category of your choice from the Select the Category prompt.
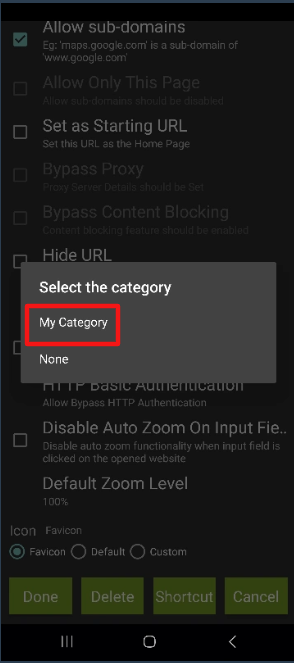
4. Click on Done.
The selected website will be visible within the category you selected on SureFox Homescreen.
Note: When a category is deleted, all the websites within that category will be brought back to the SureFox homepage.
Need help?