This Propertify plugin helps update multiple custom properties in the SureMDM device grid by allowing you to upload a CSV file containing the device name, IMEI, serial number, custom property name, and the desired value for the custom property.
Purpose
The purpose of this knowledge article is to provide a guide on how to utilize the Propertify plug-in available on SureMDM.
Prerequisites
- Please click here to check out how to create a custom property and assign it to the devices.
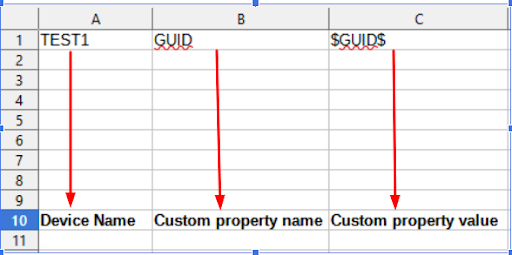
- Create a CSV file with three values separated by commas (,). The first should be either the device name, IMEI, or serial number; the second should be the custom property name; and the third should be the value to be updated or added to the specified custom property.
- Upload the CSV file and click on “Update Property.”
- Do not close the tab when the screen is loading.
- Special characters supported are: ( ) [ ] “@ – _{ } &
Steps
Step 1: Enable the Propertify Plugin in SureMDM.
- On the SureMDM Console, navigate to Settings (Gears Icon) > Account Settings > Plugins > Manage Plugin > Select Plugin Store.
- Select the Propertify plugin and click on Install.
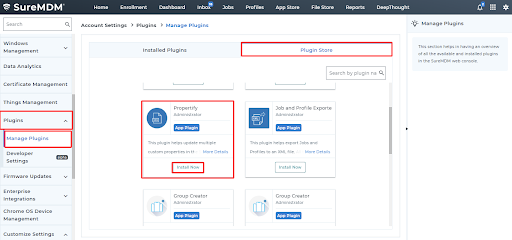
3. Once the plugin is installed, click on the Installed Plugins tab.
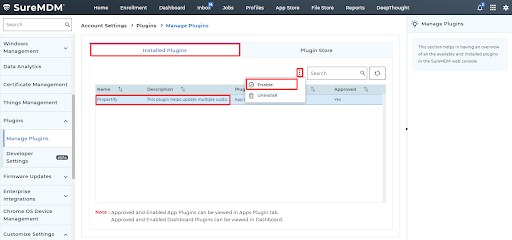
4. Select the propertify plugin, click on three dots, and click Enable.
Step 2: Create a CSV file and import the value of the custom properties
- Create a CSV file with the first value being the existing device name, IMEI, or serial number; the second should be the custom property name; and the third should be the value to be updated or added to the specified custom property.
- Please refer to the same CSV file format below:
Step 3: Execute the Propertify plugin to get the expected results.
1. Login to the SureMDM console, click on the Apps Plugin, and choose the Propertify Plugin.
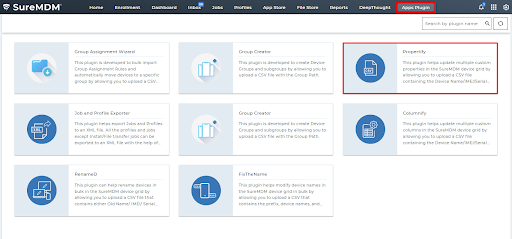
2. Select the reference column to Device/IMEI/SerialNumber. This is to specify the details of the device with the existing name.
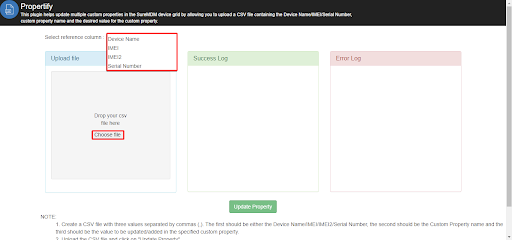
3. In the upload file section, click on Choose File to upload the CSV file that was created earlier.
4.Once the file is uploaded, we can see the number of valid rows and the valid entries in the Success Log.
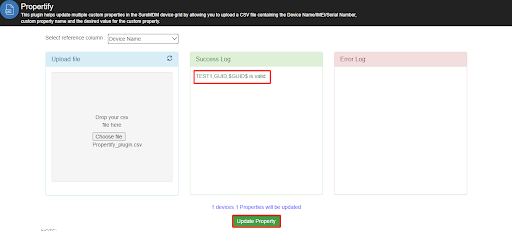
5. Click on the Update Property button to update the value of the custom property created.
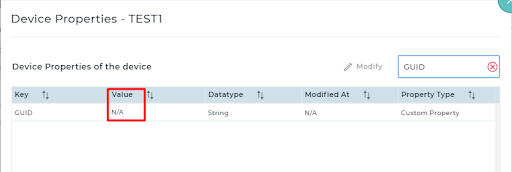
- Value of the Custom Property before using the Propertify Plugin
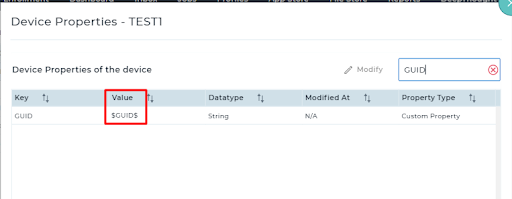
- Value of the Custom property after using the Propertify Plugin
Need help? CONTACT US
