
Admins can now make use of the custom properties feature in SureMDM console and align the values remotely which gets applied to the devices when there is a need to create custom properties or modify the device property on a fleet of devices in a group.
Also, you can easily change the attributes for the wildcards which are sent through jobs. Eg; for any custom property key created and if the same key is a part of some SureLock settings, then the value gets changed automatically and that is made possible via the Causal Job.
To know more about the Causal job and its configuration, click here.
There are a few data identifiers(data types) for which we can assign the values accordingly. Here are the data types for reference:
- String – If the data type selected is a string, the admin can use the list of characters.
- Numbers – If the data type selected is numbers, then only numbers are been considered.
- Date – If the data type selected is a date, display a date picker for the “Value” field.
- Boolean – If the data type selected is a boolean, it will support the following values – True, False (in the same order)
- Enum – If the data type selected is an Enum, the admin can enter a comma-separated list of values. The listed values should be shown as dropdown values in the “Value” field.
Defining custom property and device property keys in SureMDM console:
- Login to the SureMDM console.
- Go to Settings by clicking on settings icon at the top left corner -> Account Settings
- Click on custom properties -> Properties
- Click on Add option to add new custom property and device property
- On Add Custom Properties, you need to enter the Key name and Datatype of the property Key and click on OK.
Note: In the Key text field, admins can search for the following predefined custom properties and select them.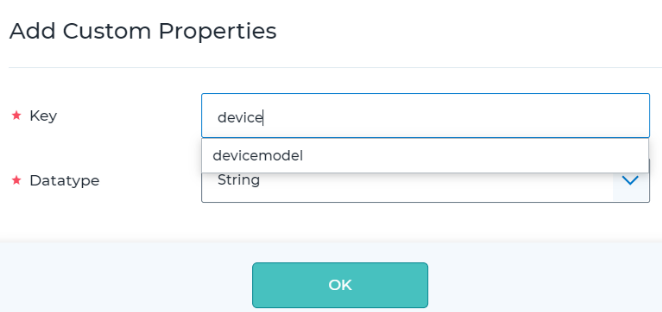
- New Custom Properties will be now added and shown on the console.
- If you wish to import Custom Properties using CSV, then you can download the template and make the required changes and import the same. A sample CSV link is here.
Note: Once a custom property is saved, it cannot be edited and removed.
Device property:
If you want to share some device unique properties like IMEI, MAC address and etc. with any third-party application from SureMDM console, you should use the pre-defined device property Key name as shown below under the Wildcards column:
| Device Property | Wildcards |
| IP Address | $ipaddress$ |
| Device Model | $devicemodel$ |
| Network Operator | $networkoperator$ |
| OS version | $osversion$ |
| IMEI | $imei_1$ |
| IMEI2 | $imei_2$ |
| MEID | $meid$ |
| IMSI | $imsi_id$ |
| Serial Number | $serial_number$ |
| Mac address | $macaddress$ |
| Sim serial number | $simserialnumber$ |
| Local IP address | $local_ipaddress$ |
Custom property:
If you want to share some custom properties with any third-party application from SureMDM console, based on these custom properties value which is defined by the IT admin from SureMDM console. You can control your third-party application.
How to approve an application to access custom properties
Any third-party application approved under custom properties will Allow SureMDM Agent to share the Custom Property Data. Follow the below steps to approve your application to collect the Custom Property Data from SureMDM Agent.
- Login to the SureMDM console.
- Go to Settings by clicking on settings icon at the top left corner -> Account Settings
- Click on custom properties -> Approved Apps
- Click on Add option to Add your application
- On Add Application, you need to enter the Application name and Package name of the application.
- You can reach out to our 42Gears Technical Support team to get the Signature Key Hash for your application.
- Once you receive Signature Key Hash from 42Gears Team, You can add and enter the same value.
- You need to check the box – Allow SureMDM Agent To Share Custom Property Data Including The PII With This Approved Application. For More Information, Please Check Our Privacy Policy.
- Click on Save.
Assign values to the custom property keys created:
After importing the custom properties under Account Settings, we need to assign the respective values to the custom properties to a group, sub-groups, and underlying devices under Device Groups if that is not a predefined device property.
Here are the steps on how to import and assign the values to the custom property keys added:
- Login to the SureMDM console.
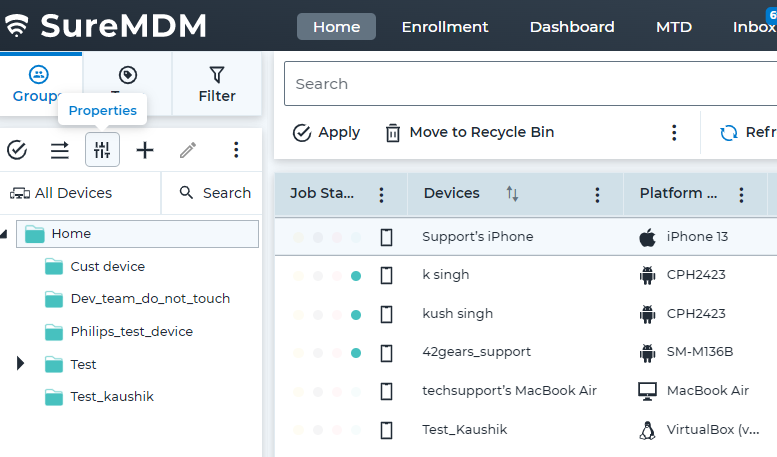
- Select any group, be it a Home group or any subgroup, > Click on Properties of the group > Tap on Custom Properties as shown in the below snippet.
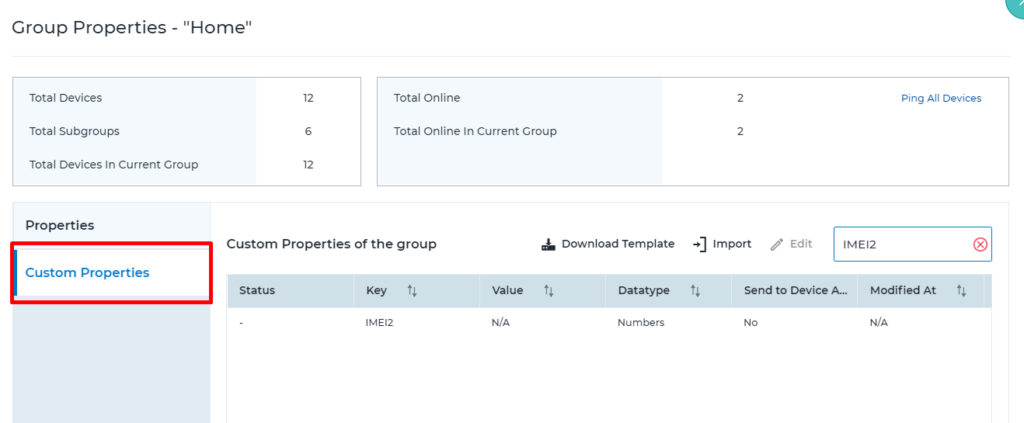
- There will be a list of keys that you have uploaded via Account Settings, (these keys can have pre-defined device properties or they could be a custom key for which we can assign the values)
- Admin can edit the Custom Property key and assign the value manually. Choose the KEY for which values need to be assigned >> click on Edit >> enter the value accordingly under the Value text box.
NOTE: Once the predefined custom property is created, the values cannot be edited.
- Admin can upload a csv as well with the value, for which download the template and fill in the values accordingly. Here is a sample CSV file.
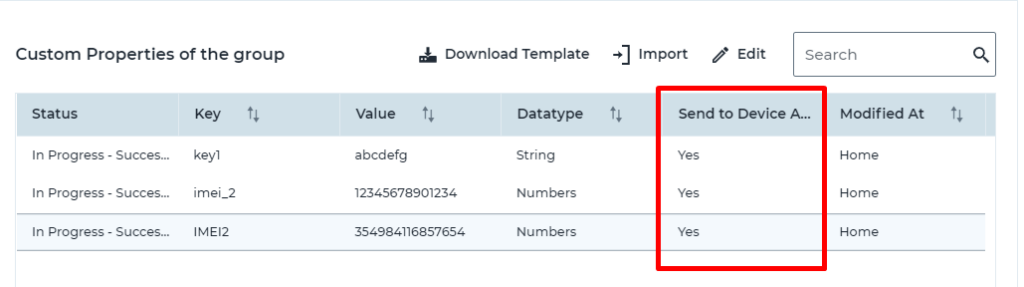
- Once after importing the above .csv file you could see the corresponding values assigned on the data grid.
- If the keys added are part of device properties, then a wild card indicator will be aligned so we can fetch the value of the key just by having the wild card sent to the device Nix agent.
Sending custom properties to the SureMDM Agent:
So far, we saw how to create and assign the custom properties/values correspondingly. Now let’s see how these values can be made read by SureMDM Agent. SureMDM Agent should hold this custom value locally for future reference. It can also broadcast these values to third-party apps based on the use case.
Select the group on which the custom properties have been aligned to and follow the below steps:
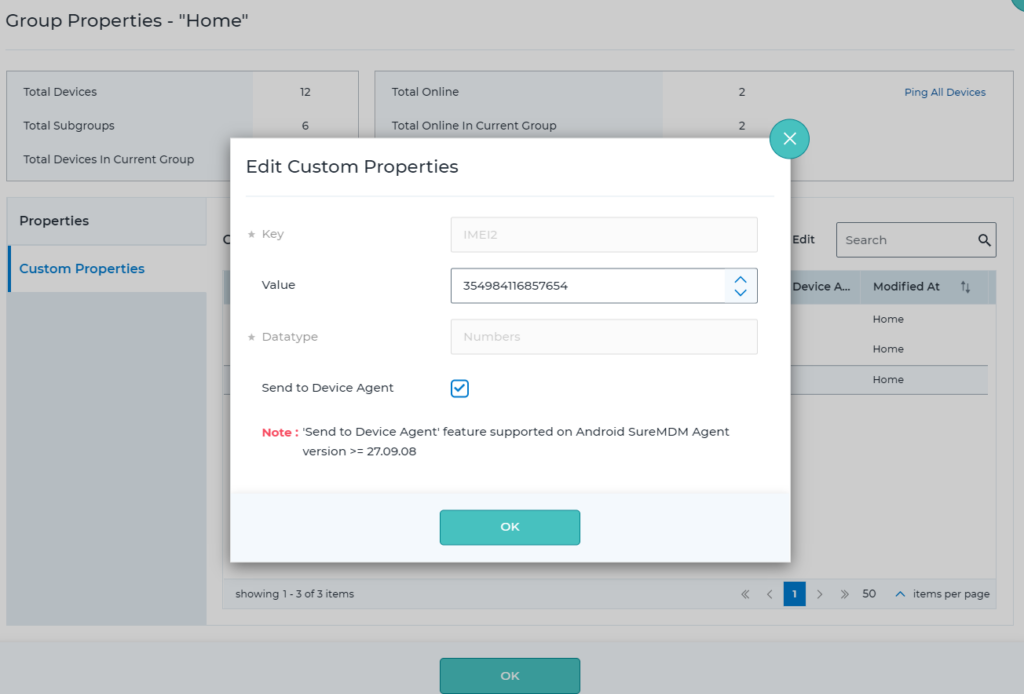
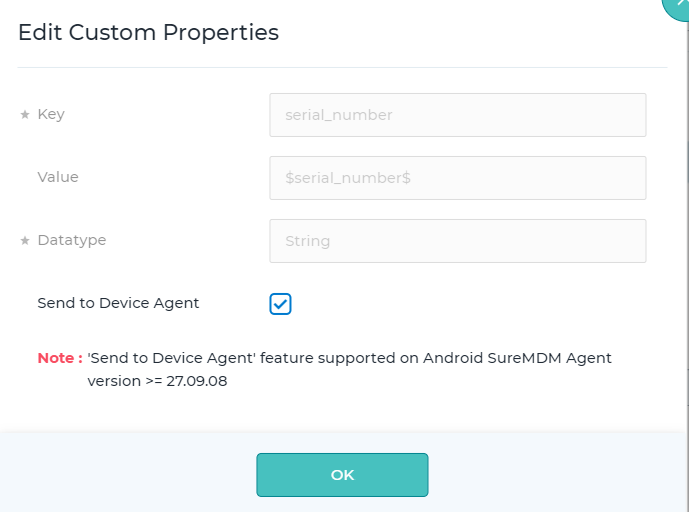
- Right-click on the Group/Sub-Group > Properties > Custom Properties.
- Select the Custom Property created > Edit > Enable “Send to Device Agent“. (by default it is unchecked)
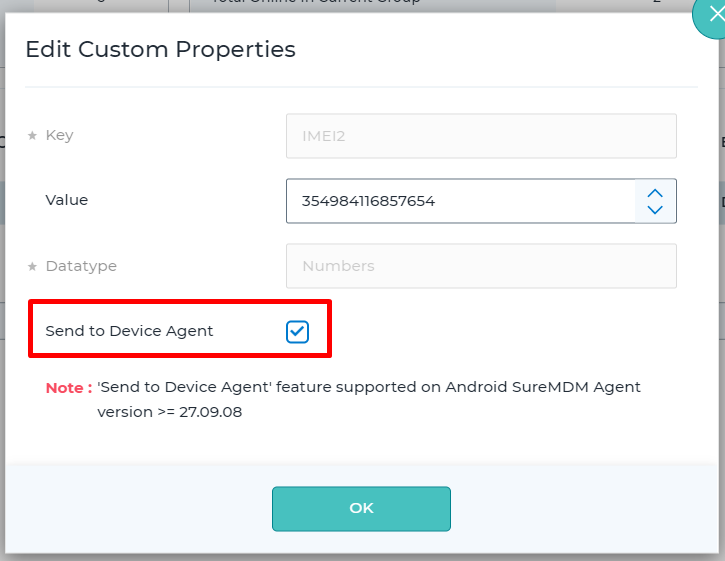
- Select YES in Send to Device Agent. SureMDM agent locally stores the value and any approved third-party app can also be retrieved using SureMDM agent via an intent API.
NOTE:
- Send to Device Agent works on SureMDM Agent v27.09.08 and higher versions.
To know more about configuring INTENT APIs on SureMDM Agent to communicate the custom properties data to the approved third-party applications, please click here.
Need more help? CONTACT US