
Shared iPad for Business allows multiple users of an organization to share an iPad and still have a personalized user experience after login. Shared iPad for Business also supports temporary sessions, which allows users to sign in using managed Apple ID account and then erases their data from the device when they sign out
The data is stored in iCloud through Managed Apple ID, so users can sign in to any Shared iPad that belongs to their organization and see their data including their Mail accounts, files, iCloud Photo Library, and App data.
Purpose
The purpose of this knowledge article is to provide a guide on how to enable Shared iPad Management from SureMDM.
Prerequisites
1. As per the Apple limitation, Devices must have at least 32GB of storage and be supervised. Shared iPad is supported on:
- iPad Pro
- iPad (5th generation or later)
- iPad Air 2 (or later)
- iPad mini (4th generation or later)
For more information, please refer to this document from Apple to know about supported devices.
2. All the devices should be enrolled through the ABM server (DEP enrollment). You can refer to the KB article to link ABM DEP with SureMDM.
Steps
Step 1 : To Create a shared iPad Profile.
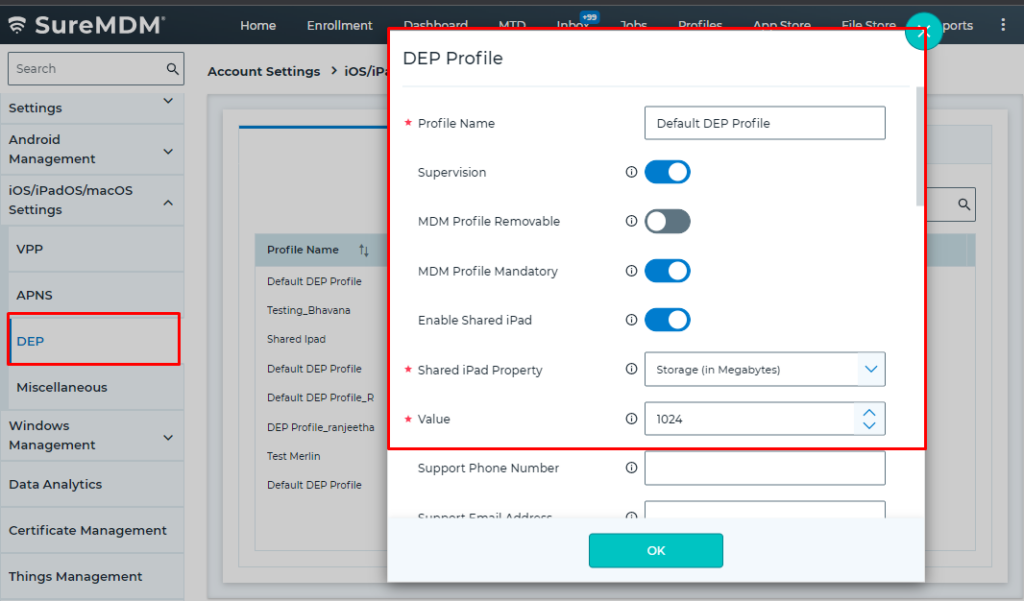
1. Navigate to SureMDM Settings > Account Settings > iOS/macOS Settings > DEP > DEP Profiles > Add
2. Name the required configuration.
3. Enable the option “Enable Shared iPad”.
4. You can select the shared iPad Property as “Storage (in Megabytes)” or “Numbers of Users”.
5. Enter the Property value and Click Save.
6. Navigate to DEP Server Tab and configure the server as required with the required Shared profile.
7. Select the DEP-created Server and click on Push the Configuration and complete the process by clicking on the Push button.
Step 2 : Initialize the Device set up.
After assigning the devices to SureMDM and Applying the Push the Configuration policy on the SureMDM console, initialize the setup process of devices by following the below-mentioned steps:
1. Turn on the devices and follow the on-screen options.
2. Connect the device to WiFi and the Shared iPad enrollment process will be initiated.
3. The setup process will show a screen confirming that the device will be managed by SureMDM.
4. Once the setup is completed, the device will appear on SureMDM Web Console under Devices.
Step 3 : Enable the Temporary Session on iPad.
1. Log in to the SureMDM Console.
2. Navigate to Profiles > Create/Modify the Profile > Restriction Profile > Functionality tab.
3. Search for the option “Allow Shared iPad Temporary Session” and enable the same.
4. Save the Profile.
5. Apply the Profile on the device.
6. Based on the Profile assigned, this should enable/disable the Shared Device Temporary Session feature on the devices.
Need more help? Here’s how to get help from our experts.