
As Google has deprecated the Device Admin (Legacy) mode of enrollment, it is necessary for IT admins to migrate the devices to Android Enterprise enrollment to manage the devices flawlessly through the SureMDM console. Because Device Admin isn’t well suited to support today’s enterprise requirements, we recommend customers and partners adopt fully managed device and work profile modes to manage their devices from now on.
Purpose
The purpose of this article is to provide a guide on how to move from a Legacy Device Administrator Android deployment to Android Enterprise.
Prerequisites
- The SureMDM console has to be enrolled in Android Enterprise.
Steps
1. Log in to the SureMDM Console.
2. Enroll your SureMDM console using Android Enterprise. Please refer to this article for the same under Step 1.
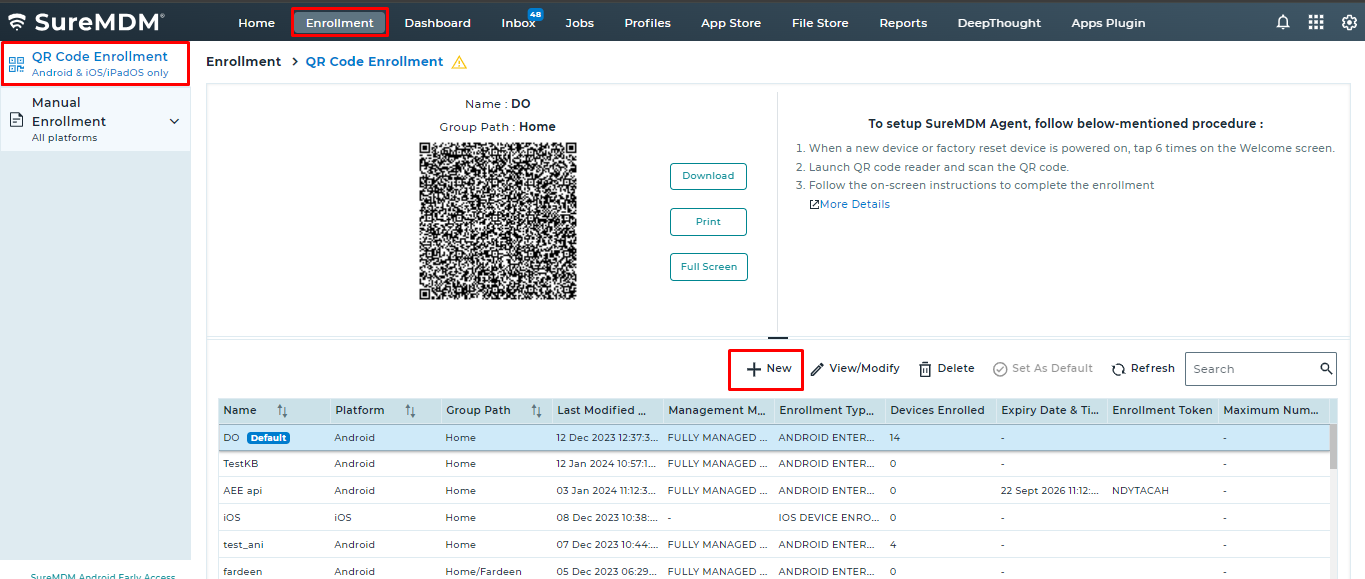
3. Navigate to Enrollment > QR Code Enrollment and click on New.
5. On the Setup QR Code for Enrollment prompt,
a. Under the Enrollment Type option,
- Give a Name for the QR code.
- Select the Android platform.
- Select the enrollment type as Android Enterprise Enrollment.
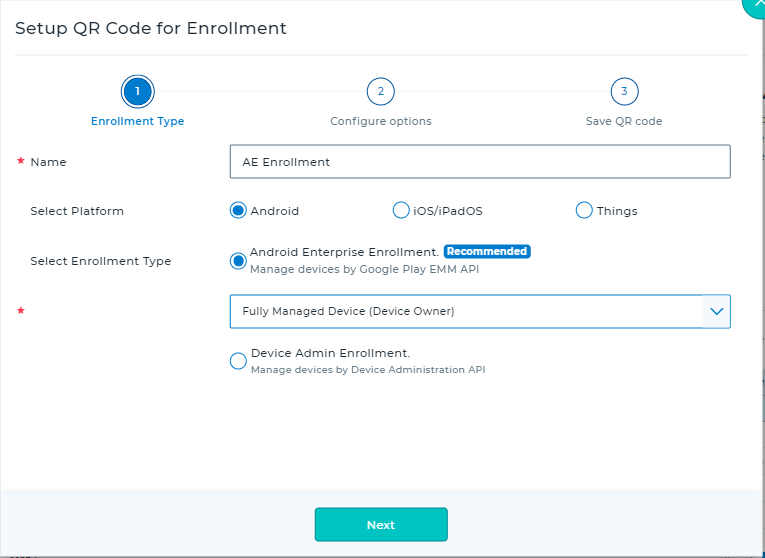
- Select the Fully Managed Device (Device Owner) and click on Next.
b. Select the Device Name type from the dropdown.
c. Check option Use mobile data if available if you are enrolling the device using mobile data.
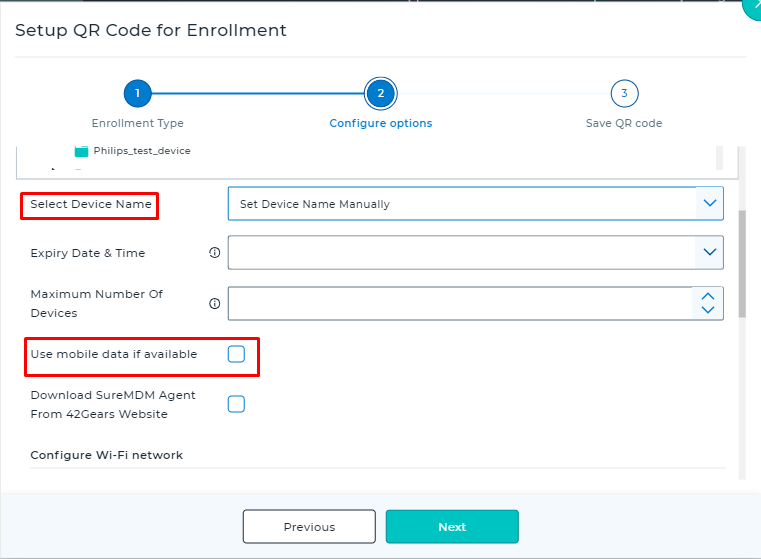
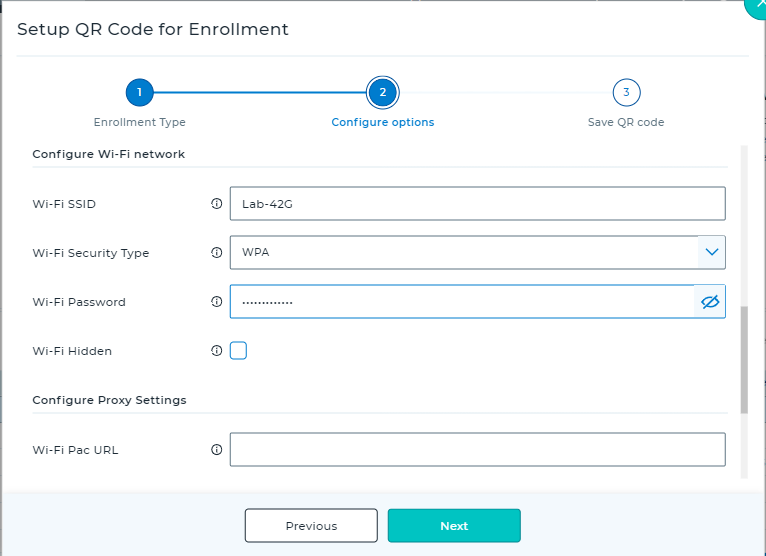
d. Under Configure Options, enter or select the required details:
- WiFi credentials (optional)
- Group to which device needs to be enrolled
- Device Naming Parameter (IMEI/MAC Address/Serial Number/Phone Number/Device Name)
e. Click on Provisioning Settings and select the required options.
- Skip Encryption
- Skip the SureMDM Agent Permission Checklist.
- Select language and country, if required.
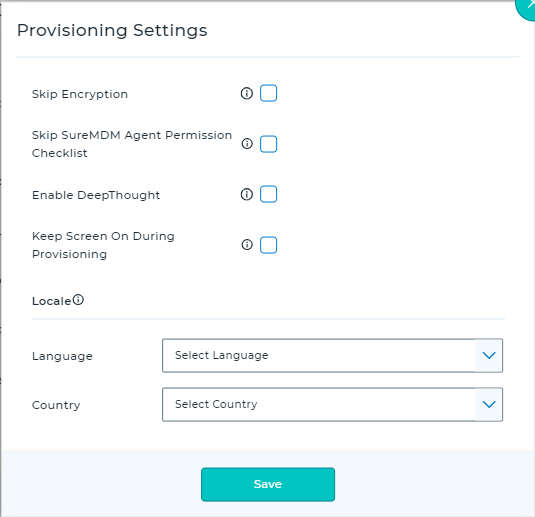
f. Then, click on Save.
The newly created QR code will be listed under the QR Code Enrollment section under the Enrollment tab of your SureMDM console.
6. Now, factory reset the device and power it back on. Navigate to the Welcome Screen.
7. On the Welcome screen, tap six times to start QR code setup. Now connect to Wi-Fi to auto-start the installation of QR Code Reader.
8. A QR code setup screen will appear on the device after installing the QR code reader.
9. Click the Next button and accept the privacy policy to launch the QR Code reader. Scan the QR code that has been generated.
10. Agree to the Terms and Conditions and click Next.
11. Click on the Download option, and the device will install SureMDM Agent with the specified settings and will get enrolled as a Device Owner in the SureMDM Web Console.
Note: Android Enterprise also offers BYOD features to improve Android device usability, security, and flexibility in the business environment. You can explore SureMDM’s offerings for BYOD here.
Need help? CONTACT US