
42Gears has integrated with Zebra LifeGuard OTA for Android devices to improve the process of securing and managing Zebra’s enterprise-class Android devices. This integration will grant administrators control over which software updates to push to devices over-the-air.
To use SureMDM’s Zebra LifeGuard OTA functionality, your Zebra devices must be registered for Zebra LifeGuard and enrolled under Android Enterprise with the Device Owner mode enabled.
Purpose
The purpose of this knowledge article is to provide a guide on how to manage Security and OS Updates on Rugged Mobile Devices using Zebra Lifeguard and SureMDM.
Prerequisites
- This feature is only available for Enterprise tier.
Steps
Please follow the steps outlined below to manage your Zebra devices:
Part 1. Authorization and token generation
1. Login to the SureMDM Console.
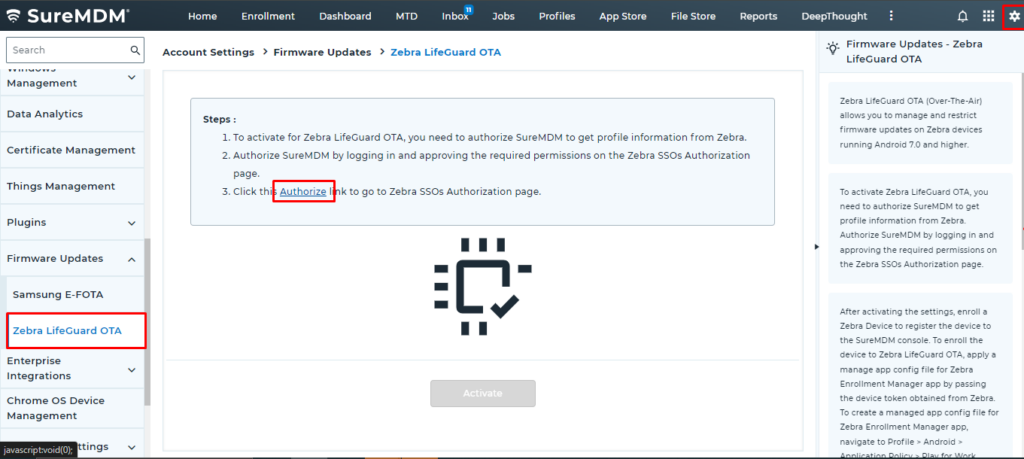
2. Click on the Settings icon at the top right corner of the console.
3. Go to Account Settings > Firmware Updates > Zebra LifeGuard OTA > Authorise.
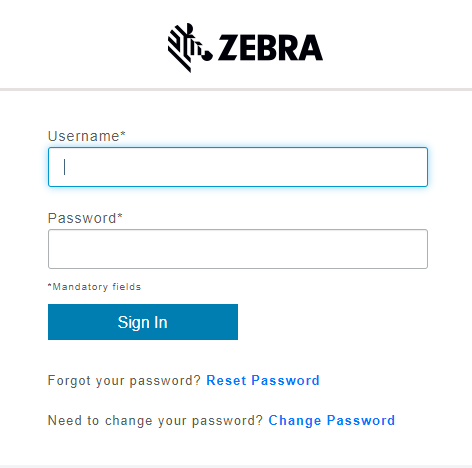
4. On the Zebra LifeGuard portal, log in with your Zebra credentials and allow all of the permissions requested by Zebra LifeGuard.
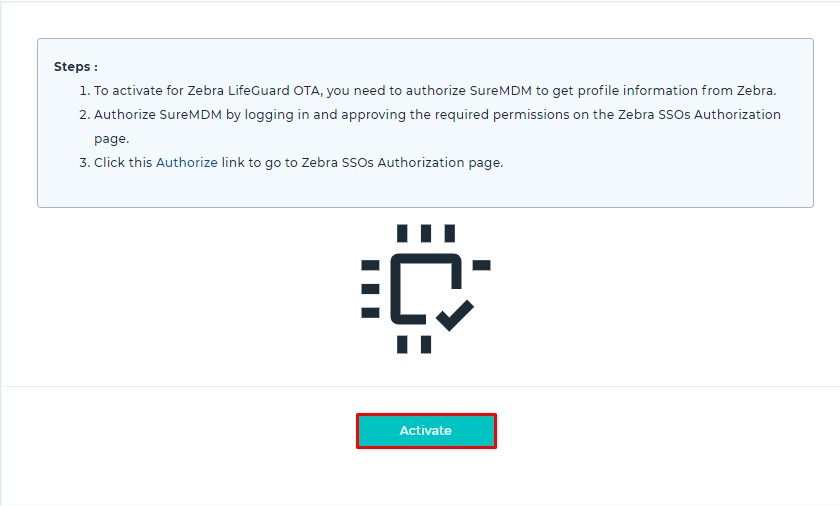
5. Click on the Activate button.
6. When the system successfully authorizes your login, it will generate a Device Token. Save the device token information, as you will need it for Part 2.
The page will display the following three options:
- Create Tags: Use this option to create a tag for Zebra devices that are already enrolled in a SureMDM account.
- Sync Devices: Use this option to check the Zebra LifeGuard account for any new successful device registrations. This also checks the status of each software update applied to the device and updates the device status in the SureMDM database.
- Revoke Authorization: Use this option to revoke an authorization, and when you wish to change the Zebra LifeGuard license associated with the SureMDM account for any reason (such as having previously authorized the wrong license).
Part 2. Zebra app installation and configuration
To complete this part, the following two Zebra apps must be present on the Zebra devices:
- Zebra Enrollment Manager
- Zebra Common Transport Layer
Follow the steps mentioned in the Part 3 to install these two apps on your Zebra devices:
Part 3 : Creating a profile in the SureMDM console
Prerequisites
- The device must be enrolled in Android Enterprise in order to push the ZLGOTA updates.
Steps
1. On the SureMDM Home page, click Profiles.
2. On the Profiles screen, select the Android tab and click Add.
3. Click Application Policy and select Play for Work Apps.
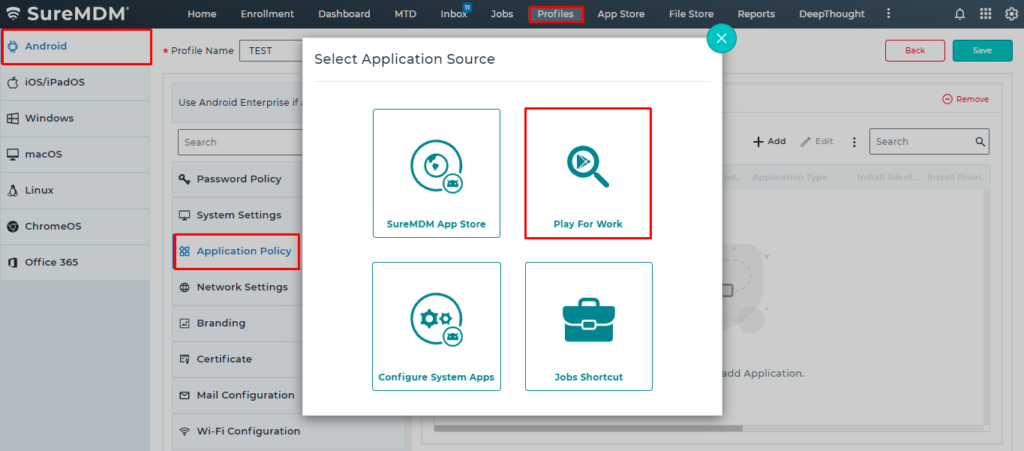
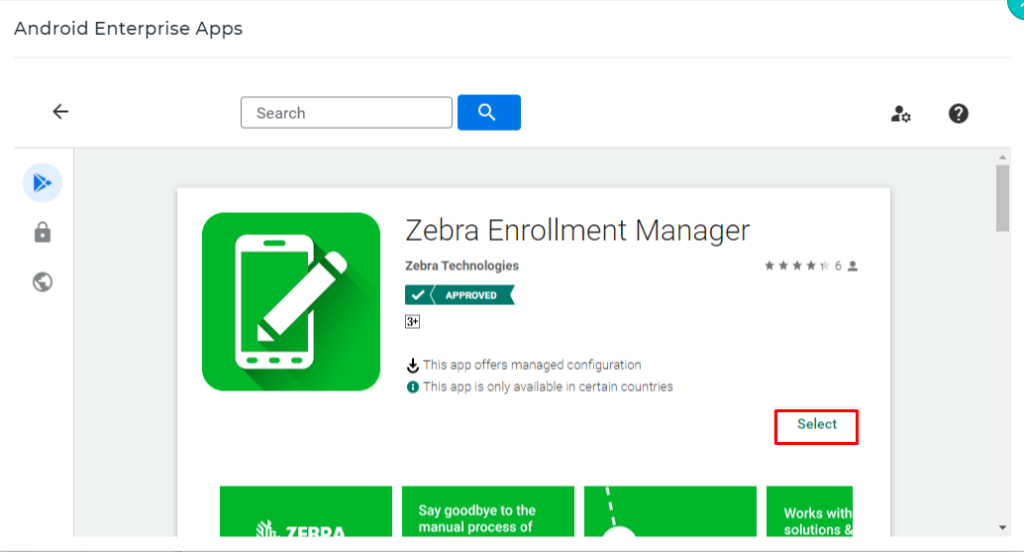
4. Search for the Zebra Enrollment Manager application and click Select.
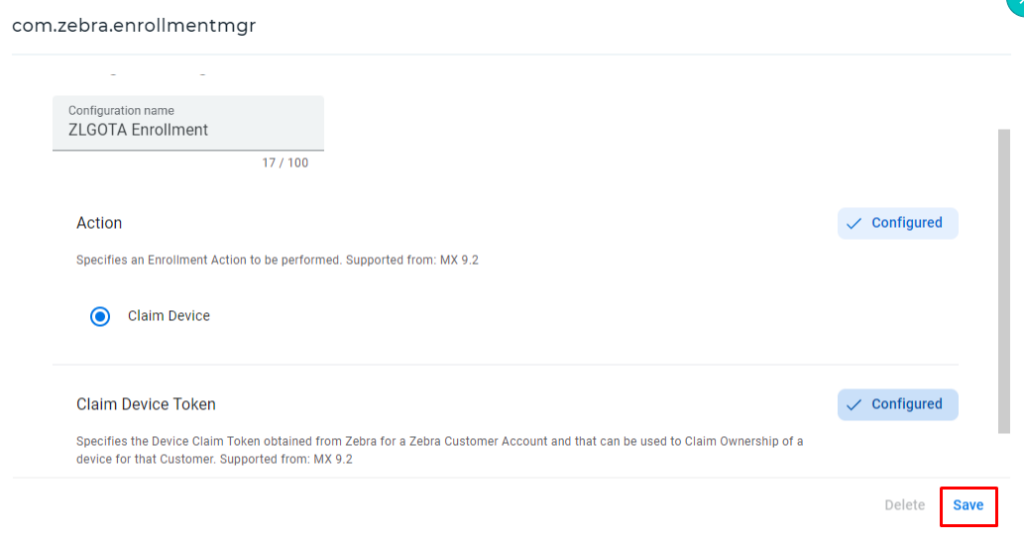
5. On the Managed Configuration page:
- Enter a name for the configuration.
- Enable the Action option and make sure the Claim Device radio button is selected.
- Enable the Claim Device Token option and enter the device token you copied in step 8.
- Click Save.
6. Again, click Add, select Play for Work, and add the Zebra Common Transport Layer application.
7. Save the profile.
Note: Once the devices are enrolled, navigate to Settings > Account Settings > Firmware Updates > Zebra LifeGuard OTA and click Create Tags and Sync Devices.
8. Navigate to the SureMDM home page, select the device(s), and Apply the profile.
9. Once you have deployed the profile and installed the applications, navigate to the Tags section of the SureMDM console.
Note: Apply the firmware update only after 20 minutes.
10. Select the Zebra tag created with the device model.
11. Click Update Firmware and select the firmware from the available options.
12. Click Next > Apply.
Note -Firmware updates may fail to initiate due to network restrictions. If such issues occur, try performing the update using an external network.
Part 4: Software update management using SureMDM
Zebra devices get tagged as soon as they are enrolled in SureMDM using Android Enterprise as a Device Owner and start automatically reflecting under tags named after their Device Model. This helps admins view and control similar devices from the central console.
Steps
1. On SureMDM Home, go to Tags.
2. Under Tags, devices will be categorized and grouped according to their device models.
3. Select the desired Tag and click on the Firmware Update and History icon.
4. Under the Available Firmware Updates tab on the Firmware Update and History prompt, all available software updates will be listed with details such as release notes.
5. Select the desired update and click Next to apply.
6. Once the software updates are pushed through SureMDM, you can use the Firmware Update History tab to check the history of all the software updates done on a specific tag.
7. This tab has the following options:
- View Devices: This option lists all the devices to which the software update was pushed, along with their statuses.
- Cancel Updates: This can be used to cancel pushed updates. This option is available only if the pushed update is pending.
- Delete: This option deletes only recorded listings. It also cancels any pending updates.
- Sync: This option refreshes the software update status.
Note: Zebra LifeGuard OTA can only be used to upgrade to the current software version on a given device. Regressing software to a previous version is not possible. LifeGuard is supported on Android devices with Android Nougat (7.0) and above and is available only for GMS devices.
Need help? CONTACT US
